DocOctober (talk | contribs) |
DocOctober (talk | contribs) mNo edit summary |
||
| (372 intermediate revisions by 39 users not shown) | |||
| Line 1: | Line 1: | ||
| + | {{#Invoke:Languages|resolveLanguageTable}} |
||
[[File:IconHelp statusHUD.png|frameless|right|128px]] |
[[File:IconHelp statusHUD.png|frameless|right|128px]] |
||
| − | ''' |
+ | The '''Status HUD''' is the primary information system available to Players in ''{{#Invoke:Utils|IconLink|Dead by Daylight}}'' and displayed as an overlay on their screen. |
== Overview == |
== Overview == |
||
| + | The '''Status HUD''' is comprised of several subsystems, with each sub-system displaying distinct pieces of information about the state of the Trial and its Players: |
||
| − | The '''{{PAGENAME}}''' indicates to the Players how they are currently affected by {{IconLink|Perks}}, {{IconLink|Add-ons}} and in-game mechanics. |
||
| + | {|class="wikitable" |
||
| − | |||
| + | |- |
||
| − | It consists of three sub-systems: '''Perk Effects''', '''Status Effects''' and '''Proficiency Indicators'''.<br>The latter two were implemented with [[Patch 1.5.0]]. |
||
| + | ! System !! Location on Screen !! Information Type !! Visibility |
||
| + | |- |
||
| + | ! [[#Status Effects|Status Effects]] |
||
| + | | {{#Invoke:Utils|tooltip|Right side|[[File:AllStatusEffects.png|250px]]|true}}, above Perk Diamond |
||
| + | | Displays when a Player is afflicted by a '''Status Effect''' and if its timer-based, for how long. |
||
| + | ! Personal |
||
| + | |- |
||
| + | ! [[#Proficiency Indicators|Proficiency Indicator]] |
||
| + | | Bottom centre, above Status Bar |
||
| + | | Displays when outside influences affect the Player's current interaction with an [[Interactable]]. |
||
| + | ! Personal |
||
| + | |- |
||
| + | ! [[#Player Effects|Player Effects]] |
||
| + | | {{#Invoke:Utils|tooltip|Bottom right|[[File:MaximumPerkEffects.png]]|true}}, next to Perk Diamond |
||
| + | | Displays when a Player and their abilities are affected directly by the effects of [[Unlockables]], regardless of whether those originate from the Player's own [[Unlockables]] or from those of other Players. |
||
| + | ! Personal |
||
| + | |- |
||
| + | ! [[#Survivor HUD Icons|Survivor HUD Icons]] |
||
| + | | Left side |
||
| + | | Displays which Character is part of the Trial and is combined with the [[Health State]] and [[#Survivor Activity HUD|Survivor Activity HUD]] systems. |
||
| + | ! All Players |
||
| + | |- |
||
| + | ! Health State |
||
| + | | Left side, combined with Survivor HUD Icons |
||
| + | | Displays the current [[Health State]] (separate Article) of Survivors to all Players in the Trial and is combined with the [[#Survivor HUD Icons|Survivor HUD Icons]] and [[#Survivor Activity HUD|Survivor Activity HUD]] systems. |
||
| + | ! All Players |
||
| + | |- |
||
| + | ! [[#Survivor Activity HUD|Survivor Activity HUD]] |
||
| + | | {{#Invoke:Utils|tooltip|Left side|[[File:SurvivorActivityHUD_Screenshot01.jpg|200px]]|true}}, combined with Survivor HUD Icons |
||
| + | | Displays a Survivor's current activity/interaction to all other Survivors. |
||
| + | ! All Survivors |
||
| + | |} |
||
| Line 12: | Line 45: | ||
[[File:IconHelp statusEffects.png|frameless|left]] |
[[File:IconHelp statusEffects.png|frameless|left]] |
||
[[File:IconHelp statusEffectList.png|frameless|right]] |
[[File:IconHelp statusEffectList.png|frameless|right]] |
||
| + | [[File:AllStatusEffects.png|right|thumb|All available Status Effects (except for Madness and Sleep Penalty) active at the same time.<ref>https://www.reddit.com/r/deadbydaylight/comments/sfw3gn/took_about_half_an_hour_some_coordination_and_one/ Screenshot from Reddit Post by u/Potassium_40. Reddit. Retrieved 30 January 2022.</ref>]] |
||
| − | '''Status Effects''' show whenever a Survivor is affected by a special effect or affliction, indicated by a corresponding icon above the Perk diamond.<br>The icon's colour will reflect whether it is a '''{{clr|2|buff (yellow)}}''' or a '''{{clr|8|debuff (red)}}'''. |
||
| + | First added with [[Patch 1.5.0]], '''Status Effects''' show whenever a Survivor is affected by a special effect or affliction, indicated by a corresponding icon above the Perk diamond.<br>The icon's colour will reflect whether it is a '''{{#Invoke:Utils|clr|2|buff (yellow)}}''' or a '''{{#Invoke:Utils|clr|8|debuff (red)}}'''. |
||
| − | Tiered '''Status Effects''' feature |
+ | Tiered '''Status Effects''' feature up to three Chevrons on the icon:<br>The more chevrons a '''Status Effect''' has, the stronger is its effect.<br>There are currently just two tiered '''Status Effects''': {{#Invoke:Utils|IconLink|Bloodlust}} and {{#Invoke:Utils|IconLink|Madness}}. |
| − | '''Status Effects''' that are on a timer may have their timer refreshed by a new application of the effect, but will not stack their |
+ | '''Status Effects''' that are on a timer may have their timer refreshed by a new application of the effect, but will generally not stack the strength of their effects.{{-}} |
| + | |||
| − | === {{clr|8|Blindness}} === |
||
| + | === Blessed === |
||
| + | {{Main|Blessed}} |
||
{| class="wikitable" |
{| class="wikitable" |
||
|- |
|- |
||
| − | ! [[File: |
+ | ! [[File:FulliconStatusEffects_blessed.png|frameless|128px]] |
| − | | The ''''' |
+ | | The '''''Blessed'' Status Effect''' is a '''{{#Invoke:Utils|clr|2|buff}}''' applied exclusively to Survivors. |
| + | * Survivors benefit from '''''Blessed''''' and whichever effect(s) it applies whenever they are inside the Area of Effect of an active {{#Invoke:Utils|IconLink|Boon Totem}} ('''{{#Invoke:Utils|clr|2|24 metres}}''') and does so for as long as they remain inside it. |
||
|} |
|} |
||
| − | The following Unlockables inflict the '''''Blindness''''' '''Status Effect''': |
||
| − | * Action: |
||
| − | ** Entering a {{IconLink|Locker}} |
||
| − | * Add-ons: |
||
| − | ** {{IconLink|Amanita Toxin}} ({{IconLink|Hunting Hatchets}}) |
||
| − | ** {{IconLink|Baby Teeth}} ({{IconLink|Blood Bond}}) |
||
| − | ** {{IconLink|"Blind Warrior" - Mud}} ({{IconLink|Wailing Bell}}) |
||
| − | ** {{IconLink|Brass Case Lighter}} ({{IconLink|Of the Abyss}}) |
||
| − | ** {{IconLink|Kerosene Can}} ({{IconLink|The Afterpiece Tonic}}) |
||
| − | ** {{IconLink|Face Mask}} ({{IconLink|Jigsaw's Baptism}}) |
||
| − | ** {{IconLink|Rust-Coloured Egg}} ({{IconLink|Rites of Judgement}}) |
||
| − | ** {{IconLink|Smiley Face Pin}} ({{IconLink|Feral Frenzy}}) |
||
| − | * Perks: |
||
| − | **{{IconLink|Hex: The Third Seal}} |
||
| − | **{{IconLink|Knock Out}} |
||
| + | |||
| − | === {{clr|2|Bloodlust}} === |
||
| + | === Blindness === |
||
| − | :''For more details on '''Bloodlust''', please refer to its [[Bloodlust|Article]].'' |
||
| + | {{Main|Blindness}} |
||
{| class="wikitable" |
{| class="wikitable" |
||
|- |
|- |
||
| − | ! [[File: |
+ | ! [[File:FulliconStatusEffects_blindness.png|frameless|128px]] |
| − | | The ''''' |
+ | | The '''''Blindness''''' '''Status Effect''' is a '''{{#Invoke:Utils|clr|8|debuff}}''' that can be applied to both Survivors and the Killer. |
| + | * Players suffering from '''''Blindness''''' are unable to read any {{#Invoke:Utils|IconLink|Auras}}, including the default ones of their role and those from {{#Invoke:Utils|IconLink|Perks}}. |
||
| + | ** Some essential Auras are exempt from that general rule, usually associated with Killer Power Objects. |
||
|} |
|} |
||
| + | |||
| − | === {{clr|8|Broken}} === |
||
| + | === Bloodlust === |
||
| + | {{Main|Bloodlust}} |
||
{| class="wikitable" |
{| class="wikitable" |
||
|- |
|- |
||
| − | ! [[File: |
+ | ! [[File:FulliconStatusEffects_bloodlust.png|frameless|128px]] |
| − | | |
+ | | The '''''Bloodlust''''' '''Status Effect''' is a '''{{#Invoke:Utils|clr|2|buff}}''' applied exclusively to the Killer. |
| + | * Killers benefitting from '''''Bloodlust''''' increasingly gain more [[Movement speed]] in prolonged ''Chases''. |
||
| + | * '''''Bloodlust''''' is a tiered '''Status Effect'''. |
||
|} |
|} |
||
| − | The following Unlockables inflict the '''''Broken''''' '''Status Effect''': |
||
| − | * Add-ons: |
||
| − | ** {{IconLink|Rusted Chains}} ({{IconLink|Bubba's Chainsaw}}) |
||
| − | ** {{IconLink|The Legion Pin}} ({{IconLink|Feral Frenzy}}) |
||
| − | ** {{IconLink|Weighty Rattle}} ({{IconLink|Blood Bond}}) |
||
| − | * Perks: |
||
| − | ** {{IconLink|Deliverance}} |
||
| − | ** {{IconLink|For the People}} |
||
| − | ** {{IconLink|Forced Penance}} |
||
| − | ** {{IconLink|No Mither}} |
||
| − | ** {{IconLink|Second Wind}} |
||
| − | * Powers: |
||
| − | ** {{IconLink|Blood Bond}} |
||
| − | ** {{IconLink|Vile Purge}} |
||
| + | |||
| − | === {{clr|8|Cursed}} === |
||
| + | === Broken === |
||
| + | {{Main|Broken}} |
||
{| class="wikitable" |
{| class="wikitable" |
||
|- |
|- |
||
| − | ! [[File: |
+ | ! [[File:FulliconStatusEffects_broken.png|frameless|128px]] |
| − | | The ''''' |
+ | | The '''''Broken''''' '''Status Effect''' is a '''{{#Invoke:Utils|clr|8|debuff}}''' applied exclusively to Survivors. |
| + | * Survivors suffering from '''''Broken''''' are unable to be healed or heal themselves past the {{#Invoke:Utils|IconLink|Injured State}}. |
||
|} |
|} |
||
| − | The following Unlockables inflict the '''''Cursed''''' '''Status Effect''': |
||
| − | * Perks: |
||
| − | ** {{IconLink|Hex: Devour Hope}} |
||
| − | ** {{IconLink|Hex: Huntress Lullaby}} |
||
| − | ** {{IconLink|Hex: No One Escapes Death}} |
||
| − | ** {{IconLink|Hex: Ruin}} |
||
| − | ** {{IconLink|Hex: The Third Seal}} |
||
| − | ** {{IconLink|Hex: Thrill of the Hunt}} |
||
| − | ** {{IconLink|Hex: Retribution}} |
||
| − | The following Unlockables require the '''''Cursed''''' '''Status Effect''' to trigger a secondary effect: |
||
| − | * Perks: |
||
| − | ** {{IconLink|Soul Guard}} |
||
| − | === |
+ | === Cursed === |
| + | {{Main|Cursed}} |
||
| − | :''For more details on '''Deep Wound''', please refer to the [[Health States#Deep Wound|Health State Article]].'' |
||
{| class="wikitable" |
{| class="wikitable" |
||
|- |
|- |
||
| − | ! [[File: |
+ | ! [[File:FulliconStatusEffects_cursed.png|frameless|128px]] |
| + | | The '''''Cursed''''' '''Status Effect''' is a '''{{#Invoke:Utils|clr|8|debuff}}''' applied exclusively to Survivors. |
||
| − | | Survivors affected by the '''''Deep Wound''''' '''Status Effect''' are heavily damaged and getting closer to the {{IconLink|Dying State}}, into which the Survivor will transition if they are not mended after '''{{clr|2|20 seconds}}''' of being stationary. |
||
| + | * Survivors suffering from '''''Cursed''''' are currently affected by an active {{#Invoke:Utils|IconLink|Hex Totem}} and its effects. |
||
|} |
|} |
||
| − | The following Unlockables inflict the '''''Deep Wound''''' '''Status Effect''': |
||
| − | * Add-ons: |
||
| − | ** {{IconLink|Styptic Agent}} |
||
| − | * Perks: |
||
| − | ** {{IconLink|Borrowed Time}} |
||
| − | ** {{IconLink|Soul Guard}} |
||
| − | * Powers: |
||
| − | ** {{IconLink|Feral Frenzy}} |
||
| − | ** {{IconLink|The Redeemer}} |
||
| + | |||
| − | === {{clr|2|Endurance}} === |
||
| + | === Deafened === |
||
| + | {{Main|Deafened}} |
||
{| class="wikitable" |
{| class="wikitable" |
||
|- |
|- |
||
| − | ! [[File: |
+ | ! [[File:FulliconStatusEffects_hearing.png|frameless|128px]] |
| − | | |
+ | | The '''''Deafened''''' '''Status Effect''' is a semi-used '''{{#Invoke:Utils|clr|8|debuff}}''' that can be applied to both Survivors and the Killer.<br>While the '''Status Effect''' is not displayed on the HUD, its effects are used by several Unlockables. |
| + | * Players suffering from '''''Deafened''''' have their audio muffled temporarily and hear a tinnitus-like whistling sound. |
||
|} |
|} |
||
| − | The following Unlockables inflict the '''''Endurance''''' '''Status Effect''': |
||
| − | * Add-ons: |
||
| − | ** {{IconLink|Styptic Agent}} |
||
| − | * Perks: |
||
| − | ** {{IconLink|Borrowed Time}} |
||
| − | ** {{IconLink|Mettle of Man}} |
||
| − | ** {{IconLink|Soul Guard}} |
||
| + | |||
| − | === {{clr|8|Exhausted}} === |
||
| + | === Deep Wound === |
||
| − | :''For more details on '''Exhaustion''', please refer to its [[Exhaustion|Article]].'' |
||
| + | {{Main|Deep Wound}} |
||
{| class="wikitable" |
{| class="wikitable" |
||
|- |
|- |
||
| − | ! [[File: |
+ | ! [[File:FulliconStatusEffects_deepWound.png|frameless|128px]] |
| + | | The '''''Deep Wound''''' '''Status Effect''' is a '''{{#Invoke:Utils|clr|8|debuff}}''' applied exclusively to Survivors. |
||
| − | | The '''''Exhausted''''' '''Status Effect''' prevents Survivors from chaining Exhaustion Perks, putting them all on a shared cool-down.<br>When a Survivor is rescued from a Hook, any Exhaustion cool-down is reset immediately. |
||
| + | * Survivors suffering from '''''Deep Wound''''' have a special health bar displayed on the HUD. |
||
| + | ** The health bar progressively drains whenever the Survivor is not running, or in the act of ''Mending'' themselves or being ''Mended'' by other Survivors. |
||
| + | ** Once the timer runs out, the Survivor is automatically put into the {{#Invoke:Utils|IconLink|Dying State}}. |
||
|} |
|} |
||
| − | The following Unlockables inflict the '''''Exhausted''''' '''Status Effect''': |
||
| − | * Add-ons: |
||
| − | ** {{IconLink|Berus Toxin}} ({{IconLink|Hunting Hatchets}}) |
||
| − | ** {{IconLink|Lifeguard Whistle}} ({{IconLink|Of the Abyss}}) |
||
| − | ** {{IconLink|Slow-Release Toxin}} ({{IconLink|Jigsaw's Baptism}}) |
||
| − | ** {{IconLink|Venomous Concoction}} ({{IconLink|Hunting Hatchets}}) |
||
| − | * Perks: |
||
| − | ** {{IconLink|Adrenaline}} |
||
| − | ** {{IconLink|Balanced Landing}} |
||
| − | ** {{IconLink|Blood Echo}} |
||
| − | ** {{IconLink|Dead Hard}} |
||
| − | ** {{IconLink|Head On}} |
||
| − | ** {{IconLink|Lithe}} |
||
| − | ** {{IconLink|Mindbreaker}} |
||
| − | ** {{IconLink|Sprint Burst}} |
||
| + | |||
| − | === {{clr|8|Exposed}} === |
||
| + | === Endurance === |
||
| − | [[File:SoundCue exposed.ogg|right]] |
||
| + | {{Main|Endurance}} |
||
{| class="wikitable" |
{| class="wikitable" |
||
|- |
|- |
||
| + | ! [[File:FulliconStatusEffects_enduranceSurvivor.png|frameless|128px]][[File:FulliconStatusEffects_enduranceKiller.png|frameless|128px]] |
||
| − | ! [[File:FulliconStatusEffects_exposed.png|frameless|64px]] |
||
| − | | The ''''' |
+ | | The '''''Endurance''''' '''Status Effect''' is a '''{{#Invoke:Utils|clr|2|buff}}''' that can be applied to both Survivors and the Killer. |
| + | * Survivors benefitting from '''''Endurance''''' can resist damage from the Killer.<br>If they are hit or otherwise damaged, their character model is briefly outlined in '''{{#Invoke:Utils|clr|16|white}}''', which is used to indicate the recent damage-protection through '''''Endurance''''' to the Killer. |
||
| − | When the '''''Exposed''''' '''Status Effect''' is triggered, a global sound cue plays and the HUD icon appears for all affected Survivors. |
||
| + | ** '''''Endurance''''' is cancelled prematurely whenever the Survivor protected by it performs a ''[[Conspicuous Action]]''. |
||
| + | ** '''''Endurance {{#Invoke:Utils|clr|8|cannot}}''''' protect a Survivor already suffering from the '''''[[#Deep Wound|Deep Wound]]''''' '''Status Effect''' from being downed. |
||
| + | * Killers benefitting from '''''Endurance''''' can endure Stuns from Survivors, greatly reducing their duration. |
||
|} |
|} |
||
| − | The following Unlockables inflict the '''''Exposed''''' '''Status Effect''': |
||
| − | * Add-ons: |
||
| − | ** {{IconLink|Iridescent Coin}} ({{IconLink|The Redeemer}}) |
||
| − | ** {{IconLink|Iridescent Pendant}} ({{IconLink|Blood Bond}}) |
||
| − | ** {{IconLink|Redhead's Pinky Finger}} ({{IconLink|The Afterpiece Tonic}}) |
||
| − | * Perks: |
||
| − | ** {{IconLink|Dragon's Grip}} |
||
| − | ** {{IconLink|Make Your Choice}} |
||
| − | ** {{IconLink|Hex: Devour Hope}} |
||
| − | ** {{IconLink|Hex: Haunted Ground}} |
||
| − | ** {{IconLink|Hex: No One Escapes Death}} |
||
| − | ** {{IconLink|Iron Maiden}} |
||
| − | ** {{IconLink|Rancor}} |
||
| − | * Powers: |
||
| − | ** {{IconLink|Evil Within III}} |
||
| − | ** {{IconLink|Night Shroud}} |
||
| + | |||
| − | === {{clr|8|Haemorrhage}} === |
||
| + | === Exhausted === |
||
| − | :''For more details on '''Bleeding''', please refer to its [[Bleeding|Article]].'' |
||
| + | {{Main|Exhausted}} |
||
{| class="wikitable" |
{| class="wikitable" |
||
|- |
|- |
||
| − | ! [[File: |
+ | ! [[File:FulliconStatusEffects_exhausted.png|frameless|128px]] |
| − | | |
+ | | The '''''Exhausted''''' '''Status Effect''' is a '''{{#Invoke:Utils|clr|8|debuff}}''' applied exclusively to Survivors. |
| + | * Survivors suffering from '''''Exhaustion''''' are unable to use any of the numerous [[Exhaustion Perks]], preventing them from chaining multiple such Perks in quick succession. |
||
| + | * '''''Exhausted''''' slowly recovers over time whenever the Survivor is '''''{{#Invoke:Utils|clr|8|not}}''''' running. |
||
| + | * '''''Exhausted''''' recovers '''''{{#Invoke:Utils|clr|3|immediately}}''''' after being unhooked. |
||
|} |
|} |
||
| − | The following Unlockables inflict the '''''Haemorrhage''''' '''Status Effect''': |
||
| − | * Add-ons: |
||
| − | ** {{IconLink|Begrimed Head}} ({{IconLink|Hunting Hatchets}}) |
||
| − | ** {{IconLink|"Blind Warrior" - White}} ({{IconLink|Wailing Bell}}) |
||
| − | ** {{IconLink|Coarse Stone}} ({{IconLink|Hunting Hatchets}}) |
||
| − | ** {{IconLink|Crimson Ceremony Book}} ({{IconLink|Rites of Judgement}}) |
||
| − | ** {{IconLink|Fine Stone}} ({{IconLink|Hunting Hatchets}}) |
||
| − | ** {{IconLink|Rusted Needle}} ({{IconLink|Blood Bond}}) |
||
| − | ** {{IconLink|Serrated Jaws}} ({{IconLink|Bear Traps}}) |
||
| − | ** {{IconLink|Utility Blades}} ({{IconLink|Jigsaw's Baptism}}) |
||
| − | * Perks: |
||
| − | ** {{IconLink|Blood Echo}} |
||
| − | ** {{IconLink|Sloppy Butcher}} |
||
| + | |||
| − | === {{clr|2|Haste}} === |
||
| + | === Exposed === |
||
| + | {{Main|Exposed}} |
||
{| class="wikitable" |
{| class="wikitable" |
||
|- |
|- |
||
| − | ! [[File: |
+ | ! [[File:FulliconStatusEffects_exposed.png|frameless|128px]] |
| − | | The ''''' |
+ | | The '''''Exposed''''' '''Status Effect''' is a '''{{#Invoke:Utils|clr|8|debuff}}''' applied exclusively to Survivors: |
| + | * Survivors suffering from '''''Exposed''''' will suffer double-damage when hit by a ''[[Basic Attack]]'', which immediately puts them into the {{#Invoke:Utils|IconLink|Dying State}}. |
||
| + | ** The '''''Endurance''''' '''Status Effect''' can shield a Survivor from double-damage, which would afflict them with '''''Deep Wound''''' instead. |
||
| + | * Survivors hear the sound cue found atop this table whenever they become '''''Exposed''''' by any means. |
||
| + | It should be noted that there is a popular misconception, especially amongst new Players, that due to the name ''"exposed"'', the '''Status Effect''' actually reveals their Aura to the Killer.<br>This is not and has never been the case, '''''Exposed''''' only ever applies double-damage. |
||
|} |
|} |
||
| − | The following Unlockables inflict the '''''Haste''''' '''Status Effect''': |
||
| − | * Powers: |
||
| − | ** {{IconLink|The Afterpiece Antidote}} |
||
| − | * Perks: |
||
| − | ** {{IconLink|Adrenaline}} |
||
| − | ** {{IconLink|Balanced Landing}} |
||
| − | ** {{IconLink|Blood Pact}} |
||
| − | ** {{IconLink|Breakout}} |
||
| − | ** {{IconLink|Hex: Devour Hope}} |
||
| − | ** {{IconLink|Hex: No One Escapes Death}} |
||
| − | ** {{IconLink|Hope}} |
||
| − | ** {{IconLink|Lithe}} |
||
| − | ** {{IconLink|Play with Your Food}} |
||
| − | ** {{IconLink|Sprint Burst}} |
||
| + | |||
| − | === {{clr|8|Hearing}} === |
||
| + | === Glyph === |
||
| + | {{Main|Glyph}} |
||
{| class="wikitable" |
{| class="wikitable" |
||
|- |
|- |
||
| − | ! [[File: |
+ | ! [[File:FulliconStatusEffects_glyph.png|frameless|128px]] |
| − | | The ''''' |
+ | | The '''''Glyph''''' '''Status Effect''' is a '''{{#Invoke:Utils|clr|8|debuff}}''' that is currently exclusive to the Killer. |
| + | * It indicates to the Killer that they are currently suffering from a debuff that was applied after interacting with a {{#Invoke:Utils|IconLink|Glyph}}. |
||
|} |
|} |
||
| − | The following Unlockables inflict the '''''Hearing''''' '''Status Effect''': |
||
| − | * None, currently unused '''Status Effect'''. |
||
| + | |||
| − | === {{clr|8|Hindered}} === |
||
| + | === Haemorrhage === |
||
| + | {{Main|Haemorrhage}} |
||
{| class="wikitable" |
{| class="wikitable" |
||
|- |
|- |
||
| − | ! [[File: |
+ | ! [[File:FulliconStatusEffects_bleeding.png|frameless|128px]] |
| + | | The '''''Haemorrhage''''' '''Status Effect''' is a '''{{#Invoke:Utils|clr|8|debuff}}''' applied exclusively to Survivors. |
||
| − | | The '''''Hindered''''' '''Status Effect''' temporarily impairs the Survivor's [[Movement Speeds#Status Effects|Movement speed]], the strength of which depending on the Unlockable applying the '''Status Effect''' (usually by '''{{clr|2|-15 %}}''', unless stated otherwise). |
||
| + | * Survivors suffering from '''''Haemorrhage''''' produce more {{#Invoke:Utils|IconLink|Pools of Blood}}, making them easier to track by the Killer. |
||
| + | * Survivors suffering from '''''Haemorrhage''''' lose any partial Healing progress at a rate of '''{{#Invoke:Utils|clr|2|-7 % per second}}''' if not healed up fully. |
||
|} |
|} |
||
| − | The following Unlockables inflict the '''''Hindered''''' '''Status Effect''': |
||
| − | * Add-ons: |
||
| − | ** {{IconLink|Flask of Bleach}} ({{IconLink|The Afterpiece Tonic}}) ('''{{clr|2|-5 %}}''') |
||
| − | ** {{IconLink|Yew Seed Brew}} ({{IconLink|Hunting Hatchets}}) ('''{{clr|6|-3 %}}''') |
||
| − | ** {{IconLink|Yew Seed Concoction}} ({{IconLink|Hunting Hatchets}}) ('''{{clr|8|-3 %}}''') |
||
| − | ** {{IconLink|Waterlogged Shoe}} ({{IconLink|Blackened Catalyst}}) ('''{{clr|4|-15 %}}''') |
||
| − | ** {{IconLink|Compound Thirty-Three}} ({{IconLink|Blighted Corruption}}) ('''{{clr|3|-15 %}}''') |
||
| − | * Powers: |
||
| − | ** Dream Snares ({{IconLink|Dream Demon}}) ('''{{clr|2|-15 %}}''') |
||
| − | ** {{IconLink|The Afterpiece Tonic}} ('''{{clr|6|-15 %}}''') |
||
| + | |||
| − | === {{clr|8|Incapacitated}} === |
||
| + | === Haste === |
||
| + | {{Main|Haste}} |
||
{| class="wikitable" |
{| class="wikitable" |
||
|- |
|- |
||
| − | ! [[File: |
+ | ! [[File:FulliconStatusEffects_haste.png|frameless|128px]] |
| − | | The ''''' |
+ | | The '''''Haste''''' '''Status Effect''' is a '''{{#Invoke:Utils|clr|2|buff}}''' that can be applied to both Survivors and the Killer. |
| + | * Players benefitting from '''''Haste''''' have their [[Movement speed]] increased.<br>The strength of the effect depends on the specific Unlockable that inflicts it. |
||
|} |
|} |
||
| − | The following (inter-)actions are inhibited by the '''''Incapacitated''''' '''Status Effect''': |
||
| − | * Entering {{IconLink|Lockers}} |
||
| − | * Leaving through the {{IconLink|Exit Gates}} |
||
| − | * Repairing {{IconLink|Generators}} |
||
| − | * Sabotaging {{IconLink|Hooks}} |
||
| − | * Using {{IconLink|Items}} |
||
| − | * Interacting with other {{IconLink|Survivors}} |
||
| − | * Cleansing {{IconLink|Totems}} |
||
| + | === Hindered === |
||
| − | The following (inter-)actions are '''''{{clr|8|not}}''''' inhibited by the '''''Incapacitated''''' '''Status Effect''': |
||
| + | {{Main|Hindered}} |
||
| − | * Opening an {{IconLink|Exit Gate}} |
||
| + | {| class="wikitable" |
||
| − | * Leaving through the {{IconLink|Hatch}} |
||
| + | |- |
||
| − | * Dropping a {{IconLink|Pallet}} |
||
| + | ! [[File:FulliconStatusEffects_hindered.png|frameless|128px]] |
||
| − | * Vaulting {{IconLink|Pallets}} or {{IconLink|Windows}} |
||
| + | | The '''''Hindered''''' '''Status Effect''' is a '''{{#Invoke:Utils|clr|8|debuff}}''' that can be applied to both Survivors and the Killer. |
||
| + | * Players suffering from '''''Hindered''''' have their [[Movement speed]] decreased.<br>The strength of the effect depends on the specific Unlockable that inflicts it. |
||
| + | |} |
||
| + | === Incapacitated === |
||
| − | The following Unlockables inflict the '''''Incapacitated''''' '''Status Effect''': |
||
| + | {{Main|Incapacitated}} |
||
| − | * Powers: |
||
| + | {| class="wikitable" |
||
| − | ** {{IconLink|Blood Bond}} |
||
| + | |- |
||
| + | ! [[File:FulliconStatusEffects_incapacitated.png|frameless|128px]] |
||
| + | | The '''''Incapacitated''''' '''Status Effect''' is a '''{{#Invoke:Utils|clr|8|debuff}}''' applied exclusively to Survivors. |
||
| + | * Survivors suffering from '''''Incapacitated''''' are unable to interact with certain [[Props]] or other Survivors.<br>See [[Inhibited Actions]] for a full list. |
||
| + | |} |
||
| + | |||
| − | === |
+ | === Madness === |
| + | {{Main|Madness}} |
||
| − | :''For more details on '''Madness''', please refer to its [[Madness|Article]].'' |
||
{| class="wikitable" |
{| class="wikitable" |
||
|- |
|- |
||
| − | ! [[File:FulliconStatusEffects_madness.png|frameless| |
+ | ! [[File:FulliconStatusEffects_madness.png|frameless|128px]] |
| − | | The '''''Madness''''' '''Status Effect''' |
+ | | The '''''Madness''''' '''Status Effect''' is a '''{{#Invoke:Utils|clr|8|debuff}}''' applied exclusively to Survivors and exclusive to Trials against The {{#Invoke:Utils|IconLink|Doctor}}. |
| + | * Survivors suffering from '''''Madness''''' suffer from various hallucinations and other debilitating impairments. |
||
| + | * '''''Madness''''' is a tiered '''Status Effect'''. |
||
| + | |||
| + | The '''''Madness''''' '''Status Effect''', used exclusively by The {{#Invoke:Utils|IconLink|Doctor}}, impairs the Survivor's sanity, increasingly affecting them with various Afflictions, depending on the Add-on(s) '''The Doctor''' is using. |
||
|} |
|} |
||
| − | The following Unlockables inflict the '''''Madness''''' '''Status Effect''': |
||
| − | * Powers: |
||
| − | ** {{IconLink|Carter's Spark}} |
||
| + | |||
| − | === {{clr|8|Mangled}} === |
||
| + | === Mangled === |
||
| + | {{Main|Mangled}} |
||
{| class="wikitable" |
{| class="wikitable" |
||
|- |
|- |
||
| − | ! [[File:FulliconStatusEffects_mangled.png|frameless| |
+ | ! [[File:FulliconStatusEffects_mangled.png|frameless|128px]] |
| − | | The '''''Mangled |
+ | | The '''''Mangled'' Status Effect''' is a '''{{#Invoke:Utils|clr|8|debuff}}''' applied exclusively to Survivors. |
| + | * Survivors suffering from '''''Mangled''''' take {{#Invoke:Utils|clror|25 %}} longer to be healed for {{#Invoke:Utils|clro|1}} '''Health State'''. |
||
| + | ** This is achieved by reducing the Healing speed on that Survivor by {{#Invoke:Utils|clro|-20 %}}. |
||
| + | ** '''''Mangled''''' only applies to healing from the Injured State back to full health. |
||
|} |
|} |
||
| − | The following Unlockables inflict the '''''Mangled''''' '''Status Effect''': |
||
| − | * Add-ons: |
||
| − | ** {{IconLink|Begrimed Head}} ({{IconLink|Hunting Hatchets}}) |
||
| − | ** {{IconLink|"Blind Warrior" - White}} ({{IconLink|Wailing Bell}}) |
||
| − | ** {{IconLink|Defaced Smiley Pin}} ({{IconLink|Feral Frenzy}}) |
||
| − | ** {{IconLink|Grisly Chains}} ({{IconLink|Bubba's Chainsaw}}) |
||
| − | ** {{IconLink|Honey Locust Thorn}} ({{IconLink|The Redeemer}}) |
||
| − | ** {{IconLink|Rusted Jaws}} ({{IconLink|Bear Traps}}) |
||
| − | ** {{IconLink|Rusted Spike}} ({{IconLink|The Redeemer}}) |
||
| − | ** {{IconLink|Rusty Attachments}} ({{IconLink|Jigsaw's Baptism}}) |
||
| − | ** {{IconLink|Rusty Head}} ({{IconLink|Hunting Hatchets}}) |
||
| − | ** {{IconLink|Sulphuric Acid Vial}} ({{IconLink|The Afterpiece Tonic}}) |
||
| − | * Perks: |
||
| − | ** {{IconLink|Sloppy Butcher}} |
||
| + | |||
| − | === {{clr|8|Oblivious}} === |
||
| + | === Oblivious === |
||
| + | {{Main|Oblivious}} |
||
{| class="wikitable" |
{| class="wikitable" |
||
|- |
|- |
||
| − | ! [[File:FulliconStatusEffects_oblivious.png|frameless| |
+ | ! [[File:FulliconStatusEffects_oblivious.png|frameless|128px]] |
| − | | |
+ | | The '''''Oblivious'' Status Effect''' is a '''{{#Invoke:Utils|clr|8|debuff}}''' applied exclusively to Survivors. |
| − | * Survivors do '''''{{clr|8|not}}''''' hear |
+ | * Survivors suffering from '''''Oblivious''''' are unable to perceive the Killer's {{#Invoke:Utils|IconLink|Terror Radius}} and also do '''''{{#Invoke:Utils|clr|8|not}}''''' hear the [[Heartbeat]] warning of the Killer's proximity. |
| + | * Survivors suffering from '''''Oblivious''''' in turn do '''''{{#Invoke:Utils|clr|8|not}}''''' suffer from any effects that rely on Survivors being inside the '''Terror Radius''' to be applied. |
||
| − | * Perks relying on the Terror Radius to activate will '''''{{clr|8|not}}''''' trigger. |
||
| + | * During a ''Chase'', Survivors are '''''{{#Invoke:Utils|clr|3|still}}''''' able to hear the [[Chase Music]]. |
||
|} |
|} |
||
| − | The following Unlockables inflict the '''''Oblivious''''' '''Status Effect''': |
||
| − | * Add-ons: |
||
| − | ** {{IconLink|Drop of Perfume}} ({{IconLink|Blood Bond}}) |
||
| − | ** {{IconLink|Lost Memories Book}} ({{IconLink|Rites of Judgement}}) |
||
| − | * Powers: |
||
| − | ** {{IconLink|Blood Bond}} |
||
| − | ** {{IconLink|Dream Demon}} |
||
| − | ** {{IconLink|Of the Abyss}} |
||
| − | * Perks: |
||
| − | ** {{IconLink|Deathbound}} |
||
| − | ** {{IconLink|Hex: Retribution}} |
||
| − | ** {{IconLink|Nemesis}} |
||
| + | |||
| − | === {{clr|8|Sleep Penalty}} === |
||
| + | === Sleep Penalty === |
||
| + | {{Main|Sleep Penalty}} |
||
{| class="wikitable" |
{| class="wikitable" |
||
|- |
|- |
||
| − | ! [[File:FulliconStatusEffects_sleepPenalty.png|frameless| |
+ | ! [[File:FulliconStatusEffects_sleepPenalty.png|frameless|128px]] |
| − | | The '''''Sleep Penalty''''' '''Status Effect''' |
+ | | The '''''Sleep Penalty''''' '''Status Effect''' is a '''{{#Invoke:Utils|clr|8|debuff}}''' applied exclusively to Survivors and exclusive to Trials against The {{#Invoke:Utils|IconLink|Nightmare}}. |
| + | * Asleep Survivors suffering from '''''Sleep Penalty''''' take longer to be woken up from the [[Dream World]] by awake Survivors. |
||
|} |
|} |
||
| − | The following Unlockable inflicts the '''''Sleep Penalty''''' '''Status Effect''': |
||
| − | * Powers: |
||
| − | ** {{IconLink|Dream Demon}} |
||
| + | |||
| − | === {{clr|2|Undetectable}} === |
||
| + | === Undetectable === |
||
| + | {{Main|Undetectable}} |
||
{| class="wikitable" |
{| class="wikitable" |
||
|- |
|- |
||
| − | ! [[File:FulliconStatusEffects_undetectable.png|frameless| |
+ | ! [[File:FulliconStatusEffects_undetectable.png|frameless|128px]] |
| − | | The '''''Undetectable''''' '''Status Effect''' |
+ | | The '''''Undetectable''''' '''Status Effect''' is a '''{{#Invoke:Utils|clr|2|buff}}''' applied exclusively to the Killer. |
| + | * Killers benefitting from '''''Undetectable''''' are granted several Stealth mechanics: |
||
| − | * Disables the {{IconLink|Terror Radius}}. |
||
| + | ** Suppresses the {{#Invoke:Utils|IconLink|Terror Radius}} |
||
| − | * Disables the [[Red Stain]]. |
||
| + | ** Suppresses the [[Red Stain]] |
||
| − | * Blocks Survivors from reading the Killer's {{IconLink|Aura}}. |
||
| + | ** Blocks their {{#Invoke:Utils|IconLink|Aura}} from being revealed to Survivors |
||
| − | * Disables the jump-scare SFX upon starting to move from being stationary. |
||
| + | ** Suppresses the Stinger jump-scare SFX when starting to move from standing still<br>[[File:SoundCue Stinger.ogg]] |
||
| − | * Enables the smokey screen VFX, indicating stealth. |
||
| + | ** Enables the smoky-screen visual effect, indicating stealth to the Killer |
||
|} |
|} |
||
| − | The following inflict the '''''Undetectable''''' '''Status Effect''': |
||
| − | * Add-ons: |
||
| − | ** {{IconLink|"Bad Man's" Last Breath}} ({{IconLink|Spencer's Last Breath}}) |
||
| − | ** {{IconLink|Iridescent Brick}} ({{IconLink|Chainsaw}}) |
||
| − | ** {{IconLink|Leafy Mash}} ({{IconLink|Chainsaw}}) |
||
| − | ** {{IconLink|Obsidian Goblet}} ({{IconLink|Rites of Judgement}}) |
||
| − | ** {{IconLink|Silencing Cloth}} ({{IconLink|Blood Bond}}) |
||
| − | ** {{IconLink|Vermilion Webcap}} ({{IconLink|Of the Abyss}}) |
||
| − | ** {{IconLink|Vigo's Journal}} ({{IconLink|Blighted Corruption}}) |
||
| − | ** {{IconLink|Violet Waxcap}} ({{IconLink|Of the Abyss}}) |
||
| − | * Perks: |
||
| − | ** {{IconLink|Beast of Prey}} |
||
| − | ** {{IconLink|Dark Devotion}} |
||
| − | ** {{IconLink|Insidious}} |
||
| − | ** {{IconLink|Tinkerer}} |
||
| − | ** {{IconLink|Trail of Torment}} |
||
| − | * Powers: |
||
| − | ** {{IconLink|Evil Within I}} |
||
| − | ** {{IconLink|Jigsaw's Baptism}} |
||
| − | ** {{IconLink|Night Shroud}} |
||
| − | ** {{IconLink|Of the Abyss}} |
||
| − | ** {{IconLink|Wailing Bell}} |
||
| + | |||
| − | === {{clr|2|Vision}} === |
||
| + | === Vision === |
||
| + | {{Main|Vision}} |
||
{| class="wikitable" |
{| class="wikitable" |
||
|- |
|- |
||
| − | ! [[File:FulliconStatusEffects_vision.png|frameless| |
+ | ! [[File:FulliconStatusEffects_vision.png|frameless|128px]] |
| − | | The '''''Vision''''' '''Status Effect''' |
+ | | The '''''Vision''''' '''Status Effect''' is an unused '''{{#Invoke:Utils|clr|2|buff}}''' that would have been applied to both Survivors and the Killer. |
| + | * The effect would have boosted the radius of range-limited Aura-reading abilities, an effect that is identical to the effect of the Perk {{#Invoke:Utils|IconLink|Open-Handed}}. |
||
|} |
|} |
||
| − | The following Unlockables inflict the '''''Vision''''' '''Status Effect''': |
||
| − | * None, currently unused '''Status Effect'''. |
||
| Line 373: | Line 291: | ||
[[File:IconHelp proficiency.png|frameless|left]] |
[[File:IconHelp proficiency.png|frameless|left]] |
||
[[File:IconHelp proficiencyList.png|frameless|right]] |
[[File:IconHelp proficiencyList.png|frameless|right]] |
||
| − | '''Proficiency Indicators''' indicate to Survivors how various effects from either their own |
+ | First added with [[Patch 1.5.0]], '''Proficiency Indicators''' indicate to both Killers and Survivors how various effects from either their own Add-ons, Perks, Offerings, etc., or those of other Players, affect their performance at the interaction they are currently performing.<br>They do this by displaying the effect's associated icon above the Progress Bar and by colouring said bar accordingly. |
| + | |||
| + | Unlike '''Status Effects''', '''Proficiency Indicators''' are not inherently a '''{{#Invoke:Utils|clr|2|buff (yellow)}}''' or a '''{{#Invoke:Utils|clr|8|debuff (red)}}''' in effect, but can be either, indicated by the colour of the icon and the colour of the Progress Bar. |
||
| + | {{-}} |
||
| + | |||
| + | === Progress Bar === |
||
| + | The '''Progress Bar''' is displayed whenever an interaction requires a certain amount of Charges to be completed.<br>The Bar has '''{{#Invoke:Utils|clr|10|3}} possible states/colours''': |
||
| + | |||
| + | {| class="wikitable" |
||
| + | |- |
||
| + | ! State & Colour !! Icon !! Information |
||
| + | |- |
||
| + | ! Default State: '''blueish white''' !! [[File:ProgressBar neutralProgressionComplete.png]] |
||
| + | | The Player's Action speed is exactly '''{{#Invoke:Utils|clr|16|1 Charge per second}}''' (default). |
||
| + | |- |
||
| + | ! Buff State: '''{{#Invoke:Utils|clr|2|yellow}}''' !! [[File:ProgressBar yellowProgressionComplete.png]] |
||
| + | | The Player's Action speed is '''{{#Invoke:Utils|clr|2|greater than 1 Charge per second}}'''. |
||
| + | |- |
||
| + | ! Debuff State: '''{{#Invoke:Utils|clr|8|red}}''' !! [[File:ProgressBar redProgressionComplete.png]] |
||
| + | | The Player's Action speed is '''{{#Invoke:Utils|clr|8|less than 1 Charge per second}}'''. |
||
| + | |} |
||
| + | |||
| + | It should be duly noted that the colour of the '''Progression''' is individual to each Player.<br>Even if the overall interaction (i.e. Generator Repair with multiple Survivors) is faster than the default Action speed of '''{{#Invoke:Utils|clr|11|1 Charge per second}}''', if your individual speed/contribution to this is below that (i.e. due to Efficiency penalty), or above that (i.e. Toolbox Repair), the '''Progress Bar''' will be coloured accordingly. |
||
| − | Unlike '''Status Effects''', '''Proficiency Indicators''' are not inherently a '''{{clr|2|buff (yellow)}}''' or a '''{{clr|8|debuff (red)}}''' in effect, but can be either, indicated by the colour of the icon and the colour of the progress bar.{{-}} |
||
=== Chance === |
=== Chance === |
||
| + | {{Main|Chance}} |
||
{| class="wikitable" |
{| class="wikitable" |
||
|- |
|- |
||
| − | ! [[File:FulliconStatusEffects_chance.png|frameless| |
+ | ! [[File:FulliconStatusEffects_chance.png|frameless|128px]] |
| − | | The '''''Chance''''' '''Proficiency Indicator''' works alongside the [[Luck]] |
+ | | The '''''Chance''''' '''Proficiency Indicator''' works alongside the [[Luck]] Mechanic and indicates whether the action a Survivor is currently performing has a '''{{#Invoke:Utils|clr|2|higher}}''' or '''{{#Invoke:Utils|clr|8|lower}}''' chance at succeeding. |
| − | * Only applies to |
+ | * Only applies to self-unhooking from a {{#Invoke:Utils|IconLink|Hook}}. |
|} |
|} |
||
| + | |||
| − | The following displays the '''''Chance''''' '''Proficiency Indicator''': |
||
| − | * Offering: |
||
| − | ** {{IconLink|Chalk Pouch}} |
||
| − | ** {{IconLink|Cream Chalk Pouch}} |
||
| − | ** {{IconLink|Salt Pouch}} |
||
| − | ** {{IconLink|Ivory Chalk Pouch}} |
||
| − | ** {{IconLink|Black Salt Statuette}} |
||
| − | ** {{IconLink|Vigo's Jar of Salty Lips}} |
||
| − | * Perks: |
||
| − | ** {{IconLink|Deliverance}} |
||
| − | ** {{IconLink|Slippery Meat}} |
||
| − | ** {{IconLink|Up the Ante}} |
||
| − | ** {{IconLink|Monstrous Shrine}} |
||
=== Efficiency === |
=== Efficiency === |
||
| + | {{Main|Efficiency}} |
||
{| class="wikitable" |
{| class="wikitable" |
||
|- |
|- |
||
| − | ! [[File:FulliconStatusEffects_efficiency.png|frameless| |
+ | ! [[File:FulliconStatusEffects_efficiency.png|frameless|128px]] |
| − | | The '''''Efficiency''''' '''Proficiency Indicator''' indicates whether an Item's current |
+ | | The '''''Efficiency''''' '''Proficiency Indicator''' indicates whether an Item's current Depletion rate is '''{{#Invoke:Utils|clr|2|reduced}}''' or '''{{#Invoke:Utils|clr|8|increased}}'''. |
| − | * This '''Proficiency Indicator''' was originally known as ''''' |
+ | * This '''Proficiency Indicator''' was originally known as '''''Expertise'''''. |
|} |
|} |
||
| − | The following displays the '''''Efficiency''''' '''Proficiency Indicator''': |
||
| − | * Add-ons: |
||
| − | ** {{IconLink|Low Amp Filament}} |
||
| − | ** {{IconLink|Odd Bulb}} |
||
| − | * Perks: |
||
| − | ** {{IconLink|Botany Knowledge}} |
||
| − | ** {{IconLink|Overwhelming Presence}} |
||
| − | ** {{IconLink|Self-Care}} |
||
| − | ** {{IconLink|Streetwise}} |
||
| + | |||
| − | === {{Anchor|Heal|Healing}}Healing=== |
||
| + | === Healing=== |
||
| + | {{Main|Healing}} |
||
{| class="wikitable" |
{| class="wikitable" |
||
|- |
|- |
||
| − | ! [[File:FulliconStatusEffects_healing.png|frameless| |
+ | ! [[File:FulliconStatusEffects_healing.png|frameless|128px]] |
| − | | The '''''Healing''''' '''Proficiency Indicator''' indicates whether a |
+ | | The '''''Healing''''' '''Proficiency Indicator''' indicates whether a Survivor's Healing speed is '''{{#Invoke:Utils|clr|2|increased}}''' or '''{{#Invoke:Utils|clr|8|reduced}}'''. |
|} |
|} |
||
| − | The following displays the '''''Healing''''' '''Proficiency Indicator''': |
||
| − | * Items: |
||
| − | ** {{IconLink|Med-Kits}} |
||
| − | * Add-ons: |
||
| − | ** {{IconLink|Butterfly Tape}} ({{IconLink|Med-Kits}}) |
||
| − | ** {{IconLink|Self Adherent Wrap}} ({{IconLink|Med-Kits}}) |
||
| − | ** {{IconLink|Needle & Thread}} ({{IconLink|Med-Kits}}) |
||
| − | ** {{IconLink|Medical Scissors}} ({{IconLink|Med-Kits}}) |
||
| − | ** {{IconLink|Surgical Suture}} ({{IconLink|Med-Kits}}) |
||
| − | ** {{IconLink|Abdominal Dressing}} ({{IconLink|Med-Kits}}) |
||
| − | * Perks: |
||
| − | ** {{IconLink|Botany Knowledge}} |
||
| − | ** {{IconLink|Coulrophobia}} |
||
| − | ** {{IconLink|Desperate Measures}} |
||
| − | ** {{IconLink|Dying Light}} |
||
| − | ** {{IconLink|Leader}} |
||
| − | ** {{IconLink|No One Left Behind}} |
||
| − | ** {{IconLink|Resilience}} |
||
| − | ** {{IconLink|Self-Care}} |
||
| − | ** {{IconLink|Spine Chill}} |
||
| − | ** {{IconLink|We'll Make It}} |
||
| − | ** {{IconLink|We're Gonna Live Forever}} |
||
| + | |||
| − | === Progression speed === |
||
| + | === Progression Speed === |
||
| + | {{Main|Progression Speed}} |
||
{| class="wikitable" |
{| class="wikitable" |
||
|- |
|- |
||
| − | ! [[File:FulliconStatusEffects_progressionSpeed.png|frameless| |
+ | ! [[File:FulliconStatusEffects_progressionSpeed.png|frameless|128px]] |
| − | | The '''''Progression speed''''' '''Proficiency Indicator''' indicates whether |
+ | | The '''''Progression speed''''' '''Proficiency Indicator''' indicates whether the Progression speed of an Action being performed by the Player is '''{{#Invoke:Utils|clr|2|increased}}''' or '''{{#Invoke:Utils|clr|8|reduced}}'''. |
|} |
|} |
||
| − | The following displays the '''''Repairing''''' '''Proficiency Indicator''': |
||
| − | * Perks: |
||
| − | **{{IconLink|Botany Knowledge}} |
||
| − | **{{IconLink|Brutal Strength}} |
||
| − | **{{IconLink|Breakout}} |
||
| − | **{{IconLink|Desperate Measures}} |
||
| − | **{{IconLink|Dying Light}} |
||
| − | **{{IconLink|Fire Up}} |
||
| − | **{{IconLink|Hex: Thrill of the Hunt}} |
||
| − | **{{IconLink|Leader}} |
||
| − | **{{IconLink|No One Left Behind}} |
||
| − | **{{IconLink|Pharmacy}} |
||
| − | **{{IconLink|Remember Me}} |
||
| − | **{{IconLink|Resilience}} |
||
| − | **{{IconLink|Sloppy Butcher}} |
||
| − | **{{IconLink|Spine Chill}} |
||
| − | **{{IconLink|Thanatophobia}} |
||
| − | **{{IconLink|Unbreakable}} |
||
| − | **{{IconLink|We'll Make It}} |
||
| − | **{{IconLink|We're Gonna Live Forever}} |
||
| + | |||
| − | === {{Anchor|Repair|Repairing}}Repairing === |
||
| + | === Repairing === |
||
| + | {{Main|Repairing}} |
||
{| class="wikitable" |
{| class="wikitable" |
||
|- |
|- |
||
| − | ! [[File:FulliconStatusEffects_repairing.png|frameless| |
+ | ! [[File:FulliconStatusEffects_repairing.png|frameless|128px]] |
| − | | The '''''Repairing''''' '''Proficiency Indicator''' indicates whether a |
+ | | The '''''Repairing''''' '''Proficiency Indicator''' indicates whether a Survivor's Repair speed is '''{{#Invoke:Utils|clr|2|increased}}''' or '''{{#Invoke:Utils|clr|8|reduced}}'''. |
|} |
|} |
||
| + | |||
| − | The following displays the '''''Repairing''''' '''Proficiency Indicator''': |
||
| − | * To be completed. |
||
=== Sabotaging === |
=== Sabotaging === |
||
| + | {{Main|Sabotaging}} |
||
{| class="wikitable" |
{| class="wikitable" |
||
|- |
|- |
||
| − | ! [[File:FulliconStatusEffects_sabotaging.png|frameless| |
+ | ! [[File:FulliconStatusEffects_sabotaging.png|frameless|128px]] |
| − | | The '''''Sabotaging''''' '''Proficiency Indicator''' indicates whether a |
+ | | The '''''Sabotaging''''' '''Proficiency Indicator''' indicates whether a Survivor's Sabotage speed is '''{{#Invoke:Utils|clr|2|increased}}''' or '''{{#Invoke:Utils|clr|8|reduced}}'''. |
|} |
|} |
||
| + | |||
| − | The following displays the '''''Sabotaging''''' '''Proficiency Indicator''': |
||
| − | * To be completed. |
||
=== Skill Check Difficulty === |
=== Skill Check Difficulty === |
||
| + | {{Main|Skill Check Difficulty}} |
||
{| class="wikitable" |
{| class="wikitable" |
||
|- |
|- |
||
| − | ! [[File:FulliconStatusEffects_skillCheckDifficulty.png|frameless| |
+ | ! [[File:FulliconStatusEffects_skillCheckDifficulty.png|frameless|128px]] |
| − | | The '''''Skill Check Difficulty''''' '''Proficiency Indicator''' indicates whether a |
+ | | The '''''Skill Check Difficulty''''' '''Proficiency Indicator''' indicates whether the Success Zone of a triggered ''Skill Check'' is '''{{#Invoke:Utils|clr|2|increased}}''' or '''{{#Invoke:Utils|clr|8|reduced}}'''. |
|} |
|} |
||
| − | The following displays the '''''Skill Check Difficulty''''' '''Proficiency Indicator''': |
||
| − | * To be completed. |
||
=== Skill Check Probability === |
=== Skill Check Probability === |
||
| + | {{Main|Skill Check Probability}} |
||
{| class="wikitable" |
{| class="wikitable" |
||
|- |
|- |
||
| − | ! [[File:FulliconStatusEffects_skillCheckProbability.png|frameless| |
+ | ! [[File:FulliconStatusEffects_skillCheckProbability.png|frameless|128px]] |
| − | | The '''''Skill Check Probability''''' '''Proficiency Indicator''' indicates |
+ | | The '''''Skill Check Probability''''' '''Proficiency Indicator''' indicates the Odds of an interaction triggering a ''Skill Check'' are '''{{#Invoke:Utils|clr|8|increased}}''' or '''{{#Invoke:Utils|clr|2|reduced}}''', with the latter being considered beneficial. |
|} |
|} |
||
| − | The following displays the '''''Skill Check Probability''''' '''Proficiency Indicator''': |
||
| − | * To be completed. |
||
| − | == |
+ | == Player Effects System == |
| + | [[File:MaximumPerkEffects.png|right|thumb|Maximum number of Player Effects possible in a single Trial as of CHAPTER 27.<ref>https://www.reddit.com/r/deadbydaylight/comments/11plare/the_maximum_amount_of_buff_indicators_possible_as/ Screenshot from Reddit Post by u/Potassium_40. Reddit. Retrieved 13 March 2023.</ref>]] |
||
| − | The '''Perk Effects System''' was the original (and up to [[Patch 1.5.0]] only) system available to display any Unlockables affecting a Player that are not equipped by themselves.<br>It displayed all HUD information in regards to Perks and Add-ons affecting Survivors and Killers.<br>With the introduction of '''Status Effects''' and '''Proficiency Indicators''', its only use these days is to indicate effects another Survivor's or the Killer's {{IconLink|Perks}} have on the Player. |
||
| + | The '''Player Effects''' System is used to indicate when something is affecting the Player and their abilities directly. |
||
| + | It was the very first such information system in ''Dead by Daylight'' and was already present in the release version 1.0.0.<br>It has remained in use to this date, with the '''Status Effects''' and '''Proficiency Indicator''' Systems complementing its functionality since [[Patch 1.5.0]], taking up functions that would have been ill-suited to the '''Player Effects''' System. |
||
| − | A Perk affecting other Survivors will display its icon with either a '''{{clr|13|turquoise (buff)}}''' or '''{{clr|8|red (debuff)}}''' background (see below), next to the Perk Diamond in the lower right corner of the screen. |
||
| + | === Use === |
||
| − | Prior to the implementation of '''Status Effect''' and '''Proficiency Indicators''' the type of effect an Add-on had on the Player could not be conveyed by that system and relied on the Player recognising the icon and knowing about its effects, which was ultimately deemed too user-unfriendly, especially for newcomers and inexperienced Players, prompting the devs to implement the new system. |
||
| + | Originally, the '''Player Effects''' System was reserved solely for the effects of '''Perks''' and '''Add-ons''' that influenced other Players, but has since expanded to encompass any effects affecting the Player and their abilities directly, whether those originate from the Player's own [[Unlockables]] or from those of other Players. |
||
| + | It is also used to indicate when a Killer's Power is affecting the Player in a way that cannot be displayed by any of the other information systems in ''Dead by Daylight''. |
||
| − | The '''Perk Effects System''' was kept for Perks, however, as it is easier to remember Perk icons and their associated effects, and continues to be used to this day, hinting at its age by continuing to use a '''{{clr|13|turquoise}}''' colour instead of '''{{clr|2|yellow}}''' to display buffs. |
||
| − | === |
+ | === Buff vs. Debuff === |
| + | Before the introduction of the newer '''Status Effects''' and '''Proficiency Indicator''' Systems, effects which buffed the Player would use a '''{{#Invoke:Utils|clr|13|turquoise}}''' colour, instead of '''{{#Invoke:Utils|clr|2|yellow}}'''.<br>Since the '''Player Effects''' System is the oldest remaining system, it still uses the '''{{#Invoke:Utils|clr|13|turquoise}}''' colour to indicate a buff.<br>Debuffs already used a '''{{#Invoke:Utils|clr|8|red}}''' colour back then. |
||
| + | |||
| + | === Icon Examples === |
||
{| class="wikitable" |
{| class="wikitable" |
||
|- |
|- |
||
| Line 525: | Line 411: | ||
|} |
|} |
||
| + | === Unlockables === |
||
| + | The following Unlockables will display their icon using the '''Player Effects''' System: |
||
| + | {| class="wikitable" |
||
| + | |- |
||
| + | ! colspan="2" | Powers |
||
| + | |- |
||
| + | ! {{#Invoke:Utils|IconLink|Carter's Spark}} |
||
| + | | Shows a '''{{#Invoke:Utils|clr|8|debuff}}''' icon of ''Carter's Spark'' while a Survivor's interactions are inhibited from being hit by a ''Shock Therapy'' Attack. |
||
| + | |- |
||
| + | ! colspan="2" | Props / Interactables |
||
| + | |- |
||
| + | ! {{#Invoke:Utils|clr|6|Orange Glyphs}} |
||
| + | | Shows a '''{{#Invoke:Utils|clr|8|debuff}}''' icon while the Killer suffers from its afflictions. |
||
| + | |} |
||
| + | |||
| + | * Add-ons: |
||
| + | ** {{#Invoke:Utils|IconLink|Acidic Blood}} |
||
| + | ** {{#Invoke:Utils|IconLink|Anti-Haemorrhagic Syringe}} |
||
| + | ** {{#Invoke:Utils|IconLink|"Bad Man's" Last Breath}} |
||
| + | ** {{#Invoke:Utils|IconLink|Geographical Readout}} |
||
| + | ** {{#Invoke:Utils|IconLink|Honing Stone}} |
||
| + | ** {{#Invoke:Utils|IconLink|Iridescent Queen}} |
||
| + | ** {{#Invoke:Utils|IconLink|Iridescent Unpublished Manuscript}} |
||
| + | ** {{#Invoke:Utils|IconLink|Jigsaw's Annotated Plan}} |
||
| + | ** {{#Invoke:Utils|IconLink|Red Paint Brush}} |
||
| + | ** {{#Invoke:Utils|IconLink|Shotgun Speakers}} |
||
| + | ** {{#Invoke:Utils|IconLink|Spasmodic Breath}} |
||
| + | |||
| + | * Perks: |
||
| + | ** {{#Invoke:Utils|IconLink|Aftercare}} |
||
| + | ** {{#Invoke:Utils|IconLink|Better than New}} |
||
| + | ** {{#Invoke:Utils|IconLink|Blood Pact}} |
||
| + | ** {{#Invoke:Utils|IconLink|Blood Echo}} |
||
| + | ** {{#Invoke:Utils|IconLink|Boil Over}} |
||
| + | ** {{#Invoke:Utils|IconLink|Boon: Circle of Healing}} |
||
| + | ** {{#Invoke:Utils|IconLink|Boon: Dark Theory}} |
||
| + | ** {{#Invoke:Utils|IconLink|Boon: Exponential}} |
||
| + | ** {{#Invoke:Utils|IconLink|Boon: Illumination}} |
||
| + | ** {{#Invoke:Utils|IconLink|Boon: Shadow Step}} |
||
| + | ** {{#Invoke:Utils|IconLink|Coulrophobia}} |
||
| + | ** {{#Invoke:Utils|IconLink|Dark Devotion}} |
||
| + | ** {{#Invoke:Utils|IconLink|Dead Man's Switch}} |
||
| + | ** {{#Invoke:Utils|IconLink|Deadline}} |
||
| + | ** {{#Invoke:Utils|IconLink|Deathbound}} |
||
| + | ** {{#Invoke:Utils|IconLink|Dissolution}} |
||
| + | ** {{#Invoke:Utils|IconLink|Dying Light}} |
||
| + | ** {{#Invoke:Utils|IconLink|Fearmonger}} |
||
| + | ** {{#Invoke:Utils|IconLink|Franklin's Demise}} |
||
| + | ** {{#Invoke:Utils|IconLink|Genetic Limits}} |
||
| + | ** {{#Invoke:Utils|IconLink|Guardian}} |
||
| + | ** {{#Invoke:Utils|IconLink|Hex: Devour Hope}} |
||
| + | ** {{#Invoke:Utils|IconLink|Hex: Face the Darkness}} |
||
| + | ** {{#Invoke:Utils|IconLink|Hex: Pentimento}} |
||
| + | ** {{#Invoke:Utils|IconLink|Hex: Plaything}} |
||
| + | ** {{#Invoke:Utils|IconLink|Hysteria}} |
||
| + | ** {{#Invoke:Utils|IconLink|Kindred}} |
||
| + | ** {{#Invoke:Utils|IconLink|Knock Out}} |
||
| + | ** {{#Invoke:Utils|IconLink|Leader}} |
||
| + | ** {{#Invoke:Utils|IconLink|Leverage}} |
||
| + | ** {{#Invoke:Utils|IconLink|Open-Handed}} |
||
| + | ** {{#Invoke:Utils|IconLink|Overwhelming Presence}} |
||
| + | ** {{#Invoke:Utils|IconLink|Prove Thyself}} |
||
| + | ** {{#Invoke:Utils|IconLink|Quick Gambit}} |
||
| + | ** {{#Invoke:Utils|IconLink|Reassurance}} |
||
| + | ** {{#Invoke:Utils|IconLink|Remember Me}} |
||
| + | ** {{#Invoke:Utils|IconLink|Scourge Hook: Gift of Pain}} |
||
| + | ** {{#Invoke:Utils|IconLink|Streetwise}} |
||
| + | ** {{#Invoke:Utils|IconLink|Terminus}} |
||
| + | ** {{#Invoke:Utils|IconLink|Thanatophobia}} |
||
| + | ** {{#Invoke:Utils|IconLink|Unnerving Presence}} |
||
| + | ** {{#Invoke:Utils|IconLink|Up the Ante}} |
||
| + | ** {{#Invoke:Utils|IconLink|Vigil}} |
||
| + | ** {{#Invoke:Utils|IconLink|We'll Make It}} |
||
| + | |||
| + | |||
| + | == Survivor Activity HUD == |
||
| + | [[File:SurvivorActivityHUD_Screenshot01.jpg|right|200px]] |
||
| + | First added with [[Patch 6.5.0]], the '''Survivor Activity HUD''' displays the current interactions of Survivors to all other Survivors as a small symbol next to their HUD Icon.<br>In case of some crucial interactions such as Dying State Recovery and Generator Repair Progression, the current Progression of the interaction is displayed as well as a yellow circle surrounding the icon that is filling itself. |
||
| + | |||
| + | It also modified the mechanic of displaying when a Survivor is being chased by the Killer, which was formerly exclusive to the '''''Obsession''''', so that it is now used on all Survivors.<br>The modified system still marks the '''''Obsession''''' with a long pair of Entity-claws framing their Survivor HUD Icon, but now uses a shorter pair of Entity-claws to indicate which Survivor is currently being chased. |
||
| + | |||
| + | The following interactions are currently displayed on the '''Survivor Activity HUD''': |
||
| + | {| class="wikitable" |
||
| + | |- |
||
| + | ! Icon !! Activity !! Progression Circle |
||
| + | |- |
||
| + | ! rowspan="2" | [[File:T survivorActivity iconTotems.png|64px]] |
||
| + | | Blessing a Totem || {{no}} |
||
| + | |- |
||
| + | | Cleansing a Totem || {{no}} |
||
| + | |- |
||
| + | ! rowspan="2" | [[File:T survivorActivity iconHealing.png|64px]] |
||
| + | | Healing yourself || {{no}} |
||
| + | |- |
||
| + | | Healing another Survivor || {{no}} |
||
| + | |- |
||
| + | ! [[File:T survivorActivity iconKiller.png|64px]] |
||
| + | | Interacting with a Killer's Power or related Prop || {{no}} |
||
| + | |- |
||
| + | ! [[File:T survivorActivity iconGates.png|64px]] |
||
| + | | Opening an Exit Gate || {{no}} |
||
| + | |- |
||
| + | ! [[File:T survivorActivity iconRecovery.png|64px]] |
||
| + | | Recovering from the Dying State || {{yes}} |
||
| + | |- |
||
| + | ! [[File:T survivorActivity iconGenerator.png|64px]] |
||
| + | | Repairing a Generator || {{yes}} |
||
| + | |- |
||
| + | ! [[File:T survivorActivity Invocation.png|64px]] |
||
| + | | Starting an Invocation || {{yes}} |
||
| + | |- |
||
| + | ! [[File:T survivorActivity iconChests.png|64px]] |
||
| + | | Unlocking a Chest || {{no}} |
||
| + | |} |
||
| + | {{-}} |
||
| + | |||
| + | |||
| + | == Survivor HUD Icons == |
||
| + | [[File:IconHelp_healthy.png|64px|border|right]] |
||
| + | The Survivor HUD Icons represent each Survivor in the Trial and the current state they are in or experiencing.<br>This includes their current [[Health State]], whether or not they are being carried, being hooked, having escaped, being sacrificed, being killed, or being dead.<br>It also includes over-/underlays with special interactions with Killer [[Powers]]. |
||
| + | |||
| + | Up to the Status HUD Rework in [[Patch 4.5.2]], Survivors were represented with a generic icon in the Status HUD instead of their Character portrait.<br>[[Patch 5.0.0]] further included separate icons for '''{{#Invoke:Utils|clr|12|Legendary Outfits}}'''. |
||
| + | |||
| + | === Portraits === |
||
| + | {| class="wikitable unsortable" |
||
| + | |- |
||
| + | ! [[Dwight Fairfield]] !! [[File:DF_charSelect_portrait_HUD.png|64px]] |
||
| + | ! rowspan="10" | [[File:nothing.png]] |
||
| + | ! [[Meg Thomas]] !! [[File:MT_charSelect_portrait_HUD.png|64px]] |
||
| + | ! rowspan="10" | [[File:nothing.png]] |
||
| + | ! [[Jake Park]] !! [[File:JP_charSelect_portrait_HUD.png|64px]] |
||
| + | ! rowspan="10" | [[File:nothing.png]] |
||
| + | ! [[Claudette Morel]] !! [[File:CM_charSelect_portrait_HUD.png|64px]] |
||
| + | ! rowspan="10" | [[File:nothing.png]] |
||
| + | ! [[Nea Karlsson]] !! [[File:NK_charSelect_portrait_HUD.png|64px]] |
||
| + | |- |
||
| + | ! [[Laurie Strode]] !! [[File:LS_charSelect_portrait_HUD.png|64px]] |
||
| + | ! [[Ace Visconti]] !! [[File:AV_charSelect_portrait_HUD.png|64px]] |
||
| + | ! [[Bill Overbeck]] !! [[File:BO_charSelect_portrait_HUD.png|64px]] |
||
| + | ! [[Feng Min]] !! [[File:FM_charSelect_portrait_HUD.png|64px]] |
||
| + | ! [[David King]] !! [[File:DK_charSelect_portrait_HUD.png|64px]] |
||
| + | |- |
||
| + | ! [[Quentin Smith]] !! [[File:QS_charSelect_portrait_HUD.png|64px]] |
||
| + | ! [[David Tapp]] !! [[File:FS_charSelect_portrait_HUD.png|64px]] |
||
| + | ! [[Kate Denson]] !! [[File:GS_charSelect_portrait_HUD.png|64px]] |
||
| + | ! [[Adam Francis]] !! [[File:AF_charSelect_portrait_HUD.png|64px]] |
||
| + | ! [[Jeff Johansen]] !! [[File:KS_charSelect_portrait_HUD.png|64px]] |
||
| + | |- |
||
| + | ! [[Jane Romero]] !! [[File:MS_charSelect_portrait_HUD.png|64px]] |
||
| + | ! [[Ash Williams]] !! [[File:MS2_charSelect_portrait_HUD.png|64px]] |
||
| + | ! [[Nancy Wheeler]] !! [[File:QF_charSelect_portrait_HUD.png|64px]] |
||
| + | ! [[Steve Harrington]] !! [[File:QM_charSelect_portrait_HUD.png|64px]] |
||
| + | ! [[Jonathan Byers]] !! [[File:QM_Outfit_010_charSelect_portrait_HUD.png|64px]] |
||
| + | |- |
||
| + | ! [[Yui Kimura]] !! [[File:SS_charSelect_portrait_HUD.png|64px]] |
||
| + | ! [[Zarina Kassir]] !! [[File:US_charSelect_portrait_HUD.png|64px]] |
||
| + | ! [[Cheryl Mason]] !! [[File:S22_charSelect_portrait_HUD.png|64px]] |
||
| + | ! [[Lisa Garland]] !! [[File:S22_outfit_006_charSelect_portrait_HUD.png|64px]] |
||
| + | ! [[Cybil Bennett]] !! [[File:S22_outfit_008_charSelect_portrait_HUD.png|64px]] |
||
| + | |- |
||
| + | ! [[Maria]] !! [[File:S22 Maria charSelect portrait HUD.png|64px]] |
||
| + | ! [[James Sunderland]] !! [[File:S22_outfit_009_charSelect_portrait_HUD.png|64px]] |
||
| + | ! [[Felix Richter]] !! [[File:S23_charSelect_portrait_HUD.png|64px]] |
||
| + | ! [[Élodie Rakoto]] !! [[File:S24_charSelect_portrait_HUD.png|64px]] |
||
| + | ! [[Yun-Jin Lee]] !! [[File:S25_charSelect_portrait_HUD.png|64px]] |
||
| + | |- |
||
| + | ! [[Jill Valentine]] !! [[File:S26_charSelect_portrait_HUD.png|64px]] |
||
| + | ! [[Claire Redfield]] !! [[File:S26_outfit02_charSelect_portrait_HUD.png|64px]] |
||
| + | ! [[Sheva Alomar]] !! [[File:S26 outfit008 charSelect portrait HUD.png|64px]] |
||
| + | ! [[Leon Scott Kennedy]] !! [[File:S27_charSelect_portrait_HUD.png|64px]] |
||
| + | ! [[Chris Redfield]] !! [[File:S27_outfit02_charSelect_portrait_HUD.png|64px]] |
||
| + | |- |
||
| + | ! [[Carlos Oliveira]] !! [[File:S27 outfit008 charSelect portrait HUD.png|64px]] |
||
| + | ! [[Mikaela Reid]] !! [[File:S28_charSelect_portrait_HUD.png|64px]] |
||
| + | ! [[Jonah Vasquez]] !! [[File:S29_charSelect_portrait_HUD.png|64px]] |
||
| + | ! [[Yoichi Asakawa]] !! [[File:S30_charSelect_portraitHUD.png|64px]] |
||
| + | ! [[Haddie Kaur]] !! [[File:S31_charSelect_portraitHUD.png|64px]] |
||
| + | |- |
||
| + | ! [[Ada Wong]] !! [[File:S32_charSelect_portraitHUD.png|64px]] |
||
| + | ! [[Rebecca Chambers]] !! [[File:S33_charSelect_portraitHUD.png|64px]] |
||
| + | ! [[Vittorio Toscano]] !! [[File:S34_charSelect_portraitHUD.png|64px]] |
||
| + | ! [[Thalita Lyra]] !! [[File:S35_charSelect_portraitHUD.png|64px]] |
||
| + | ! [[Renato Lyra]] !! [[File:S36_charSelect_portraitHUD.png|64px]] |
||
| + | |- |
||
| + | ! [[Tubarão]] !! [[File:S36 Tubarao charSelect portraitHUD.png|64px]] |
||
| + | ! [[Gabriel Soma]] !! [[File:S37_charSelect_portraitHUD.png|64px]] |
||
| + | ! [[Nicolas Cage]] !! [[File:S38_charSelect_portraitHUD.png|64px]] |
||
| + | ! [[Ellen Ripley]] !! [[File:S39_charSelect_portraitHUD.png|64px]] |
||
| + | ! [[Alan Wake]] !! [[File:S40_charSelect_portraitHUD.png|64px]] |
||
| + | |- |
||
| + | ! [[Sable Ward]] !! [[File:S41_charSelect_portraitHUD.png|64px]] |
||
| + | |} |
||
| + | |||
| + | === Broken State === |
||
| + | [[File:IconStatusEffects broken.png|right|frameless|128px]] |
||
| + | The Broken State is shown whenever a Survivor is damaged to the point that they can no longer be healed back to the Healthy State. |
||
| + | |||
| + | It adds a red version of the '''''Broken''''' '''Status Effect's''' icon to the Survivor's HUD portrait. |
||
| + | {{-}} |
||
| + | |||
| + | === Caged State === |
||
| + | [[File:IconStatus cagedSurvivor.png|right|frameless|128px]] |
||
| + | The Caged State is shown whenever a Survivor was sent to a {{#Invoke:Utils|IconLink|Cage of Atonement}} by The {{#Invoke:Utils|IconLink|Executioner}}. |
||
| + | |||
| + | It replaces the Survivor's HUD portrait with a stylised Survivor trapped in a stylised cage. |
||
| + | {{-}} |
||
| + | |||
| + | === Carried State === |
||
| + | [[File:IconHelp carrySurvivor.png|right|frameless|128px]] |
||
| + | The Carried State is shown whenever a Survivor is being carried by the Killer. |
||
| + | |||
| + | It replaces the Survivor's HUD portrait with a stylised Survivor hung up around their midsection. |
||
| + | {{-}} |
||
| + | |||
| + | === Chain Hunt State === |
||
| + | [[File:UI Rip - ChainHunt.png|right|frameless|128px]] |
||
| + | The Chain Hunt State is shown whenever '''Lament Configuration''' is charging a ''Chain Hunt'' when facing The {{#Invoke:Utils|IconLink|Cenobite}}. |
||
| + | |||
| + | It frames all Survivors' HUD portraits with a ring of dark blue chains.<br>The ring slowly fills with light blue and white colours (same as '''The Cenobite's''' visual effects when using his Powers) while the next ''Chain Hunt'' is charging up.<br>Once the ring is filled, the ''Chain Hunt'' starts. |
||
| + | {{-}} |
||
| + | |||
| + | === Chased State === |
||
| + | [[File:Unknown QuestionMark.png|right|frameless|128px]] |
||
| + | The Chased State is shown whenever a Survivor whom is not the {{#Invoke:Utils|IconLink|Obsession}} is being chased by the Killer. |
||
| + | |||
| + | It frames the chased Survivor's HUD portrait with two short wiggling Entity claws. |
||
| + | {{-}} |
||
| + | |||
| + | === Condemned State === |
||
| + | [[File:IconHUD condemnation.png|right|frameless|128px]] |
||
| + | [[File:IconHUD condemned.png|right|frameless|128px]] |
||
| + | The Condemned State is shown whenever a Survivor has gained Condemned progress when facing The {{#Invoke:Utils|IconLink|Onryō}}. |
||
| + | |||
| + | It frames the Survivor's HUD portrait with a ring that fills its seven sections in '''{{#Invoke:Utils|clr|16|white}}'''.<br>Once a Survivor is fully ''Condemned'', the ring turns '''{{#Invoke:Utils|clr|19|red}}''' and they can be killed with the ''Inexorable Stare''. |
||
| + | {{-}} |
||
| + | |||
| + | === Contaminated State === |
||
| + | [[File:Unknown QuestionMark.png|right|frameless|128px]] |
||
| + | The Contaminated State is shown whenever The {{#Invoke:Utils|IconLink|Nemesis T-Type|The Nemesis|Nemesis}} contaminates a Survivor with a ''Tentacle Strike''. |
||
| + | |||
| + | It underlays the Survivor's HUD portrait in '''{{#Invoke:Utils|clr|10|blue}}''' with the heartbeat line of an electrocardiogram. |
||
| + | {{-}} |
||
| + | |||
| + | === Dead State === |
||
| + | [[File:IconHelp BleedOutDeath.png|right|frameless|128px]] |
||
| + | The Dead State is shown after a Survivor dies in any manner other than being sacrificed to the Entity using the Sacrificial Hooks, meaning being killed with a Memento Mori or comparable [[Unlockable]], or bleeding out completely in the Dying State. |
||
| + | |||
| + | It replaces the Survivor's HUD portrait with a stylised skull. |
||
| + | {{-}} |
||
| + | |||
| + | === Disconnected State === |
||
| + | [[File:DC_Icon.png|right|frameless|128px]] |
||
| + | The Disconnected State is shown after a Survivor leaves match. |
||
| + | |||
| + | Before Survivors were replaced by [[Bots]], it would replace the disconnected Survivor's HUD portrait with disconnected plugs. |
||
| + | {{-}} |
||
| + | |||
| + | === Hooked State=== |
||
| + | [[File:IconHelpLoading hook.png|right|frameless|128px]] |
||
| + | The Hooked State is shown whenever a Survivor is on a Hook and undergoing the Sacrifice process. |
||
| + | |||
| + | It replaces the Survivor's HUD portrait with a stylised hook. |
||
| + | {{-}} |
||
| + | |||
| + | === Hunted State === |
||
| + | [[File:IconHUD patrolhunt.png|right|frameless|128px]] |
||
| + | The Hunted State is shown whenever a Survivor is being hunted by a '''[[Guard]]''' spawned by The {{#Invoke:Utils|IconLink|Knight}}. |
||
| + | |||
| + | It frames the Survivor's HUD portrait with a '''{{#Invoke:Utils|clr|27|turqoise-green}}''' circle that displays a timer turning counter clockwise as it runs out, displaying the remaining ''Hunt'' duration before the '''Guard''' dissolves. |
||
| + | {{-}} |
||
| + | |||
| + | === Infected State === |
||
| + | [[File:IconHUD infection.png|right|frameless|128px]] |
||
| + | [[File:IconHUD infected.png|right|frameless|128px]] |
||
| + | The Infected State is shown whenever The {{#Invoke:Utils|IconLink|Mastermind}} infects a Survivor with a ''Virulent Bound''. |
||
| + | |||
| + | It frames the Survivor's HUD portrait with a patterned ring in two different colours: |
||
| + | * '''{{#Invoke:Utils|clr|16|White}}''' is the Progression icon for this state, showing the partial progression towards '''''{{#Invoke:Utils|clr|19|Critical Infection}}'''''. |
||
| + | ** Partial progression is only visible to Survivors, '''The Mastermind''' will only ever see the full icon while Survivors are infected by ''Uroboros''. |
||
| + | * '''{{#Invoke:Utils|clr|19|Red}}''' indicates that the infected Survivor is now '''''{{#Invoke:Utils|clr|19|Critical Infection}}''''', at which point they receive the '''''Hindered''''' '''Status Effect''' and are more vulnerable to '''The Mastermind's''' ''Virulent Bounds''. |
||
| + | ** Both Survivors and '''The Mastermind''' will see this icon fully. |
||
| + | {{-}} |
||
| + | |||
| + | === Lacerated State === |
||
| + | [[File:UI Rip - Lacerated Empty.png|right|frameless|128px]] |
||
| + | [[File:UI Rip - Lacerated.png|right|frameless|128px]] |
||
| + | [[File:UI Rip - Lacerated Full.png|right|frameless|128px]] |
||
| + | The Lacerated State is shown whenever a Survivor gets hit by The {{#Invoke:Utils|IconLink|Trickster}}'s '''Blades'''.<br>The HUD also indicates how many '''Blades''' left until the next '''Health State'''. |
||
| + | |||
| + | It frames the Survivor's HUD portrait with a ring that fills its sections in '''{{#Invoke:Utils|clr|15|fuchsia}}''' for each '''Blade''' that hit them.<br>Once they are one hit away from going down, the ring's colour changes to '''{{#Invoke:Utils|clr|19|red}}'''. |
||
| + | {{-}} |
||
| + | |||
| + | === Latched-On State === |
||
| + | [[File:IconHUD_latchedOnState.png|right|frameless|128px]] |
||
| + | The Latched-On State is shown whenever '''Victor''' of The {{#Invoke:Utils|IconLink|Twins}} successfully pounced on a Survivor's back. |
||
| + | |||
| + | It frames the Survivor's HUD portrait with '''Victor's''' hands grabbing at it. |
||
| + | {{-}} |
||
| + | |||
| + | === Lock On State === |
||
| + | [[File:Unknown QuestionMark.png|right|frameless|128px]] |
||
| + | [[File:Unknown QuestionMark.png|right|frameless|128px]] |
||
| + | The Lock On State is shown whenever a Survivor enters the ''Detection Zone'' of a drone deployed by The {{#Invoke:Utils|IconLink|Skull Merchant}}. |
||
| + | |||
| + | It underlays the Survivor's HUD portrait with a {{#Invoke:Utils|clr|2|yellow}} digitized timer when they are in the ''Detection Zone'', which becomes {{#Invoke:Utils|clr|6|orange}} if it fully fills up.<br>The icon also acts as a timer to display for how long the Survivor stays ''Locked On'' for. |
||
| + | {{-}} |
||
| + | |||
| + | === Madness State === |
||
| + | [[File:Unknown QuestionMark.png|right|frameless|128px]] |
||
| + | [[File:Unknown QuestionMark.png|right|frameless|128px]] |
||
| + | [[File:IconHUD_madState_3.png|right|frameless|128px]] |
||
| + | The Mad State is shown whenever a Survivor afflicted with {{#Invoke:Utils|IconLink|Madness}}, induced by the ''Shock Attacks'' of The {{#Invoke:Utils|IconLink|Doctor}}.<br>The amount of static on the HUD overlay indicates the strength of Madness. |
||
| + | |||
| + | It underlays the Survivor's HUD portrait with increasing degrees of static: |
||
| + | *'''''Madness Tier I''''' shows horizontal lines of static |
||
| + | *'''''Madness Tier II''''' shows vertical lines of static |
||
| + | *'''''Madness Tier III''''' shows static noise |
||
| + | {{-}} |
||
| + | |||
| + | === Marked State === |
||
| + | [[File:IconHUD marking.png|right|frameless|128px]] |
||
| + | [[File:IconHUD_markedState.png|right|frameless|128px]] |
||
| + | The Marked State is shown whenever a Survivor was successfully stalked by The {{#Invoke:Utils|IconLink|Ghost Face}} and now suffers from the '''''Exposed''''' '''Status Effect'''. |
||
| + | |||
| + | It frames the Survivor's HUD portrait with stylised blood drops propagating from the centre.<br>The icon also acts as a timer to display for how long the Survivor stays ''Marked'' for. |
||
| + | {{-}} |
||
| + | |||
| + | === Obsessed State === |
||
| + | [[File:IconHelp obsession.png|right|frameless|128px]] |
||
| + | The Obsessed State is shown each Trial on the Survivor designated as the Killer's '''''{{#Invoke:Utils|IconLink|Obsession}}'''''. |
||
| + | |||
| + | It frames the Survivor's HUD portrait with two of '''The Entity's''' spider legs, which wiggle side-to-side whenever the '''''Obsession''''' is being chased by the Killer. |
||
| + | {{-}} |
||
| + | |||
| + | === Puzzle Solving State=== |
||
| + | [[File:UI Rip - Puzzle Solve.png|right|frameless|128px]] |
||
| + | The Puzzle Solving State is shown whenever a Survivor has picked up the '''Lament Configuration''' when facing The {{#Invoke:Utils|IconLink|Cenobite}}. |
||
| + | |||
| + | It frames the Survivor's HUD portrait with a cog wheel of '''{{#Invoke:Utils|clr|24|ocker/gold}}''' colour while they are carrying the '''Lament Configuration'''.<br>The cog wheel animates when the Survivor is solving the box. |
||
| + | {{-}} |
||
| + | |||
| + | === Sacrificed State === |
||
| + | [[File:IconHelp Sacrificed.png|right|frameless|128px]] |
||
| + | The Sacrificed State is shown after a Survivor lost the battle against The {{#Invoke:Utils|IconLink|Entity}} or didn't escape within an hour after the trial started and was successfully sacrificed. |
||
| + | |||
| + | It replaces the Survivor's HUD portrait with a stylised blood-smeared skull. |
||
| + | {{-}} |
||
| + | |||
| + | === Sickness State === |
||
| + | [[File:IconHUD_sicknessState_3.png|right|frameless|128px]] |
||
| + | [[File:IconHUD_sicknessState_2.png|right|frameless|128px]] |
||
| + | The Sickness State is shown whenever a Survivor came in contact with '''{{#Invoke:Utils|clr|17|Vile Purge}}''' by The {{#Invoke:Utils|IconLink|Plague}}. |
||
| + | |||
| + | It underlays the Survivor's HUD portrait with a vomit-puddle of different colours: |
||
| + | * '''{{#Invoke:Utils|clr|8|Red}}''' is the default background icon for this state and is visible to Survivors as soon as they come into contact with '''The Plague's''' vomit. |
||
| + | ** For Survivors, the icon will initially partially hidden by its yellow version, based how much progression they have obtained towards full '''''Sickness''''' |
||
| + | ** Both Survivors and '''The Plague''' will see this icon fully, as soon as Survivors are completely afflicted by her '''''Sickness''''' and receive the '''''Broken''''' '''Status Effect'''. |
||
| + | * '''{{#Invoke:Utils|clr|2|Yellow}}''' is the Progression icon for this state, showing the partial progression towards full '''''Sickness'''''. |
||
| + | ** Partial progression is only visible to Survivors, '''The Plague''' will only ever see the full icon while Survivors are partially sick. |
||
| + | {{-}} |
||
| + | |||
| + | === Sleep State === |
||
| + | [[File:Sleep clock.png|right|frameless|128px]] |
||
| + | [[File:Status sleep iconpng.png|right|frameless|128px]] |
||
| + | The two Sleep States are shown whenever a Survivor is under the influence of micro-sleep (a timer will be shown) or asleep and inside the [[Dream World]] of The {{#Invoke:Utils|IconLink|Nightmare}}. |
||
| + | |||
| + | It underlays the Survivor's HUD portrait with a timer during micro-sleep, static swirls when they are sleeping, and pulsating yellow rings when they are woken up by an '''Alarm Clock'''. |
||
| + | {{-}} |
||
| + | |||
| + | === Swarmed State === |
||
| + | [[File:UI Rip - Swarmed.png|right|frameless|128px]] |
||
| + | [[File:UI Rip - Swarmed 2.png|right|frameless|128px]] |
||
| + | The Swarmed State is shown whenever a Survivor is hit by a '''Dire Crow''' summoned by The {{#Invoke:Utils|IconLink|Artist}}. |
||
| + | {{-}} |
||
| + | |||
| + | === Tormented State === |
||
| + | [[File:UI Rip - Torment 1.png|right|frameless|128px]] |
||
| + | The Tormented State is shown whenever a Survivor, while not crouched, moves through a ''Torment Trail'' set by The {{#Invoke:Utils|IconLink|Executioner}}. |
||
| + | |||
| + | It frames the Survivor's HUD portrait with a ring of barbed wire. |
||
| + | {{-}} |
||
| + | |||
| + | === Trapped State === |
||
| + | [[File:StatusIcon trap.png|right|frameless|128px]] |
||
| + | The Trapped State is shown whenever a Survivor gets caught in a {{#Invoke:Utils|IconLink|Bear Trap}} when facing The {{#Invoke:Utils|IconLink|Trapper}}. |
||
| + | |||
| + | It replaces the Survivor's HUD portrait with a half-way-opened bear trap. |
||
| + | {{-}} |
||
| + | |||
| + | === Trapped Timer State === |
||
| + | [[File:IconHelp reverseBearTrap_timerStop.png|right|frameless|128px]] |
||
| + | [[File:IconHelp reverseBearTrap_timerStart.png|right|frameless|128px]] |
||
| + | |||
| + | The Trapped Timer State is shown whenever a Survivor's has a {{#Invoke:Utils|IconLink|Reverse Bear Trap}} of The {{#Invoke:Utils|IconLink|Pig}} attached to their head.<br>The former shows an inactive '''Reverse Bear Trap''', while the latter shows one ticking down. |
||
| + | |||
| + | It underlays the Survivor's HUD portrait with a timer icon that indicates whether the Death timer is paused (white) or ticking down (red).<br>Survivors are shown the exact time they have left on the Death timer. |
||
| + | {{-}} |
||
| + | |||
| + | === Weakened State === |
||
| + | [[File:Unknown QuestionMark.png|right|frameless|128px]] |
||
| + | The Weakened State is shown whenever a Survivor comes in contact with {{#Invoke:Utils|IconLink|UVX}} by The {{#Invoke:Utils|IconLink|Unknown}}. |
||
| + | {{-}} |
||
== Change Log == |
== Change Log == |
||
| − | === [[Patch |
+ | === [[Patch 1.5.0]] === |
| + | * '''''{{#Invoke:Utils|clr|6|Quality of Life}}:''''' added the '''Status Effects''' and '''Proficiency Indicators''' systems to the '''Status HUD''', which allow the game to better convey to Players when outside effects are affecting them and of which type the effects are. |
||
| − | * All Timers no longer stack or automatically reset, but will now take the highest remaining Status timer and ignore the other. |
||
| + | === [[Patch 2.5.0]] === |
||
| + | * '''''{{#Invoke:Utils|clr|3|Change}}:''''' timers no longer stack or automatically reset; the longest timer will prevail and shorter ones are ignored. |
||
** If the new Timer is the higher one, the previous timer is discarded and the '''Status Effect''' icon will visually reset to '''100 %'''. |
** If the new Timer is the higher one, the previous timer is discarded and the '''Status Effect''' icon will visually reset to '''100 %'''. |
||
** If the new Timer is the lower one, the new timer is discarded and the '''Status Effect''' icon will remain at its current progression. |
** If the new Timer is the lower one, the new timer is discarded and the '''Status Effect''' icon will remain at its current progression. |
||
=== [[Patch 3.4.0]] === |
=== [[Patch 3.4.0]] === |
||
| − | * |
+ | * '''''{{#Invoke:Utils|clr|6|Killer Quality of Life}}:''''' the red de-buff icon applied by Perks no longer appears on the Survivors' HUD until the debuff is active. |
=== [[Patch 4.5.0]] === |
=== [[Patch 4.5.0]] === |
||
| − | * |
+ | * '''''{{#Invoke:Utils|clr|3|Change}}:''''' the '''''Deep Wound''''' timer is now '''{{#Invoke:Utils|clr|2|20 seconds}}''' across the board. |
| + | === [[Patch 5.7.0]] === |
||
| + | * '''''{{#Invoke:Utils|clr|2|Killer Buff}}:''''' added a new effect to '''''Haemorrhage''''', which now causes partial Healing progression to regress over time. |
||
| + | === [[Patch 6.1.0]] === |
||
| + | * '''''{{#Invoke:Utils|clr|8|Survivor Nerf}}:''''' '''''Endurance''''' is no longer able to shield a Survivor from going down while suffering from '''''Deep Wound''''' at the same time. |
||
| + | ** This change was motivated by wishing to prevent Survivors from being able to avoid more than just one hit from the Killer through stacking '''''Endurance'''''. |
||
| + | === [[Patch 6.5.0]] === |
||
| + | * '''''{{#Invoke:Utils|clr|2|Survivor Buff}}:''''' added the '''Survivor Activity HUD''' system to the '''Status HUD''', which displays a Survivor's current interaction to all other Survivors. |
||
| + | * '''''{{#Invoke:Utils|clr|6|Survivor Quality of Life}}:''''' added an icon to display when a Survivor is being carried. |
||
| + | === [[Patch 6.5.1]] === |
||
| + | * '''''{{#Invoke:Utils|clr|2|Survivor Buff}}:''''' if a Survivor is working on a Generator, its current Progression is now displayed on the '''Survivor Activity HUD'''. |
||
| + | |||
| + | == References == |
||
| + | <references /> |
||
| − | {{Leveling Ranking & HUD}} |
||
| + | {{Levelling Ranking & HUD}} |
||
| − | [[Category:Game Mechanic]] |
+ | [[Category: Game Mechanic]] |
| − | [[de:Status HUD]] |
+ | [[de: Status HUD]] |
| − | [[es:Barra de Estado]] |
+ | [[es: Barra de Estado]] |
| − | [[ |
+ | [[fr: Interface de Statut]] |
| − | [[ |
+ | [[it: HUD di Stato]] |
| − | [[ |
+ | [[pl: Status HUD]] |
| − | [[ |
+ | [[pt: HUD de Status]] |
| + | [[zh: 状态系统]] |
||
Latest revision as of 20:36, 29 March 2024
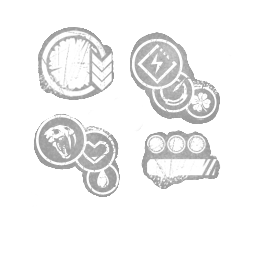
The Status HUD is the primary information system available to Players in Dead by Daylight![]() and displayed as an overlay on their screen.
and displayed as an overlay on their screen.


Overview
The Status HUD is comprised of several subsystems, with each sub-system displaying distinct pieces of information about the state of the Trial and its Players:
| System | Location on Screen | Information Type | Visibility |
|---|---|---|---|
| Status Effects | Right side (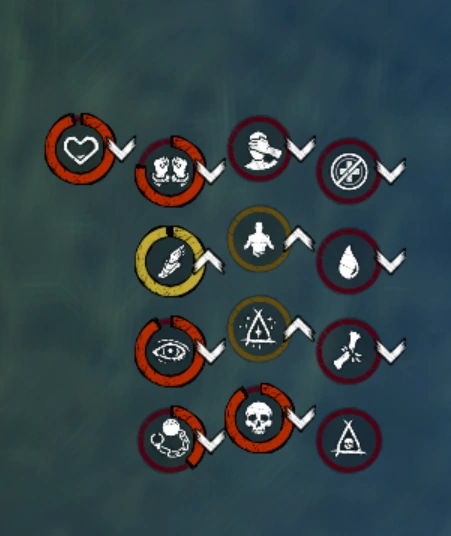 ) , above Perk Diamond ) , above Perk Diamond
|
Displays when a Player is afflicted by a Status Effect and if its timer-based, for how long. | Personal |
| Proficiency Indicator | Bottom centre, above Status Bar | Displays when outside influences affect the Player's current interaction with an Interactable. | Personal |
| Player Effects | Bottom right (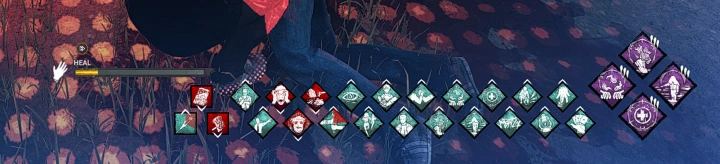 ) , next to Perk Diamond ) , next to Perk Diamond
|
Displays when a Player and their abilities are affected directly by the effects of Unlockables, regardless of whether those originate from the Player's own Unlockables or from those of other Players. | Personal |
| Survivor HUD Icons | Left side | Displays which Character is part of the Trial and is combined with the Health State and Survivor Activity HUD systems. | All Players |
| Health State | Left side, combined with Survivor HUD Icons | Displays the current Health State (separate Article) of Survivors to all Players in the Trial and is combined with the Survivor HUD Icons and Survivor Activity HUD systems. | All Players |
| Survivor Activity HUD | Left side (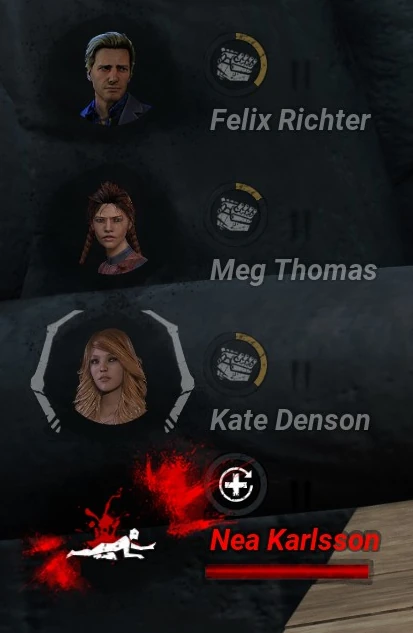 ) , combined with Survivor HUD Icons ) , combined with Survivor HUD Icons
|
Displays a Survivor's current activity/interaction to all other Survivors. | All Survivors |
Status Effects


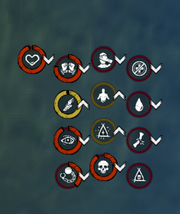
All available Status Effects (except for Madness and Sleep Penalty) active at the same time.[1]
First added with Patch 1.5.0, Status Effects show whenever a Survivor is affected by a special effect or affliction, indicated by a corresponding icon above the Perk diamond.
The icon's colour will reflect whether it is a buff (yellow) or a debuff (red).
Tiered Status Effects feature up to three Chevrons on the icon:
The more chevrons a Status Effect has, the stronger is its effect.
There are currently just two tiered Status Effects: Bloodlust![]() and Madness
and Madness![]() .
.


Status Effects that are on a timer may have their timer refreshed by a new application of the effect, but will generally not stack the strength of their effects.
Blessed

|
The Blessed Status Effect is a buff applied exclusively to Survivors.
|
|---|
Blindness
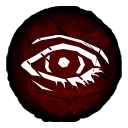
|
The Blindness Status Effect is a debuff that can be applied to both Survivors and the Killer. |
|---|


Bloodlust

|
The Bloodlust Status Effect is a buff applied exclusively to the Killer.
|
|---|
Broken
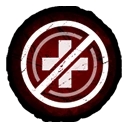
|
The Broken Status Effect is a debuff applied exclusively to Survivors.
|
|---|


Cursed
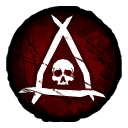
|
The Cursed Status Effect is a debuff applied exclusively to Survivors.
|
|---|


Deafened
|
The Deafened Status Effect is a semi-used debuff that can be applied to both Survivors and the Killer. While the Status Effect is not displayed on the HUD, its effects are used by several Unlockables.
|
|---|
Deep Wound
|
The Deep Wound Status Effect is a debuff applied exclusively to Survivors.
|
|---|


Endurance
|
The Endurance Status Effect is a buff that can be applied to both Survivors and the Killer.
|
|---|
Exhausted
|
The Exhausted Status Effect is a debuff applied exclusively to Survivors.
|
|---|
Exposed
|
The Exposed Status Effect is a debuff applied exclusively to Survivors:
It should be noted that there is a popular misconception, especially amongst new Players, that due to the name "exposed", the Status Effect actually reveals their Aura to the Killer. |
|---|
Glyph

|
The Glyph Status Effect is a debuff that is currently exclusive to the Killer.
|
|---|


Haemorrhage
|
The Haemorrhage Status Effect is a debuff applied exclusively to Survivors.
|
|---|


Haste
|
The Haste Status Effect is a buff that can be applied to both Survivors and the Killer.
|
|---|
Hindered
|
The Hindered Status Effect is a debuff that can be applied to both Survivors and the Killer.
|
|---|
Incapacitated
|
The Incapacitated Status Effect is a debuff applied exclusively to Survivors.
|
|---|
Madness
|
The Madness Status Effect is a debuff applied exclusively to Survivors and exclusive to Trials against The Doctor
The Madness Status Effect, used exclusively by The Doctor |
|---|


Mangled
|
The Mangled Status Effect is a debuff applied exclusively to Survivors.
|
|---|
Oblivious
|
The Oblivious Status Effect is a debuff applied exclusively to Survivors.
|
|---|

Sleep Penalty
|
The Sleep Penalty Status Effect is a debuff applied exclusively to Survivors and exclusive to Trials against The Nightmare
|
|---|


Undetectable
|
The Undetectable Status Effect is a buff applied exclusively to the Killer.
|
|---|
Vision
|
The Vision Status Effect is an unused buff that would have been applied to both Survivors and the Killer.
|
|---|


Proficiency Indicators


First added with Patch 1.5.0, Proficiency Indicators indicate to both Killers and Survivors how various effects from either their own Add-ons, Perks, Offerings, etc., or those of other Players, affect their performance at the interaction they are currently performing.
They do this by displaying the effect's associated icon above the Progress Bar and by colouring said bar accordingly.
Unlike Status Effects, Proficiency Indicators are not inherently a buff (yellow) or a debuff (red) in effect, but can be either, indicated by the colour of the icon and the colour of the Progress Bar.
Progress Bar
The Progress Bar is displayed whenever an interaction requires a certain amount of Charges to be completed.
The Bar has 3 possible states/colours:
| State & Colour | Icon | Information |
|---|---|---|
| Default State: blueish white | The Player's Action speed is exactly 1 Charge per second (default). | |
| Buff State: yellow | The Player's Action speed is greater than 1 Charge per second. | |
| Debuff State: red | The Player's Action speed is less than 1 Charge per second. |
It should be duly noted that the colour of the Progression is individual to each Player.
Even if the overall interaction (i.e. Generator Repair with multiple Survivors) is faster than the default Action speed of 1 Charge per second, if your individual speed/contribution to this is below that (i.e. due to Efficiency penalty), or above that (i.e. Toolbox Repair), the Progress Bar will be coloured accordingly.
Chance

|
The Chance Proficiency Indicator works alongside the Luck Mechanic and indicates whether the action a Survivor is currently performing has a higher or lower chance at succeeding.
|
|---|


Efficiency
|
The Efficiency Proficiency Indicator indicates whether an Item's current Depletion rate is reduced or increased.
|
|---|
Healing

|
The Healing Proficiency Indicator indicates whether a Survivor's Healing speed is increased or reduced. |
|---|
Progression Speed

|
The Progression speed Proficiency Indicator indicates whether the Progression speed of an Action being performed by the Player is increased or reduced. |
|---|
Repairing
|
The Repairing Proficiency Indicator indicates whether a Survivor's Repair speed is increased or reduced. |
|---|
Sabotaging
|
The Sabotaging Proficiency Indicator indicates whether a Survivor's Sabotage speed is increased or reduced. |
|---|
Skill Check Difficulty
|
The Skill Check Difficulty Proficiency Indicator indicates whether the Success Zone of a triggered Skill Check is increased or reduced. |
|---|
Skill Check Probability
|
The Skill Check Probability Proficiency Indicator indicates the Odds of an interaction triggering a Skill Check are increased or reduced, with the latter being considered beneficial. |
|---|
Player Effects System

Maximum number of Player Effects possible in a single Trial as of CHAPTER 27.[2]
The Player Effects System is used to indicate when something is affecting the Player and their abilities directly.
It was the very first such information system in Dead by Daylight and was already present in the release version 1.0.0.
It has remained in use to this date, with the Status Effects and Proficiency Indicator Systems complementing its functionality since Patch 1.5.0, taking up functions that would have been ill-suited to the Player Effects System.
Use
Originally, the Player Effects System was reserved solely for the effects of Perks and Add-ons that influenced other Players, but has since expanded to encompass any effects affecting the Player and their abilities directly, whether those originate from the Player's own Unlockables or from those of other Players.
It is also used to indicate when a Killer's Power is affecting the Player in a way that cannot be displayed by any of the other information systems in Dead by Daylight.
Buff vs. Debuff
Before the introduction of the newer Status Effects and Proficiency Indicator Systems, effects which buffed the Player would use a turquoise colour, instead of yellow.
Since the Player Effects System is the oldest remaining system, it still uses the turquoise colour to indicate a buff.
Debuffs already used a red colour back then.
Icon Examples
| Buff | Debuff |
|---|---|
 |
|
Unlockables
The following Unlockables will display their icon using the Player Effects System:
| Powers | |
|---|---|
| Carter's Spark |
Shows a debuff icon of Carter's Spark while a Survivor's interactions are inhibited from being hit by a Shock Therapy Attack. |
| Props / Interactables | |
| Orange Glyphs | Shows a debuff icon while the Killer suffers from its afflictions. |


- Add-ons:


- Perks:
- Aftercare

- Better than New
- Blood Pact
- Blood Echo
- Boil Over
- Boon: Circle of Healing
- Boon: Dark Theory
- Boon: Exponential
- Boon: Illumination
- Boon: Shadow Step
- Coulrophobia
- Dark Devotion
- Dead Man's Switch
- Deadline
- Deathbound
- Dissolution
- Dying Light
- Fearmonger
- Franklin's Demise
- Genetic Limits
- Guardian
- Hex: Devour Hope
- Hex: Face the Darkness
- Hex: Pentimento
- Hex: Plaything
- Hysteria
- Kindred
- Knock Out
- Leader
- Leverage
- Open-Handed
- Overwhelming Presence
- Prove Thyself
- Quick Gambit
- Reassurance
- Remember Me
- Scourge Hook: Gift of Pain
- Streetwise
- Terminus
- Thanatophobia
- Unnerving Presence
- Up the Ante
- Vigil
- We'll Make It
- Aftercare


Survivor Activity HUD
First added with Patch 6.5.0, the Survivor Activity HUD displays the current interactions of Survivors to all other Survivors as a small symbol next to their HUD Icon.
In case of some crucial interactions such as Dying State Recovery and Generator Repair Progression, the current Progression of the interaction is displayed as well as a yellow circle surrounding the icon that is filling itself.
It also modified the mechanic of displaying when a Survivor is being chased by the Killer, which was formerly exclusive to the Obsession, so that it is now used on all Survivors.
The modified system still marks the Obsession with a long pair of Entity-claws framing their Survivor HUD Icon, but now uses a shorter pair of Entity-claws to indicate which Survivor is currently being chased.
The following interactions are currently displayed on the Survivor Activity HUD:
| Icon | Activity | Progression Circle |
|---|---|---|

|
Blessing a Totem | |
| Cleansing a Totem | ||

|
Healing yourself | |
| Healing another Survivor | ||

|
Interacting with a Killer's Power or related Prop | |

|
Opening an Exit Gate | |

|
Recovering from the Dying State | |

|
Repairing a Generator | |

|
Starting an Invocation | |

|
Unlocking a Chest |
Survivor HUD Icons

The Survivor HUD Icons represent each Survivor in the Trial and the current state they are in or experiencing.
This includes their current Health State, whether or not they are being carried, being hooked, having escaped, being sacrificed, being killed, or being dead.
It also includes over-/underlays with special interactions with Killer Powers.
Up to the Status HUD Rework in Patch 4.5.2, Survivors were represented with a generic icon in the Status HUD instead of their Character portrait.
Patch 5.0.0 further included separate icons for Legendary Outfits.
Portraits


Broken State
The Broken State is shown whenever a Survivor is damaged to the point that they can no longer be healed back to the Healthy State.
It adds a red version of the Broken Status Effect's icon to the Survivor's HUD portrait.
Caged State
The Caged State is shown whenever a Survivor was sent to a Cage of Atonement![]() by The Executioner
by The Executioner![]() .
.


It replaces the Survivor's HUD portrait with a stylised Survivor trapped in a stylised cage.
Carried State
The Carried State is shown whenever a Survivor is being carried by the Killer.
It replaces the Survivor's HUD portrait with a stylised Survivor hung up around their midsection.
Chain Hunt State
The Chain Hunt State is shown whenever Lament Configuration is charging a Chain Hunt when facing The Cenobite![]() .
.


It frames all Survivors' HUD portraits with a ring of dark blue chains.
The ring slowly fills with light blue and white colours (same as The Cenobite's visual effects when using his Powers) while the next Chain Hunt is charging up.
Once the ring is filled, the Chain Hunt starts.
Chased State

The Chased State is shown whenever a Survivor whom is not the Obsession![]() is being chased by the Killer.
is being chased by the Killer.


It frames the chased Survivor's HUD portrait with two short wiggling Entity claws.
Condemned State
The Condemned State is shown whenever a Survivor has gained Condemned progress when facing The Onryō![]() .
.


It frames the Survivor's HUD portrait with a ring that fills its seven sections in white.
Once a Survivor is fully Condemned, the ring turns red and they can be killed with the Inexorable Stare.
Contaminated State
The Contaminated State is shown whenever The Nemesis![]() contaminates a Survivor with a Tentacle Strike.
contaminates a Survivor with a Tentacle Strike.


It underlays the Survivor's HUD portrait in blue with the heartbeat line of an electrocardiogram.
Dead State

The Dead State is shown after a Survivor dies in any manner other than being sacrificed to the Entity using the Sacrificial Hooks, meaning being killed with a Memento Mori or comparable Unlockable, or bleeding out completely in the Dying State.
It replaces the Survivor's HUD portrait with a stylised skull.
Disconnected State
The Disconnected State is shown after a Survivor leaves match.
Before Survivors were replaced by Bots, it would replace the disconnected Survivor's HUD portrait with disconnected plugs.
Hooked State
The Hooked State is shown whenever a Survivor is on a Hook and undergoing the Sacrifice process.
It replaces the Survivor's HUD portrait with a stylised hook.
Hunted State

The Hunted State is shown whenever a Survivor is being hunted by a Guard spawned by The Knight![]() .
.


It frames the Survivor's HUD portrait with a turqoise-green circle that displays a timer turning counter clockwise as it runs out, displaying the remaining Hunt duration before the Guard dissolves.
Infected State
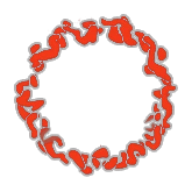
The Infected State is shown whenever The Mastermind![]() infects a Survivor with a Virulent Bound.
infects a Survivor with a Virulent Bound.


It frames the Survivor's HUD portrait with a patterned ring in two different colours:
- White is the Progression icon for this state, showing the partial progression towards Critical Infection.
- Partial progression is only visible to Survivors, The Mastermind will only ever see the full icon while Survivors are infected by Uroboros.
- Red indicates that the infected Survivor is now Critical Infection, at which point they receive the Hindered Status Effect and are more vulnerable to The Mastermind's Virulent Bounds.
- Both Survivors and The Mastermind will see this icon fully.
Lacerated State


The Lacerated State is shown whenever a Survivor gets hit by The Trickster![]() 's Blades.
's Blades.
The HUD also indicates how many Blades left until the next Health State.


It frames the Survivor's HUD portrait with a ring that fills its sections in fuchsia for each Blade that hit them.
Once they are one hit away from going down, the ring's colour changes to red.
Latched-On State

The Latched-On State is shown whenever Victor of The Twins![]() successfully pounced on a Survivor's back.
successfully pounced on a Survivor's back.


It frames the Survivor's HUD portrait with Victor's hands grabbing at it.
Lock On State
The Lock On State is shown whenever a Survivor enters the Detection Zone of a drone deployed by The Skull Merchant![]() .
.


It underlays the Survivor's HUD portrait with a yellow digitized timer when they are in the Detection Zone, which becomes orange if it fully fills up.
The icon also acts as a timer to display for how long the Survivor stays Locked On for.
Madness State

The Mad State is shown whenever a Survivor afflicted with Madness![]() , induced by the Shock Attacks of The Doctor
, induced by the Shock Attacks of The Doctor![]() .
.
The amount of static on the HUD overlay indicates the strength of Madness.
It underlays the Survivor's HUD portrait with increasing degrees of static:
- Madness Tier I shows horizontal lines of static
- Madness Tier II shows vertical lines of static
- Madness Tier III shows static noise
Marked State

The Marked State is shown whenever a Survivor was successfully stalked by The Ghost Face![]() and now suffers from the Exposed Status Effect.
and now suffers from the Exposed Status Effect.


It frames the Survivor's HUD portrait with stylised blood drops propagating from the centre.
The icon also acts as a timer to display for how long the Survivor stays Marked for.
Obsessed State
The Obsessed State is shown each Trial on the Survivor designated as the Killer's Obsession![]() .
.
It frames the Survivor's HUD portrait with two of The Entity's spider legs, which wiggle side-to-side whenever the Obsession is being chased by the Killer.
Puzzle Solving State
The Puzzle Solving State is shown whenever a Survivor has picked up the Lament Configuration when facing The Cenobite![]() .
.
It frames the Survivor's HUD portrait with a cog wheel of ocker/gold colour while they are carrying the Lament Configuration.
The cog wheel animates when the Survivor is solving the box.
Sacrificed State

The Sacrificed State is shown after a Survivor lost the battle against The Entity![]() or didn't escape within an hour after the trial started and was successfully sacrificed.
or didn't escape within an hour after the trial started and was successfully sacrificed.


It replaces the Survivor's HUD portrait with a stylised blood-smeared skull.
Sickness State
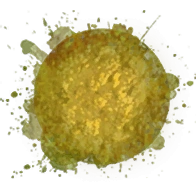
The Sickness State is shown whenever a Survivor came in contact with Vile Purge by The Plague![]() .
.


It underlays the Survivor's HUD portrait with a vomit-puddle of different colours:
- Red is the default background icon for this state and is visible to Survivors as soon as they come into contact with The Plague's vomit.
- For Survivors, the icon will initially partially hidden by its yellow version, based how much progression they have obtained towards full Sickness
- Both Survivors and The Plague will see this icon fully, as soon as Survivors are completely afflicted by her Sickness and receive the Broken Status Effect.
- Yellow is the Progression icon for this state, showing the partial progression towards full Sickness.
- Partial progression is only visible to Survivors, The Plague will only ever see the full icon while Survivors are partially sick.
Sleep State

The two Sleep States are shown whenever a Survivor is under the influence of micro-sleep (a timer will be shown) or asleep and inside the Dream World of The Nightmare![]() .
.
It underlays the Survivor's HUD portrait with a timer during micro-sleep, static swirls when they are sleeping, and pulsating yellow rings when they are woken up by an Alarm Clock.
Swarmed State
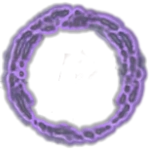
The Swarmed State is shown whenever a Survivor is hit by a Dire Crow summoned by The Artist![]() .
.


Tormented State
The Tormented State is shown whenever a Survivor, while not crouched, moves through a Torment Trail set by The Executioner![]() .
.
It frames the Survivor's HUD portrait with a ring of barbed wire.
Trapped State
The Trapped State is shown whenever a Survivor gets caught in a Bear Trap![]() when facing The Trapper
when facing The Trapper![]() .
.


It replaces the Survivor's HUD portrait with a half-way-opened bear trap.
Trapped Timer State
The Trapped Timer State is shown whenever a Survivor's has a Reverse Bear Trap![]() of The Pig
of The Pig![]() attached to their head.
attached to their head.
The former shows an inactive Reverse Bear Trap, while the latter shows one ticking down.


It underlays the Survivor's HUD portrait with a timer icon that indicates whether the Death timer is paused (white) or ticking down (red).
Survivors are shown the exact time they have left on the Death timer.
Weakened State
The Weakened State is shown whenever a Survivor comes in contact with UVX![]() by The Unknown
by The Unknown![]() .
.


Change Log
Patch 1.5.0
- Quality of Life: added the Status Effects and Proficiency Indicators systems to the Status HUD, which allow the game to better convey to Players when outside effects are affecting them and of which type the effects are.
Patch 2.5.0
- Change: timers no longer stack or automatically reset; the longest timer will prevail and shorter ones are ignored.
- If the new Timer is the higher one, the previous timer is discarded and the Status Effect icon will visually reset to 100 %.
- If the new Timer is the lower one, the new timer is discarded and the Status Effect icon will remain at its current progression.
Patch 3.4.0
- Killer Quality of Life: the red de-buff icon applied by Perks no longer appears on the Survivors' HUD until the debuff is active.
Patch 4.5.0
- Change: the Deep Wound timer is now 20 seconds across the board.
Patch 5.7.0
- Killer Buff: added a new effect to Haemorrhage, which now causes partial Healing progression to regress over time.
Patch 6.1.0
- Survivor Nerf: Endurance is no longer able to shield a Survivor from going down while suffering from Deep Wound at the same time.
- This change was motivated by wishing to prevent Survivors from being able to avoid more than just one hit from the Killer through stacking Endurance.
Patch 6.5.0
- Survivor Buff: added the Survivor Activity HUD system to the Status HUD, which displays a Survivor's current interaction to all other Survivors.
- Survivor Quality of Life: added an icon to display when a Survivor is being carried.
Patch 6.5.1
- Survivor Buff: if a Survivor is working on a Generator, its current Progression is now displayed on the Survivor Activity HUD.
References
- ↑ https://www.reddit.com/r/deadbydaylight/comments/sfw3gn/took_about_half_an_hour_some_coordination_and_one/ Screenshot from Reddit Post by u/Potassium_40. Reddit. Retrieved 30 January 2022.
- ↑ https://www.reddit.com/r/deadbydaylight/comments/11plare/the_maximum_amount_of_buff_indicators_possible_as/ Screenshot from Reddit Post by u/Potassium_40. Reddit. Retrieved 13 March 2023.
| CHARACTER PROGRESSION & HUD OVERLAY | ||||||
|---|---|---|---|---|---|---|
 Emblems Emblems 
|
 Status HUD Status HUD
| |||||