Irreverentwizard (talk | contribs) m (Added zh link) |
Nekotani74630 (talk | contribs) m (Minor spelling and typo corrections) |
||
| Line 17: | Line 17: | ||
Survivors can also sabotage a Bear Trap with either the use of {{IconLink|Saboteur}} or using a {{IconLink|Toolbox}}. |
Survivors can also sabotage a Bear Trap with either the use of {{IconLink|Saboteur}} or using a {{IconLink|Toolbox}}. |
||
| − | * |
+ | * Immobilizes and injures trapped Survivors. |
* Starts match with '''{{clr|2|1}}''' Bear Trap. |
* Starts match with '''{{clr|2|1}}''' Bear Trap. |
||
* '''{{clr|6|5}}''' Bear Traps are available randomly placed throughout the Map. |
* '''{{clr|6|5}}''' Bear Traps are available randomly placed throughout the Map. |
||
| Line 64: | Line 64: | ||
''{{clr|9|A powerful and violent last breath snatched from [[Crotus Prenn Asylum]] Warden [[Patrick Spencer]].}}'' |
''{{clr|9|A powerful and violent last breath snatched from [[Crotus Prenn Asylum]] Warden [[Patrick Spencer]].}}'' |
||
| − | '''Spencer's Last Breath''' is The Nurse's main Power: |
+ | '''Spencer's Last Breath''' is The Nurse's main Power: channeling its energy allows The Nurse to pierce and jump through the [[Spirit World]] in a Blink multiple times in a row. Doing so leaves her in a state of fatigue as blinking is quite painful to her, hence also why she shrieks after each Blink. |
Holding alternate attack (default: M2) will charge up a Blink, the range depending on how long you charge the Blink, with the maximum range reached when she clenches her fist and exhales and the number of orbs floating in her hand indicating the remaining Blinks. |
Holding alternate attack (default: M2) will charge up a Blink, the range depending on how long you charge the Blink, with the maximum range reached when she clenches her fist and exhales and the number of orbs floating in her hand indicating the remaining Blinks. |
||
| Line 244: | Line 244: | ||
=== The Afterpiece Tonic === |
=== The Afterpiece Tonic === |
||
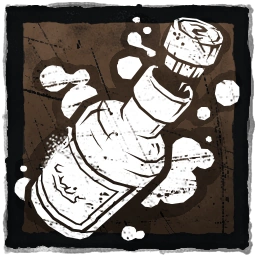
[[File:FulliconPowers gasBomb.png|right|frameless|130x130px]] |
[[File:FulliconPowers gasBomb.png|right|frameless|130x130px]] |
||
| − | Throughout his years experimenting with |
+ | Throughout his years experimenting with anesthetics and muscle relaxants, The Clown developed several effective concoctions and formulas. His favourite, The Afterpiece Tonic, he has used to great effect, intoxicating and capturing many unwilling victims. |
*Tap or hold and release the Power button to launch a bottle of The Afterpiece Tonic. On contact, the bottle will break, emitting a gas cloud that will intoxicate any Survivors within the area of effect. |
*Tap or hold and release the Power button to launch a bottle of The Afterpiece Tonic. On contact, the bottle will break, emitting a gas cloud that will intoxicate any Survivors within the area of effect. |
||
| Line 270: | Line 270: | ||
=== Feral Frenzy === |
=== Feral Frenzy === |
||
[[File:FulliconPowers feralFrenzy.png|frameless|right|130px]] |
[[File:FulliconPowers feralFrenzy.png|frameless|right|130px]] |
||
| − | The '''Legion''' has a Frenzy '''power gauge''' that builds up over time. The power, Feral Frenzy, can be activated by '''tapping the Power button'''. While active, the power gauge drains rapidly and the |
+ | The '''Legion''' has a Frenzy '''power gauge''' that builds up over time. The power, Feral Frenzy, can be activated by '''tapping the Power button'''. While active, the power gauge drains rapidly and the power ends when the gauge is empty, triggering an '''extended recovery cool-down''' ('''{{clr|2|3 seconds}}'''). |
When activating Feral Frenzy, The '''Legion''' enters a deadly rage. While the power is '''active''': |
When activating Feral Frenzy, The '''Legion''' enters a deadly rage. While the power is '''active''': |
||
Revision as of 07:55, 14 May 2019
Powers lists a compendium of all Killer Powers featured in Dead by Daylight.
Each Killer has a very unique Power which creates their distinct and unique playstyles.
The Trapper
Bear Trap
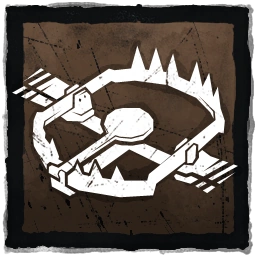
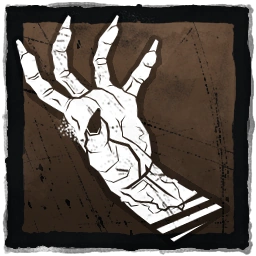
A large foothold trap made of steel.
The Bear Trap is The Trapper's main Power and also his secondary weapon: Bear Traps are found lying around the map. They can be picked up and set down mostly anywhere, though not below Hooks. Traps are not armed until picked up and placed. The Trapper starts the game with a single trap in his hands, and can only carry one at once unless with the use of Add-ons.
After pressing alternate attack (default: M2), The Trapper bends down and sets the Trap, looking downwards, which allows nearby Survivors to walk around him unseen. If a Survivor walks over an armed Bear Trap, it will spring and catch one of their legs, whereupon they will be trapped in place until either they manage to free themselves or get freed by another Survivor or are either downed or picked up by The Trapper and hoisted onto his shoulder. A trapped Survivor produces a noise indicator, showing The Trapper and the other Survivors the exact location of the trapped Survivor until they are freed from it.
Survivors can disarm the Bear Trap by walking up to it and pressing the primary action key (default: M1). They need to stand still for the prompt to appear. Disarming the Trap will usually take 3.5 seconds.
Survivors can also sabotage a Bear Trap with either the use of Template:IconLink or using a Template:IconLink.
- Immobilizes and injures trapped Survivors.
- Starts match with 1 Bear Trap.
- 5 Bear Traps are available randomly placed throughout the Map.
- Sabotaged Bear Traps respawn after 3 minutes.
Trivia
- The Bear Traps are also considered as Props, similar to The Pig's Template:IconLink.
The Wraith
Wailing Bell
A heavy cast iron bell imbued with ancient powers.
The Wailing Bell is The Wraith's main Power: the Wailing Bell holds ancient powers, both with good and bad consequences. It allows its user to enter and walk the Spirit World when rung. When cloaked, The Wraith has no Terror Radius, meaning that Survivors do not hear a Heartbeat, and The Wraith's Stain is also gone. The Wraith walks moderately faster when cloaked, making up for his inability to attack while in this state. The sound of the Bell is very loud, but can only be heard at a close distance and is accompanied by the *Woosh* that can be heard farther. The Bell's sound can be made to be non-directional ({Template:IconLink) or completely silent (Template:IconLink).
Whilst cloaked, The Wraith cannot attack Survivors and has to uncloak first. It takes 2 seconds to cloak and 3 seconds to uncloak without the use of Add-ons, and during this time, The Wraith's movement speed is reduced.
Walking the spirit world has one big drawback: it makes The Wraith very vulnerable to Flashlights triggering the Lightburn mechanic unless he shields himself with obstacles or uses "Blind Warrior" Add-ons.
- Grants near total invisibility.
- Total invisibility while standing still.
- Faster movement speed when invisible.
- No Terror Radius while invisible.
- Cannot attack while invisible, but can interact with objects.
- Grants a 1 second burst of speed upon reappearing.
- Exposure to bright light can burn the user out of the Spirit World.
- The Wailing Bell can be heard up to a distance of 24 metres.
The Hillbilly
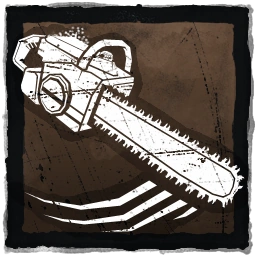
Chainsaw
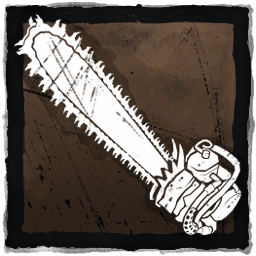
A hulking and deadly chainsaw of terrifying strength. Grinds through flesh, bone and soul.
The Chainsaw is The Hillbilly's main Power and also his secondary weapon: Once revved up, it sends its user into a violent frenzy, running at high speed across the map. The noise can be heard across the whole map. It can also be muffled with the use of Add-ons. It takes 2.5 seconds to charge the Chainsaw and is done by pressing alternate attack (default: M2).
Whilst revving up the Chainsaw, The Hillbilly's movement speed is reduced to the same speed as a running Survivor and he will still gain Bloodlust.
- Break into a Chainsaw Sprint on charge activation.
- Limited steering capabilities while sprinting.
- Automatically puts Survivors into the Template:IconLink on a successful hit.
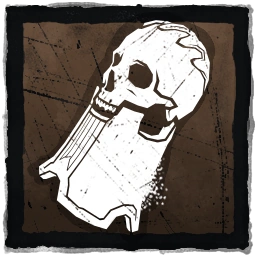
The Nurse
Spencer's Last Breath
A powerful and violent last breath snatched from Crotus Prenn Asylum Warden Patrick Spencer.
Spencer's Last Breath is The Nurse's main Power: channeling its energy allows The Nurse to pierce and jump through the Spirit World in a Blink multiple times in a row. Doing so leaves her in a state of fatigue as blinking is quite painful to her, hence also why she shrieks after each Blink.
Holding alternate attack (default: M2) will charge up a Blink, the range depending on how long you charge the Blink, with the maximum range reached when she clenches her fist and exhales and the number of orbs floating in her hand indicating the remaining Blinks.
After blinking, there is a short window of opportunity (called the "Chainblink Window") in which The Nurse can choose to either attack or Blink again (if she has Blinks remaining), after which she will enter the fatigue or if the Chainblink Window closes. By default, The Nurse has 1 Chainblink. The fatigue will stun The Nurse and prevent her from interacting until she leaves the fatigue. The stun duration scales with the number of Blinks used. Also, the stun will be longer if she misses or successfully lands the post-blink attack.
The Nurse can chain multiple blinks together before attacking. To prevent herself from being stunned even longer, the Nurse can elect to not use her extra Blinks, by simply letting the Chainblink window run out while charging a Chainblink. She can also decide to forgo an attack, as attacking will delay the onset of the stun by about 1.5-2 seconds and might not the strategically best thing to do under certain circumstances.
Akin to The Wraith, The Nurse too is vulnerable to Flashlights triggering the Lightburn mechanic thanks to her ability to interact with the spirit world and unlike him, can't shield herself from its drawbacks.
- Blink up to 20 metres on charge activation.
- Chain-blinks have only half the maximum Blink distance (up to 12 metres)
- Can blink twice before becoming fatigued.
- Can perform a Lethal Blink Attack after blinking.
The Shape
Evil Within
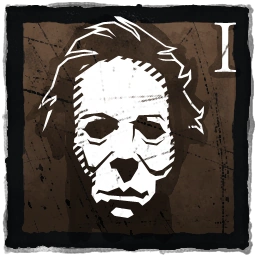
The darkness inside feeds his determination to take the life of his prey.
Evil Within is The Shape's main Power: activating Evil Within allows him to see his prey clearly and build up evil by stalking them.
Evil Within is a Tier-based Power and comes with 3 Tiers, each having its own advantages and disadvantages:
| Tier | Description | Audio Cues |
|---|---|---|
|
|
|
 |
|
|
 |
|
|
Upon reaching Tier II, The Shape can never fall back to Tier I. The colour of a Survivor's Aura determines how much evil is left in them (ranging from white/full to red/empty).
The Hag
Blackened Catalyst
Source of The Hag's power, a blackened finger used as a catalyst for her terrible power.
The Blackened Catalyst is The Hag's main Power: she bends and shapes mud to her will. With simple ritualistic drawings, she creates deceitful duplicates of herself made from mud and decay which she can use for various effects.
Drawing a Phantasm Trap works very similar to setting down a Bear Trap. She can have up to 10 Traps at once distributed across the map, with each subsequently set Trap removing the oldest one.
Her Phantasm Traps also allow to instantly travel up to 40 metres but are vulnerable to Flashlights as they will burn a Phantasm Trap away and thus destroy it.
- Grants the ability to create and maintain 10 Phantasm Traps.
- Grants the ability to instantly travel to triggered Phantasms when within 40 metres of range.
- Survivors who enter the trap area trigger a Phantasm of The Hag to appear and disorient the Survivor.
The Doctor
Carter's Spark
Is it a gift, or a curse?
Carter's Spark is The Doctor's main Power: The Entity has ignited a corrupted and inexhaustible spark in his heart, which allows him to generate electro-convulsive power at will.
His insidious treatment corrupts the minds of those it touches. Victims shocked by the corrupt spark begin to lose their grip on reality and, with repeated exposure, inevitably succumb to madness.
- Switch Stance: Punishment mode is used to injure Survivors. Treatment mode grants the abilities Static Field and Shock Therapy.
- Static Field: While in Treatment mode, generate a Static Field equal to your Terror Radius which increases Survivors' Madness based on proximity to the Doctor.
- Shock Therapy: Treatment mode grants the ability to charge and release a Shock Therapy attack that greatly increases Survivors' Madness.
- Madness Tier I:
- Causes Survivors to scream, revealing their position to The Doctor.
- Madness Tier II:
- All effects of Tier I.
- Causes Survivors to experience shared Doctor Hallucinations.
- Madness Tier III:
- All effects of Tier II.
- Shared Doctor Hallucinations intensify, allowing the Doctor to read their Auras.
- Survivors regularly scream, revealing their position to the Doctor via an Aura.
- Survivors cannot heal, repair, sabotage, search or cleanse until they Snap Out of It.
- Survivors cannot use any Template:IconLink or Template:IconLink until they Snap Out of It.
- Survivors cannot channel a Template:IconLink, though they may still use a key to open the Template:IconLink
- More Afflictions are available with Add-ons.
The Huntress
Hunting Hatchets
A skill taught by her mother and mastered in the wild. The Huntress can throw Hatchets with deadly precision.'
Hunting Hatchets are The Huntress' main Power and also her secondary weapons: charging up her Hatchets allows her to throw them at great speed at fleeing Survivors or use them as ranged weapons to snipe Survivors from afar. The more she charges them, the faster they will travel through the air with a *ding* sound indicating a fully charged Hatchet.
- Start the trial with 5 Hatchets.
- Charge throw for maximum throwing speed.
- Can cancel Hatchet throw.
- Hatchets are consumed on use.
- Refill Hatchets at Lockers.
- The Huntress hums from 45-20 metres, her Terror Radius starts at 20 metres.
- Slightly decreased movement speed (110% | 4.4 m/s).
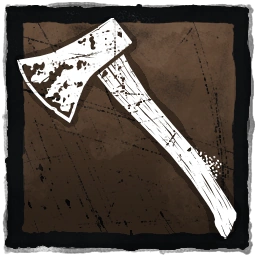
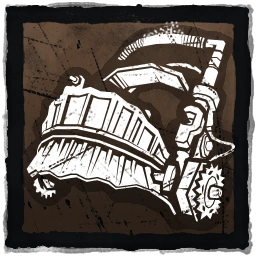
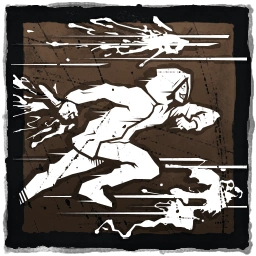
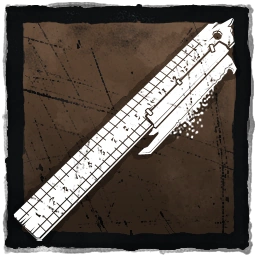
The Cannibal
Bubba's Chainsaw
Bubba's Chainsaw is The Cannibal's main Power and also his secondary weapon, very similar to the Hillbilly's Template:IconLink: once the Chainsaw is revved up, The Cannibal enters a crazed attack mode where he swings his Chainsaw from side to side in a wide angle as he gains momentum, putting Survivors into the Template:IconLink upon hit.
- Start a timed sweeping attack on activation.
- Can hit multiple targets in one Chainsaw charge.
- Running into an objects forces The Cannibal into a Tantrum, this attack damages anyone around him.
- Automatically puts victims in the dying state on a successful hit.
The Nightmare
Dream Demon
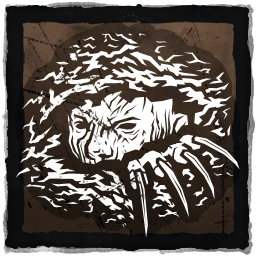
"You have nothing to worry about. This won't hurt one... little... bit." — Freddy Krueger
Dream Demon is The Nightmare's main Power: activating Dream Demon allows him to pull his victims into the Dream World and attack them.
Death won't accept him and thus he remains, a calamity, indisputable master of his victims' nightmares. Dream Demon allows The Nightmare to pull Survivors into the Dream World.
- Survivors who are awake do not see or hear The Nightmare.
- Once targeted by The Nightmare power, Survivors enter the Dream Transition for 7 seconds.
- During the Dream Transition they can see The Nightmare intermittently.
- When the Dream Transition lapses, the Survivor is pulled into the Dream World.
Once in the Dream World:
- Survivors' Auras are revealed to The Nightmare when they are outside of his Terror Radius.
- Survivors suffer an action speed penalty of 50 %.
- To exit the Dream World, Survivors can find other non-sleeping Survivors to perform a wake up action
- Some failed actions can wake up the Survivor.
- Getting hooked wakes up the Survivor.
- Getting healed up from the Template:IconLink wakes up the Survivor.
- Adrenaline wakes up the Survivor once triggered.
The Pig
Jigsaw's Baptism
"You will give everything to me, every cell in your body. The marks on your arms, they're from another life. We'll leave that life behind. When you walk down that corridor there is no turning back. Do you understand that?" — Jigsaw's Baptism
Forever devoted to her master's cause, she punished the ungrateful and the guilty with slyness and murderous puzzles. The Pig can move stealthily, dash in ambush attacks and put deadly Reverse Bear Traps on Survivors' heads.
Use the Secondary Power interaction to assume a crouching position. While crouching:
The Pig has no Terror Radius. Activate the attack interaction to dash and perform an ambush attack. Start the trial with 4 Reverse Bear Traps:
- Reverse Bear Traps are put on Template:IconLink Survivors.
- Reverse Bear Traps automatically sacrifice the Survivor when they trigger.
- Reverse Bear Traps trigger automatically beyond the Template:IconLink.
- Reverse Bear Traps trigger once their timers expire.
- Reverse Bear Traps timers start when a Template:IconLink is completed.
- Survivors can free themselves from Reverse Bear Traps by searching Template:IconLink found around the Map to find the correct Key.
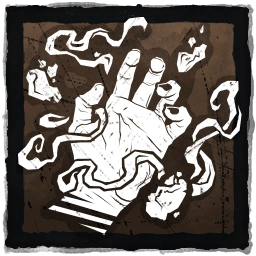
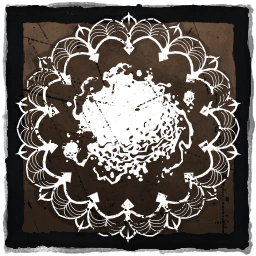
The Clown
The Afterpiece Tonic
Throughout his years experimenting with anesthetics and muscle relaxants, The Clown developed several effective concoctions and formulas. His favourite, The Afterpiece Tonic, he has used to great effect, intoxicating and capturing many unwilling victims.
- Tap or hold and release the Power button to launch a bottle of The Afterpiece Tonic. On contact, the bottle will break, emitting a gas cloud that will intoxicate any Survivors within the area of effect.
- Intoxicated Survivors will suffer from impaired vision, reduced movement speed (-15 %) and involuntary coughing for 2 seconds after leaving the Gas Cloud.
Press and hold the Secondary Power button to replenish your bottles of The Afterpiece Tonic.
The Spirit
Yamaoka's Haunting
The Spirit can use her Power, Yamaoka's Haunting, to enter an ethereal plane and reappear at a new location.
- Tap and hold the Power button to charge. The Spirit will depart her physical body, leaving behind a stationary "Husk".
While Yamaoka's Haunting is active:
- The Spirit may traverse freely to a new location, moving at a faster rate for a short duration (5 seconds). She is still confined to movement within the physical environments and surroundings.
- The Spirit leaves the physical plane, losing sight of all Survivors. She can, however, still sense the Scratch Marks they leave in the environment.
- The Spirit will produce an audible cue at her current location.
- Once the Power has ended, The Spirit retains her speed boost for a brief moment and her Husk fades away.
Using Yamaoka's Haunting depletes The Spirit's Power bar. The Power bar will automatically replenish over time (15 seconds). The Power bar must be fully replenished before it can be triggered again.
The Legion
Feral Frenzy
The Legion has a Frenzy power gauge that builds up over time. The power, Feral Frenzy, can be activated by tapping the Power button. While active, the power gauge drains rapidly and the power ends when the gauge is empty, triggering an extended recovery cool-down (3 seconds).
When activating Feral Frenzy, The Legion enters a deadly rage. While the power is active:
- The Legion sprints faster than base movement speed.
- The Legion can vault Pallets, but cannot break them.
- Survivors' Scratch Marks are hidden from The Legion's view.
- Missed attack have a reduced cool-down.
While Feral Frenzy is active, hitting a Survivor who is not currently afflicted with the Deep Wound Status Effect:
- Applies the Template:IconLink Status Effect.
- Injures the Survivor, if they are not already injured.
- Refills The Legion's entire power gauge.
- Triggers "Killer Instinct", revealing the location of all Survivors who do not have the Deep Wound Status Effect applied and are within The Legion's Terror Radius.
While Feral Frenzy is active, hitting a Survivor is currently afflicted with the Deep Wound Status Effect:
- Reduces a portion of the Survivor's Deep Wound bleed-out timer.
- Depletes The Legion's entire power gauge and ends the power immediately.
NOTE: Hitting a Survivor with a basic attack while Feral Frenzy is not active will deplete the entire power gauge.
The Plague
Vile Purge
Hold down the Power Button to charge Vile Purge. Releasing the button unleashes a stream of infectious bile.
A Survivor hit by the stream becomes infected. A Survivor accumulates an amount of infection by being hit by the stream, running, or performing interactions. Environmental objects also become infected for a short duration when hit by the stream.
If the Survivor's infection indicator is completely filled, they are forced to vomit, and continue to do so at random intervals; they become injured, if they are not already, and gain the Template:IconLink Status Effect; and they pass on their infection to other Survivors, as well as environmental objects that they interact with.
Infected Survivors can remove all infection by interacting with a Pool of Devotion. This blocks it from further use by other Survivors. If the Survivor is injured, they become healthy. If all Pools of Devotion are corrupted at the same time, all Pools of Devotion revert to their clean state and The Plague automatically gains Corrupt Purge.
The Plague may consume the corruption at a Pool of Devotion that has previously been used by a Survivor. This removes the corruption from the Pool and transforms Vile Purge into Corrupt Purge. Corrupt Purge instantly damages any Survivors hit by the stream, but does not apply infection. This effect only lasts for a short duration.
The Teacher (unused)
Detention
Detention is an unused Killer Power for an unknown Killer (potentially a Teacher). It is suspected to have been put into the game files alongside the Trapple and the Perk Underperform to fuel speculations about a new Killer back in August 2016.