(typos fixed: a immediate → an immediate, a Exit → an Exit, the the → the) |
(Typo on Hag: Phantom Trap instead of Phantasm Trap and erased Trapper: Receive a notification when survivor sabotaged his trap (this is outdated).) Tag: Visual edit |
||
| (14 intermediate revisions by 8 users not shown) | |||
| Line 3: | Line 3: | ||
== Load-out == |
== Load-out == |
||
{| class="wikitable" |
{| class="wikitable" |
||
| − | !Killer P.O.V<slideboxlightshow halign="center" width="360" height="200" transitionspeed="700" interval="4000"> |
+ | !Killer P.O.V.<slideboxlightshow halign="center" width="360" height="200" transitionspeed="700" interval="4000"> |
File:Basic Killer P.O.V.jpg |
File:Basic Killer P.O.V.jpg |
||
| Line 44: | Line 44: | ||
* Kazan Yamaoka - The {{IconLink|Oni}} |
* Kazan Yamaoka - The {{IconLink|Oni}} |
||
* Caleb Quinn - The {{IconLink|Deathslinger}} |
* Caleb Quinn - The {{IconLink|Deathslinger}} |
||
| + | *Pyramid Head - The [[Pyramid Head|Executioner]] |
||
| + | * Talbot Grimes - The {{IconLink|Blight}} |
||
| + | *Charlotte and Victor Deshayes - The [[Twins]] |
||
== Tracking Survivors == |
== Tracking Survivors == |
||
| Line 54: | Line 57: | ||
* Cracking Branches |
* Cracking Branches |
||
* Rustling Grass |
* Rustling Grass |
||
| − | * Cawing {{IconLink|Crows |
+ | * Cawing {{IconLink|Crows}} |
* Groaning |
* Groaning |
||
* Healing |
* Healing |
||
| Line 62: | Line 65: | ||
===Notification=== |
===Notification=== |
||
| − | The {{IconLink|Entity |
+ | The {{IconLink|Entity}} has granted its Killer enhanced senses and the ability to pinpoint Survivors who make noise. When a Survivor fails a {{IconLink|Skill Check}} or rushes an action, Killers receive a visual ''loud noise notification''. This visual effect indicates the loud noise source's location. |
* All Killers will receive a notification when the Survivors: |
* All Killers will receive a notification when the Survivors: |
||
** Repaired a {{IconLink|Generator}} |
** Repaired a {{IconLink|Generator}} |
||
| − | ** Cleansed a {{IconLink|Hex Totem |
+ | ** Cleansed a {{IconLink|Hex Totem}}. |
** Sabotaged a {{IconLink|Hook}} |
** Sabotaged a {{IconLink|Hook}} |
||
** Unhooked themselves or by another Survivor |
** Unhooked themselves or by another Survivor |
||
| − | * The {{IconLink|Trapper}} will receive a notification when the Survivors activated his '''Bear Traps''' whether they got trapped by it or they disarmed it |
+ | * The {{IconLink|Trapper}} will receive a notification when the Survivors activated his '''Bear Traps''' whether they got trapped by it or they disarmed it. |
| − | * The {{IconLink|Hag}} will receive notifications when the Survivors activated her ''' |
+ | * The {{IconLink|Hag}} will receive notifications when the Survivors activated her '''Phantasm Traps'''. Activating her traps will summon an illusion Hag. Within range you'll have an option if you want to teleport to the illusion or not. |
** She will '''not''' receive a notification when the Survivors destroyed her Phantasm Traps with a {{IconLink|Flashlight}}. |
** She will '''not''' receive a notification when the Survivors destroyed her Phantasm Traps with a {{IconLink|Flashlight}}. |
||
* As the {{IconLink|Doctor}}, he can increase the Survivors' madness by attacking them in '''Treatment Mode''' or being in his '''Static Field'''. While in '''Madness Tier III''', the Survivors will regularly scream which the Doctor will receive a notification from them. They will continue to scream until they '''Snap Out of It'''. |
* As the {{IconLink|Doctor}}, he can increase the Survivors' madness by attacking them in '''Treatment Mode''' or being in his '''Static Field'''. While in '''Madness Tier III''', the Survivors will regularly scream which the Doctor will receive a notification from them. They will continue to scream until they '''Snap Out of It'''. |
||
| Line 78: | Line 81: | ||
=== Bloodstains === |
=== Bloodstains === |
||
: Main article: [[Bleeding]] |
: Main article: [[Bleeding]] |
||
| − | Another way for Killers to track Survivors is by the bloodstains that they leave behind while {{IconLink| |
+ | Another way for Killers to track Survivors is by the bloodstains that they leave behind while {{IconLink|Injured}} or {{IconLink|Dying}}. Bloodstains are harder to see than scratch marks, but they are more precise and Survivors cannot stop bleeding until they recover back to healthy status. |
* If a Survivor hides in a {{IconLink|Locker}} and they're injured, their blood can be seen outside of the locker which is a dead giveaway. |
* If a Survivor hides in a {{IconLink|Locker}} and they're injured, their blood can be seen outside of the locker which is a dead giveaway. |
||
* Survivors that are using {{IconLink|No Mither}}Perk don't leave bloodstain trails. |
* Survivors that are using {{IconLink|No Mither}}Perk don't leave bloodstain trails. |
||
* Combining {{IconLink|Bloodhound}}and {{IconLink|Sloppy Butcher}}will create an almost continuous red-line of blood on the floor. |
* Combining {{IconLink|Bloodhound}}and {{IconLink|Sloppy Butcher}}will create an almost continuous red-line of blood on the floor. |
||
* The bloodstains is more visible for the {{IconLink|Wraith}} when '''Cloaked'''. |
* The bloodstains is more visible for the {{IconLink|Wraith}} when '''Cloaked'''. |
||
| + | *When controlling [[Victor & Charlotte Deshayes|Victor]], blood stains are much easier to spot |
||
=== Crows === |
=== Crows === |
||
| Line 88: | Line 92: | ||
Crows are another way to help Killers locate the Survivors. They will make noise and can be seen flying away if the Survivors startle them. Note that Killers can startle the Crows too. They're normally in pairs and can be seen throughout the [[Realms|Map]] standing on the ground or on top of rocks or crates. |
Crows are another way to help Killers locate the Survivors. They will make noise and can be seen flying away if the Survivors startle them. Note that Killers can startle the Crows too. They're normally in pairs and can be seen throughout the [[Realms|Map]] standing on the ground or on top of rocks or crates. |
||
* If a Survivor stays in an area for too long without performing any interactions, [[Stillness Crows]] will start flying in circles above them, giving away their position. |
* If a Survivor stays in an area for too long without performing any interactions, [[Stillness Crows]] will start flying in circles above them, giving away their position. |
||
| − | * Killers will receive a notification from the Crows with {{IconLink|Spies from the Shadows |
+ | * Killers will receive a notification from the Crows with {{IconLink|Spies from the Shadows}} Perk. |
* A '''Cloaked''' {{IconLink|Wraith}} will not startle the Crows. |
* A '''Cloaked''' {{IconLink|Wraith}} will not startle the Crows. |
||
| Line 95: | Line 99: | ||
If Survivors manage to repair 5 Generators, the 2 Exit Gates become accessible. If this happens, their locations are revealed to all players, but only temporarily for Survivors. Killer can use this knowledge to predict Survivor movements and catch them in the final stretch. Survivors must hold down the lever on the switch box to open the gates before they can escape, which takes them 20 seconds, a great opportunity for the Killer to catch them there. |
If Survivors manage to repair 5 Generators, the 2 Exit Gates become accessible. If this happens, their locations are revealed to all players, but only temporarily for Survivors. Killer can use this knowledge to predict Survivor movements and catch them in the final stretch. Survivors must hold down the lever on the switch box to open the gates before they can escape, which takes them 20 seconds, a great opportunity for the Killer to catch them there. |
||
* Once the Survivors open the Exit Gates, sometimes they will stand near the exit so once the Killer puts them in the dying state, they can fall down and escape while giving the Killer some [[Bloodpoints]]. |
* Once the Survivors open the Exit Gates, sometimes they will stand near the exit so once the Killer puts them in the dying state, they can fall down and escape while giving the Killer some [[Bloodpoints]]. |
||
| − | ** As the {{IconLink|Shape}}, if you're using the {{IconLink|Tombstone Piece |
+ | ** As the {{IconLink|Shape}}, if you're using the {{IconLink|Tombstone Piece}} or {{IconLink|Judith's Tombstone}} add-on and you haven't revealed it yet, that's the time to surprise them with it. |
| − | * Once the Survivors powered the Exit Gates, {{IconLink|Hex: No One Escapes Death}} is activated and all your hits can instantly put Survivors into dying state |
+ | * Once the Survivors powered the Exit Gates, {{IconLink|Hex: No One Escapes Death}} is activated and all your hits can instantly put Survivors into dying state. |
** This is a [[Hex Perk]], so the Perk can only be activated if there is a {{IconLink|Totem}}available to turn into a '''Hex Totem'''. The Hex can be removed as normal by destroying its associated Totem. |
** This is a [[Hex Perk]], so the Perk can only be activated if there is a {{IconLink|Totem}}available to turn into a '''Hex Totem'''. The Hex can be removed as normal by destroying its associated Totem. |
||
** This Perk doesn't affect the {{IconLink|Huntress}}' '''Hatchets''' nor the {{IconLink|Trapper}}'s '''Bear Traps'''. |
** This Perk doesn't affect the {{IconLink|Huntress}}' '''Hatchets''' nor the {{IconLink|Trapper}}'s '''Bear Traps'''. |
||
| − | * The {{IconLink|Trapper}} or {{IconLink|Hag}} can place their traps near the Exit Gates. Bear Traps may be easy to see in the bright light of an Exit Gate but offer a guaranteed kill if the Killer is nearby. |
+ | * The {{IconLink|Trapper}} or {{IconLink|Hag}} can place their traps near the Exit Gates. Bear Traps may be easy to see in the bright light of an Exit Gate, but offer a guaranteed kill if the Killer is nearby. ''Phantasm Traps'' are much more hidden, but do not stop Survivors from escaping. |
| − | * {{IconLink|Blood Warden}} will summon the {{IconLink|Entity |
+ | * {{IconLink|Blood Warden}} will summon the {{IconLink|Entity}} to block both exits for the Survivors when you hooked at least one Survivor. You can also read the {{IconLink|Auras}} of the Survivors if they're near the {{IconLink|Exit Gates}}. This Perk can only work when an Exit Gate is open. |
| − | * {{IconLink|Remember Me}} will increase the opening time to the {{IconLink|Exit Gates |
+ | * {{IconLink|Remember Me}} will increase the opening time to the {{IconLink|Exit Gates}} for each time you hit your {{IconLink|Obsession}}. This will affect all Survivors except the Obsession. |
| + | * If a Survivor with an active ''[[Reverse Bear Trap]]''' on their head attempts to escape through Exit Gates, the Trap will trigger and sacrifice them. |
||
| + | * A Survivor who has Victor on their back is unable to leave through the Gates. |
||
| + | |||
== Patrolling == |
== Patrolling == |
||
=== Generators === |
=== Generators === |
||
| − | When the trial begins, the first thing most [[Killers]] will try to do is locate some [[Survivors]]. Survivors must repair {{IconLink|Generators}} |
+ | When the trial begins, the first thing most [[Killers]] will try to do is locate some [[Survivors]]. Survivors must repair {{IconLink|Generators}} to escape, so Killers are likely to encounter Survivors there. Fortunately, Killers can read the {{IconLink|Auras}} of Generators that require repairs, allowing them to see their outlines with unlimited range. There are 7 Generators in a typical trial. Try to find an efficient patrol route to protect them. A Generator in progress is a good sign that a Survivor is nearby, so Killer should keep their eyes peeled in this situation. If the Survivors manage to repair at least 5 Generators, the {{IconLink|Exit Gates}} regain power and may be opened, allowing the Survivors to escape. |
Killers can damage Generators that have been partially repaired by getting close and performing the ''Damage Generator'' action. This will cause the Generator's repair progress to degrade over time. A Generator that is losing progress can be identified by the fiery sparks it emits. This regression is cancelled when a Survivor resumes repairs. |
Killers can damage Generators that have been partially repaired by getting close and performing the ''Damage Generator'' action. This will cause the Generator's repair progress to degrade over time. A Generator that is losing progress can be identified by the fiery sparks it emits. This regression is cancelled when a Survivor resumes repairs. |
||
| Line 114: | Line 121: | ||
There are 2 ways to attack the Survivors with your weapon: '''Quick Attack''' and '''Lunge Attack'''. |
There are 2 ways to attack the Survivors with your weapon: '''Quick Attack''' and '''Lunge Attack'''. |
||
# The quick attack is performed by simply tapping the Attack button. As the name implies, it is quick but has a very short range. |
# The quick attack is performed by simply tapping the Attack button. As the name implies, it is quick but has a very short range. |
||
| − | # The lunge attack is performed by holding down the attack button. It provides greater reach at the cost of |
+ | # The lunge attack is performed by holding down the attack button. It provides greater reach at the cost of longer recovery time and can take some practice to master. |
An attack triggers a short cooldown during which the Killer's speed is reduced, with a hit triggering a much longer cooldown while the killer readies their weapon. Killers must be careful to properly aim and time their attacks, or risk allowing Survivors to escape. Hitting a healthy Survivor grants them a brief (1 second) burst of speed. Keep a close eye on their movements during this time in order to continue the pursuit. |
An attack triggers a short cooldown during which the Killer's speed is reduced, with a hit triggering a much longer cooldown while the killer readies their weapon. Killers must be careful to properly aim and time their attacks, or risk allowing Survivors to escape. Hitting a healthy Survivor grants them a brief (1 second) burst of speed. Keep a close eye on their movements during this time in order to continue the pursuit. |
||
| Line 128: | Line 135: | ||
** Unhooking another Survivor |
** Unhooking another Survivor |
||
** Cleansing {{IconLink|Totem}} |
** Cleansing {{IconLink|Totem}} |
||
| − | ** Sabotaging {{IconLink|Hook}} and {{IconLink|Bear Trap |
+ | ** Sabotaging {{IconLink|Hook}} and {{IconLink|Bear Trap}} |
** Entering/Exiting the {{IconLink|Lockers}} |
** Entering/Exiting the {{IconLink|Lockers}} |
||
| − | ** Opening {{IconLink|Exit Gates |
+ | ** Opening {{IconLink|Exit Gates}} |
** Searching in {{IconLink|Chests}} |
** Searching in {{IconLink|Chests}} |
||
* Lunge attacks do '''not''' trigger interrupts. |
* Lunge attacks do '''not''' trigger interrupts. |
||
| Line 147: | Line 154: | ||
** The {{IconLink|Hag}} teleporting to her '''Phantasm''' trap. |
** The {{IconLink|Hag}} teleporting to her '''Phantasm''' trap. |
||
** The {{IconLink|Doctor}}in '''Treatment mode'''. |
** The {{IconLink|Doctor}}in '''Treatment mode'''. |
||
| − | ** The {{IconLink|Huntress}}throwing her ''' |
+ | ** The {{IconLink|Huntress}}throwing her '''Hatchets'''. |
** The {{IconLink|Cannibal}} during a '''Chainsaw Sweep'''. |
** The {{IconLink|Cannibal}} during a '''Chainsaw Sweep'''. |
||
| + | ** The {{IconLink|Blight}} while performing a '''Rush'''. |
||
=== Transporting Survivors === |
=== Transporting Survivors === |
||
Once a Killer catches a Survivor, their next goal is to carry them to a {{IconLink|Hook}}. While being carried, Survivors can wiggle and attempt to break free. Their struggles will affect the Killer's movements. The Survivor will eventually succeed and escape the Killer's grasp, so there is a limited time to transport them. Fortunately, Killers are able to see the {{IconLink|Auras}} of available Hooks while they are carrying Survivors. Try to take the most efficient route. |
Once a Killer catches a Survivor, their next goal is to carry them to a {{IconLink|Hook}}. While being carried, Survivors can wiggle and attempt to break free. Their struggles will affect the Killer's movements. The Survivor will eventually succeed and escape the Killer's grasp, so there is a limited time to transport them. Fortunately, Killers are able to see the {{IconLink|Auras}} of available Hooks while they are carrying Survivors. Try to take the most efficient route. |
||
| − | * The Killers can still swing their weapon while carrying a Survivor and potentially injure or down another Survivor, but will be |
+ | * The Killers can still swing their weapon while carrying a Survivor and potentially injure or down another Survivor, but will be punished with an increased cool- and slow-down. |
* Watch out for other Survivors while transporting a victim, as any action that stuns or blinds the Killer will free any carried Survivor. |
* Watch out for other Survivors while transporting a victim, as any action that stuns or blinds the Killer will free any carried Survivor. |
||
* If a Killer intentionally drops a Survivor, they will remain in the dying state. Sometimes, dropping them is the best option. |
* If a Killer intentionally drops a Survivor, they will remain in the dying state. Sometimes, dropping them is the best option. |
||
| Line 159: | Line 167: | ||
* Using {{IconLink|Iron Grasp}} will reduce Survivors struggling so the Killer's movement is more steady and can hold on to the Survivors a little longer. |
* Using {{IconLink|Iron Grasp}} will reduce Survivors struggling so the Killer's movement is more steady and can hold on to the Survivors a little longer. |
||
* {{IconLink|Agitation}} will increase the Killer's [[Movement Speeds|movement speed]] while they're carrying a Survivor. |
* {{IconLink|Agitation}} will increase the Killer's [[Movement Speeds|movement speed]] while they're carrying a Survivor. |
||
| − | * Beware of Survivors using {{IconLink|Decisive Strike}}. If the carried Survivor succeeds the {{IconLink|Skill Check}}, they will automatically stun the Killer and break free out of |
+ | * Beware of Survivors using {{IconLink|Decisive Strike}}. If the carried Survivor succeeds the {{IconLink|Skill Check}}, they will automatically stun the Killer and break free out of their grasp. |
** The perk is active for 60 seconds after they get off of a hook. Killers may only avoid Decisive Strike by waiting out the timer, either by avoiding the survivor or by slugging them. |
** The perk is active for 60 seconds after they get off of a hook. Killers may only avoid Decisive Strike by waiting out the timer, either by avoiding the survivor or by slugging them. |
||
* Survivors with a {{IconLink|Flashlight}} might try to blind the Killers while they're picking up a Survivor so they can blind the Killer and have the Survivor immediately break free. |
* Survivors with a {{IconLink|Flashlight}} might try to blind the Killers while they're picking up a Survivor so they can blind the Killer and have the Survivor immediately break free. |
||
| − | ** They |
+ | ** They have to time it perfectly though. Survivors can't stun Killers while they're in the animation of picking up a Survivor. |
** Look up quickly to avoid getting blind. |
** Look up quickly to avoid getting blind. |
||
* Try to avoid going through the pallets. |
* Try to avoid going through the pallets. |
||
| Line 172: | Line 180: | ||
* Another strategy for survivors waiting next to pallets is to walk somewhat close to the pallet. Survivors may simply wait for you to get closer so they can stun you. If this is the case, then you may catch them off guard by lunge attacking them. You may get a free hit in. |
* Another strategy for survivors waiting next to pallets is to walk somewhat close to the pallet. Survivors may simply wait for you to get closer so they can stun you. If this is the case, then you may catch them off guard by lunge attacking them. You may get a free hit in. |
||
* Survivors with a {{IconLink|Flashlight}} will try to blind the Killers while they're breaking the pallets. |
* Survivors with a {{IconLink|Flashlight}} will try to blind the Killers while they're breaking the pallets. |
||
| − | **{{IconLink|Overwhelming Presence}} will consume the |
+ | **{{IconLink|Overwhelming Presence}} will consume the flashlight item's durability more. |
| − | **{{IconLink|Lightborn}} will |
+ | **{{IconLink|Lightborn}} will make it impossible to blind the Killer. |
| − | * Leaving a dying Survivor, they will sometimes crawl to the nearest pallet so once you're ready pick them up, another Survivor will stun you with the pallet, thus making you drop the Survivor and letting them make their escape. |
+ | * Leaving a dying Survivor, they will sometimes crawl to the nearest pallet so once you're ready to pick them up, another Survivor will stun you with the pallet, thus making you drop the Survivor and letting them make their escape. |
* {{IconLink|Brutal Strength}} will have the Killer break the pallets faster. |
* {{IconLink|Brutal Strength}} will have the Killer break the pallets faster. |
||
* {{IconLink|Enduring}} will have the Killer recover faster when Survivors stuns them with pallets. |
* {{IconLink|Enduring}} will have the Killer recover faster when Survivors stuns them with pallets. |
||
* As the {{IconLink|Trapper}} or {{IconLink|Hag}}, place traps on one side of the windows/pallets to cut the Survivors off when they're being chased by you. |
* As the {{IconLink|Trapper}} or {{IconLink|Hag}}, place traps on one side of the windows/pallets to cut the Survivors off when they're being chased by you. |
||
| − | * The {{IconLink|Wraith}} is able to break pallets when |
+ | * The {{IconLink|Wraith}} is able to break pallets when cloaked. |
* The {{IconLink|Hillbilly}} and the {{IconLink|Cannibal}} can break pallets with their Chainsaw. |
* The {{IconLink|Hillbilly}} and the {{IconLink|Cannibal}} can break pallets with their Chainsaw. |
||
* As the {{IconLink|Nurse}}, blink to the other side if you think they will vault though a window or throw down a pallet. |
* As the {{IconLink|Nurse}}, blink to the other side if you think they will vault though a window or throw down a pallet. |
||
| Line 185: | Line 193: | ||
* As the {{IconLink|Huntress}}, prepare to throw a Hatchet at the Survivors if you think they're going to throw down a pallet or vault through a window. |
* As the {{IconLink|Huntress}}, prepare to throw a Hatchet at the Survivors if you think they're going to throw down a pallet or vault through a window. |
||
* As the {{IconLink|Doctor}}, attack the Survivors with '''Shock Therapy''' before they vault or if they stay near a pallet. Then switch to '''Punishment Mode''' and attack them if they're trying to perform any interactions. Attacking with Shock Therapy prevents Survivor to vault or drop pallets for 2.5 seconds. |
* As the {{IconLink|Doctor}}, attack the Survivors with '''Shock Therapy''' before they vault or if they stay near a pallet. Then switch to '''Punishment Mode''' and attack them if they're trying to perform any interactions. Attacking with Shock Therapy prevents Survivor to vault or drop pallets for 2.5 seconds. |
||
| − | * The {{IconLink|Doctor}}'s {{IconLink|"Order" |
+ | * The {{IconLink|Doctor}}'s {{IconLink|"Order"}} Add-on Series can replace '''Broken Pallets''' with '''Illusionary Pallets'''. He must attack the Survivors with '''Shock Therapy''' for them to appear. |
=== Killing Survivors === |
=== Killing Survivors === |
||
| − | There are two ways for the Killers to kill Survivors without sacrificing them to the {{IconLink|Entity |
+ | There are two ways for the Killers to kill Survivors without sacrificing them to the {{IconLink|Entity}}: |
# Survivors who are in the {{IconLink|Dying State}} will have a life bar under their names. If they're left alone for too long (240 seconds), they will slowly bleed to death. Their life bar will pause when they're being carried by the Killer or being healed by the Survivors. Recovering from the dying state will not restart their life bar, but it will resume when they go down again. |
# Survivors who are in the {{IconLink|Dying State}} will have a life bar under their names. If they're left alone for too long (240 seconds), they will slowly bleed to death. Their life bar will pause when they're being carried by the Killer or being healed by the Survivors. Recovering from the dying state will not restart their life bar, but it will resume when they go down again. |
||
# [[Memento Mori]] are Killer-specific {{IconLink|Offerings}} which influence the Entity to allow a Killer to kill one or multiple Survivors by their own hands instead of sacrificing them. They are a reward from the Entity, and an efficient way to deal with the Survivors, but Killers should not rely on them too often. Without sacrifice, the Entity will eventually become ''displeased''. |
# [[Memento Mori]] are Killer-specific {{IconLink|Offerings}} which influence the Entity to allow a Killer to kill one or multiple Survivors by their own hands instead of sacrificing them. They are a reward from the Entity, and an efficient way to deal with the Survivors, but Killers should not rely on them too often. Without sacrifice, the Entity will eventually become ''displeased''. |
||
Revision as of 11:50, 5 July 2021
This page is a compendium of all the help information featured in the in-game Help & Tutorials section of Template:IconLink.
Load-out
Killer P.O.V.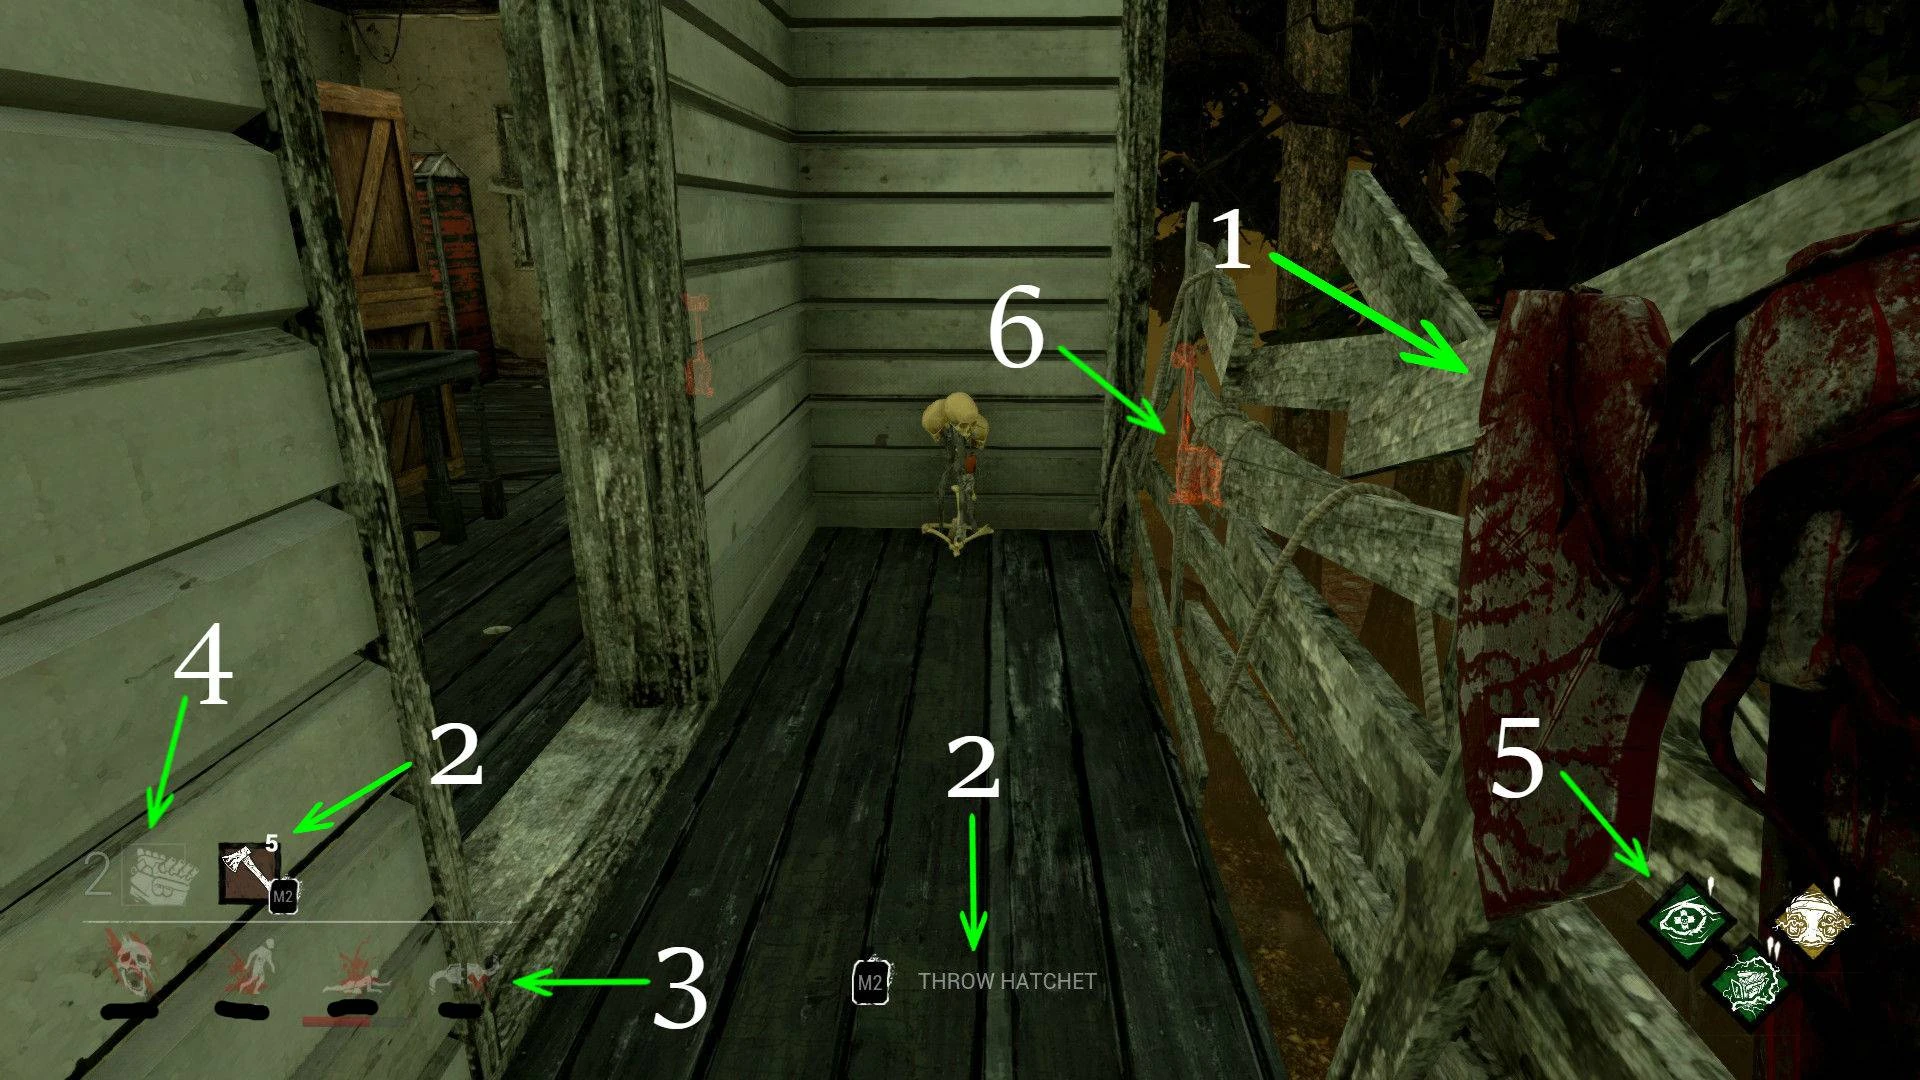 |
|---|
|
Powers & Add-ons
Killers cannot change their power. However, they can customize it. Killers may equip up to 2 Power Add-ons in the loadout before the trial which have a variety of effects on their power. Each Killer has their own unique power with their own add-ons. At the end of the trial, any equipped Add-ons are consumed.
Killers:
- Main articles: Template:IconLink and their respective Articles
There are currently 4 Killers featured in the Game:
- Evan MacMillan - The Template:IconLink
- Philip Ojomo - The Template:IconLink
- Max Thompson Jr. - The Template:IconLink
- Sally Smithson - The Template:IconLink
- Michael Myers - The Template:IconLink
- Lisa Sherwood - The Template:IconLink
- Herman Carter - The Template:IconLink
- Anna - The Template:IconLink
- Bubba Sawyer - The Template:IconLink
- Freddy Krueger - The Template:IconLink
- Amanda Young - The Template:IconLink
- Jeffrey Hawk - The Template:IconLink
- Rin Yamaoka - The Template:IconLink
- Frank, Julie, Susie, and Joey - The Template:IconLink
- Adiris - The Template:IconLink
- Danny "Jed Olsen" Johnson - The Template:IconLink
- Demogorgon - The Template:IconLink
- Kazan Yamaoka - The Template:IconLink
- Caleb Quinn - The Template:IconLink
- Pyramid Head - The Executioner
- Talbot Grimes - The Template:IconLink
- Charlotte and Victor Deshayes - The Twins
Tracking Survivors
Noises
A skilled Killer is attentive to the audio cues made by nearby Survivors.
Using these audio cues efficiently might lead you straight to a Survivor. Take great care to listen for:
- Heavy breathing
- Footsteps
- Cracking Branches
- Rustling Grass
- Cawing Template:IconLink
- Groaning
- Healing
- Sabotaging
- Searching in Template:IconLink
- Cleansing Template:IconLink
Notification
The Template:IconLink has granted its Killer enhanced senses and the ability to pinpoint Survivors who make noise. When a Survivor fails a Template:IconLink or rushes an action, Killers receive a visual loud noise notification. This visual effect indicates the loud noise source's location.
- All Killers will receive a notification when the Survivors:
- Repaired a Template:IconLink
- Cleansed a Template:IconLink.
- Sabotaged a Template:IconLink
- Unhooked themselves or by another Survivor
- The Template:IconLink will receive a notification when the Survivors activated his Bear Traps whether they got trapped by it or they disarmed it.
- The Template:IconLink will receive notifications when the Survivors activated her Phantasm Traps. Activating her traps will summon an illusion Hag. Within range you'll have an option if you want to teleport to the illusion or not.
- She will not receive a notification when the Survivors destroyed her Phantasm Traps with a Template:IconLink.
- As the Template:IconLink, he can increase the Survivors' madness by attacking them in Treatment Mode or being in his Static Field. While in Madness Tier III, the Survivors will regularly scream which the Doctor will receive a notification from them. They will continue to scream until they Snap Out of It.
Scratch Marks
Running Survivors leave tracks only the Killer can see. These tracks last a few seconds before they fade, and can be very helpful for locating and tracking Survivors.
Bloodstains
- Main article: Bleeding
Another way for Killers to track Survivors is by the bloodstains that they leave behind while Template:IconLink or Template:IconLink. Bloodstains are harder to see than scratch marks, but they are more precise and Survivors cannot stop bleeding until they recover back to healthy status.
- If a Survivor hides in a Template:IconLink and they're injured, their blood can be seen outside of the locker which is a dead giveaway.
- Survivors that are using Template:IconLinkPerk don't leave bloodstain trails.
- Combining Template:IconLinkand Template:IconLinkwill create an almost continuous red-line of blood on the floor.
- The bloodstains is more visible for the Template:IconLink when Cloaked.
- When controlling Victor, blood stains are much easier to spot
Crows
- Main article: Crows
Crows are another way to help Killers locate the Survivors. They will make noise and can be seen flying away if the Survivors startle them. Note that Killers can startle the Crows too. They're normally in pairs and can be seen throughout the Map standing on the ground or on top of rocks or crates.
- If a Survivor stays in an area for too long without performing any interactions, Stillness Crows will start flying in circles above them, giving away their position.
- Killers will receive a notification from the Crows with Template:IconLink Perk.
- A Cloaked Template:IconLink will not startle the Crows.
Exit Gates
- Main article: Exit Gates
If Survivors manage to repair 5 Generators, the 2 Exit Gates become accessible. If this happens, their locations are revealed to all players, but only temporarily for Survivors. Killer can use this knowledge to predict Survivor movements and catch them in the final stretch. Survivors must hold down the lever on the switch box to open the gates before they can escape, which takes them 20 seconds, a great opportunity for the Killer to catch them there.
- Once the Survivors open the Exit Gates, sometimes they will stand near the exit so once the Killer puts them in the dying state, they can fall down and escape while giving the Killer some Bloodpoints.
- As the Template:IconLink, if you're using the Template:IconLink or Template:IconLink add-on and you haven't revealed it yet, that's the time to surprise them with it.
- Once the Survivors powered the Exit Gates, Template:IconLink is activated and all your hits can instantly put Survivors into dying state.
- This is a Hex Perk, so the Perk can only be activated if there is a Template:IconLinkavailable to turn into a Hex Totem. The Hex can be removed as normal by destroying its associated Totem.
- This Perk doesn't affect the Template:IconLink' Hatchets nor the Template:IconLink's Bear Traps.
- The Template:IconLink or Template:IconLink can place their traps near the Exit Gates. Bear Traps may be easy to see in the bright light of an Exit Gate, but offer a guaranteed kill if the Killer is nearby. Phantasm Traps are much more hidden, but do not stop Survivors from escaping.
- Template:IconLink will summon the Template:IconLink to block both exits for the Survivors when you hooked at least one Survivor. You can also read the Template:IconLink of the Survivors if they're near the Template:IconLink. This Perk can only work when an Exit Gate is open.
- Template:IconLink will increase the opening time to the Template:IconLink for each time you hit your Template:IconLink. This will affect all Survivors except the Obsession.
- If a Survivor with an active Reverse Bear Trap' on their head attempts to escape through Exit Gates, the Trap will trigger and sacrifice them.
- A Survivor who has Victor on their back is unable to leave through the Gates.
Patrolling
Generators
When the trial begins, the first thing most Killers will try to do is locate some Survivors. Survivors must repair Template:IconLink to escape, so Killers are likely to encounter Survivors there. Fortunately, Killers can read the Template:IconLink of Generators that require repairs, allowing them to see their outlines with unlimited range. There are 7 Generators in a typical trial. Try to find an efficient patrol route to protect them. A Generator in progress is a good sign that a Survivor is nearby, so Killer should keep their eyes peeled in this situation. If the Survivors manage to repair at least 5 Generators, the Template:IconLink regain power and may be opened, allowing the Survivors to escape.
Killers can damage Generators that have been partially repaired by getting close and performing the Damage Generator action. This will cause the Generator's repair progress to degrade over time. A Generator that is losing progress can be identified by the fiery sparks it emits. This regression is cancelled when a Survivor resumes repairs.
Attacking Survivors
Weapon Attacks
There are 2 ways to attack the Survivors with your weapon: Quick Attack and Lunge Attack.
- The quick attack is performed by simply tapping the Attack button. As the name implies, it is quick but has a very short range.
- The lunge attack is performed by holding down the attack button. It provides greater reach at the cost of longer recovery time and can take some practice to master.
An attack triggers a short cooldown during which the Killer's speed is reduced, with a hit triggering a much longer cooldown while the killer readies their weapon. Killers must be careful to properly aim and time their attacks, or risk allowing Survivors to escape. Hitting a healthy Survivor grants them a brief (1 second) burst of speed. Keep a close eye on their movements during this time in order to continue the pursuit.
Chases
When Survivors are located by the Killer, they'll usually attempt to run and hide. The pursuit that follows is called The Chase. Most Killers are faster than a Survivor, but Survivors are small, nimble, and have many tricks they can use to gain distance, put obstacles in the Killer's way and break line of sight. The Killer's goal is to keep track of the fleeing Survivor and get close enough to land a devastating hit. The chase ends when the Survivor gets far enough away from the Killer or the Killer incapacitates the Survivor.
Interrupts
Many Survivor actions can be interrupted, giving the Killer a free grab and pick up. To initiate an interrupt, tap the attack button at close range while the Survivor is occupied.
- List of ways Killers can interrupt the Survivors:
- Vaulting (injured state only)
- Repairing Template:IconLink
- Unhooking another Survivor
- Cleansing Template:IconLink
- Sabotaging Template:IconLink and Template:IconLink
- Entering/Exiting the Template:IconLink
- Opening Template:IconLink
- Searching in Template:IconLink
- Lunge attacks do not trigger interrupts.
- Killers can't interrupt the Survivors during the cool-down of successful attacks.
- The Survivors' health state will not change until the Killer either drop the Survivor (which will put them in the Template:IconLink), or hang them on a Template:IconLink.
Bloodlust
- Main article: Bloodlust
As a chase progresses, Killers will develop a boiling Bloodlust. Bloodlust is a Status Effect that grants the Killer increased movement speed. Bloodlust becomes stronger the longer a chase continues, to a maximum of Tier 3, indicated by 3 chevrons on the Status Effect icon.
- Bloodlust subsides when a chase ends or a Survivor is successfully hit.
- Bloodlust does not apply under the following conditions or will reset completely:
- A cloaked Template:IconLink.
- The Template:IconLink breaking into his Chainsaw Sprint.
- The Template:IconLink using her Blink.
- The Template:IconLink stalking a Survivor, or in tier 1 of Evil Within.
- The Template:IconLink teleporting to her Phantasm trap.
- The Template:IconLinkin Treatment mode.
- The Template:IconLinkthrowing her Hatchets.
- The Template:IconLink during a Chainsaw Sweep.
- The Template:IconLink while performing a Rush.
Transporting Survivors
Once a Killer catches a Survivor, their next goal is to carry them to a Template:IconLink. While being carried, Survivors can wiggle and attempt to break free. Their struggles will affect the Killer's movements. The Survivor will eventually succeed and escape the Killer's grasp, so there is a limited time to transport them. Fortunately, Killers are able to see the Template:IconLink of available Hooks while they are carrying Survivors. Try to take the most efficient route.
- The Killers can still swing their weapon while carrying a Survivor and potentially injure or down another Survivor, but will be punished with an increased cool- and slow-down.
- Watch out for other Survivors while transporting a victim, as any action that stuns or blinds the Killer will free any carried Survivor.
- If a Killer intentionally drops a Survivor, they will remain in the dying state. Sometimes, dropping them is the best option.
- This will however fill their wiggle meter with each drop, eventually leading on an immediate break free.
- You can't always trust Survivors to stay in the dying state. They can fully recover on their own if they're using Template:IconLink or Template:IconLink.
- Using Template:IconLink will reduce Survivors struggling so the Killer's movement is more steady and can hold on to the Survivors a little longer.
- Template:IconLink will increase the Killer's movement speed while they're carrying a Survivor.
- Beware of Survivors using Template:IconLink. If the carried Survivor succeeds the Template:IconLink, they will automatically stun the Killer and break free out of their grasp.
- The perk is active for 60 seconds after they get off of a hook. Killers may only avoid Decisive Strike by waiting out the timer, either by avoiding the survivor or by slugging them.
- Survivors with a Template:IconLink might try to blind the Killers while they're picking up a Survivor so they can blind the Killer and have the Survivor immediately break free.
- They have to time it perfectly though. Survivors can't stun Killers while they're in the animation of picking up a Survivor.
- Look up quickly to avoid getting blind.
- Try to avoid going through the pallets.
Vaults & Pallets
- Main articles: Windows & Pull-Downs
Vaulting is the action of going through a window or over a pallet. Survivors can vault slowly and quietly or quickly and loudly. By running straight at a window, Survivors can pick up some extra speed for their vault. Killers can only vault slowly. Pallets are found around the map and can be dropped by Survivors to stun and create obstacles for the Killer. Killers cannot vault over pallets, but they can take time to destroy them by interacting with them.
- Survivors that wait right next to the pallets, head straight towards them then back up quickly so they can throw the pallets down without you being stunned.
- Another strategy for survivors waiting next to pallets is to walk somewhat close to the pallet. Survivors may simply wait for you to get closer so they can stun you. If this is the case, then you may catch them off guard by lunge attacking them. You may get a free hit in.
- Survivors with a Template:IconLink will try to blind the Killers while they're breaking the pallets.
- Template:IconLink will consume the flashlight item's durability more.
- Template:IconLink will make it impossible to blind the Killer.
- Leaving a dying Survivor, they will sometimes crawl to the nearest pallet so once you're ready to pick them up, another Survivor will stun you with the pallet, thus making you drop the Survivor and letting them make their escape.
- Template:IconLink will have the Killer break the pallets faster.
- Template:IconLink will have the Killer recover faster when Survivors stuns them with pallets.
- As the Template:IconLink or Template:IconLink, place traps on one side of the windows/pallets to cut the Survivors off when they're being chased by you.
- The Template:IconLink is able to break pallets when cloaked.
- The Template:IconLink and the Template:IconLink can break pallets with their Chainsaw.
- As the Template:IconLink, blink to the other side if you think they will vault though a window or throw down a pallet.
- The Template:IconLink has an increased vaulting speed when in Evil Within III.
- As the Template:IconLink, prepare to throw a Hatchet at the Survivors if you think they're going to throw down a pallet or vault through a window.
- As the Template:IconLink, attack the Survivors with Shock Therapy before they vault or if they stay near a pallet. Then switch to Punishment Mode and attack them if they're trying to perform any interactions. Attacking with Shock Therapy prevents Survivor to vault or drop pallets for 2.5 seconds.
- The Template:IconLink's Template:IconLink Add-on Series can replace Broken Pallets with Illusionary Pallets. He must attack the Survivors with Shock Therapy for them to appear.
Killing Survivors
There are two ways for the Killers to kill Survivors without sacrificing them to the Template:IconLink:
- Survivors who are in the Template:IconLink will have a life bar under their names. If they're left alone for too long (240 seconds), they will slowly bleed to death. Their life bar will pause when they're being carried by the Killer or being healed by the Survivors. Recovering from the dying state will not restart their life bar, but it will resume when they go down again.
- Memento Mori are Killer-specific Template:IconLink which influence the Entity to allow a Killer to kill one or multiple Survivors by their own hands instead of sacrificing them. They are a reward from the Entity, and an efficient way to deal with the Survivors, but Killers should not rely on them too often. Without sacrifice, the Entity will eventually become displeased.
Each Killer has their own unique Memento Mori animation. Click HERE for a video of each Killer's Memento Mori.