Tag: Visual edit |
DocOctober (talk | contribs) mNo edit summary |
||
| (77 intermediate revisions by 19 users not shown) | |||
| Line 1: | Line 1: | ||
| + | {{#Invoke:Languages|resolveLanguageTable}} |
||
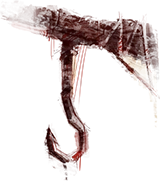
{{Quote|These vicious hooks, strewn about this nightmarish world, represent the true horror of the thing that rules this place - this Entity. Killers bring their prey to the hooks to torture them before that twisted mess of claws comes down for the finishing blow. There is still a chance of escape once hung from a hook. Either by enduring excruciating pain as you twist and turn to attempt to escape with a shoulder in pieces, or sometimes you might even get help from others that also reside within this nightmare. |
{{Quote|These vicious hooks, strewn about this nightmarish world, represent the true horror of the thing that rules this place - this Entity. Killers bring their prey to the hooks to torture them before that twisted mess of claws comes down for the finishing blow. There is still a chance of escape once hung from a hook. Either by enduring excruciating pain as you twist and turn to attempt to escape with a shoulder in pieces, or sometimes you might even get help from others that also reside within this nightmare. |
||
| Line 7: | Line 8: | ||
''The Entity is pleased! Kill more meat!''|The Voices|4=IconHelp sounds.png}} |
''The Entity is pleased! Kill more meat!''|The Voices|4=IconHelp sounds.png}} |
||
| − | ''' |
+ | '''Hooks''' are one of '''{{#Invoke:Utils|clr|2|{{PropNom}}}}''' [[Props]] featured in ''{{#Invoke:Utils|IconLink|Dead by Daylight}}''. |
| − | == |
+ | == Overview == |
[[File:IconHelpLoading_hook.png|right|frameless]] |
[[File:IconHelpLoading_hook.png|right|frameless]] |
||
| − | The |
+ | The '''Hooks''' are used by the Killer to progress their main objective of sacrificing Survivors to The {{#Invoke:Utils|IconLink|Entity}}. |
| + | Each Map spawns several '''Hooks''' placed randomly throughout the environment, as well as a fixed set of '''Basement Hooks'''. |
||
| − | Hooks are procedurally generated in every trial, thus their locations vary. |
||
| − | |||
| − | An exception to that are Hooks inside Landmarks. If they spawn there, they'll always be in the same location. |
||
{{-}} |
{{-}} |
||
== Hook Mechanics == |
== Hook Mechanics == |
||
| + | === Carrying === |
||
| + | Before hooking a Survivor, Killers must pick up the Survivor and carry them to a hook. During this time, the Killer's speed is reduced to '''{{#Invoke:Utils|clr|8|3.68 m/s}}''' or '''{{#Invoke:Utils|clr|4|92 %}}''' for all Killers by default. |
||
| + | |||
| + | ==== Wiggling ==== |
||
| + | :''Main Article:'' [[Wiggle]] |
||
| + | While being carried, the Survivor can wiggle, causing the Killer to randomly strafe side-to-side, and eventually wiggling free from their grasp after '''{{#Invoke:Utils|clr|2|16 seconds}}'''. |
||
| + | |||
=== Hooking === |
=== Hooking === |
||
[[File:SoundCue survivorHooked.ogg|right]] |
[[File:SoundCue survivorHooked.ogg|right]] |
||
| − | When in proximity to a Hook that has not been sabotaged or broken from an earlier sacrifice, the Killer carrying a Survivor is given the opportunity to hook that Survivor, placing them onto the Hook, this action takes '''{{clr|2|1.5 seconds}}'''. |
+ | When in proximity to a Hook that has not been sabotaged or broken from an earlier sacrifice, the Killer carrying a Survivor is given the opportunity to hook that Survivor, placing them onto the Hook, this action takes '''{{#Invoke:Utils|clr|2|1.5 seconds}}'''. |
If a Survivor is killed by the Entity on the Hook, the Killer will be unable to use the same Hook on another Survivor. The '''Basement Hooks''' are an exception to that. |
If a Survivor is killed by the Entity on the Hook, the Killer will be unable to use the same Hook on another Survivor. The '''Basement Hooks''' are an exception to that. |
||
=== Unhooking === |
=== Unhooking === |
||
| − | Survivors are given the opportunity to unhook their dying teammate, unhooking takes '''{{clr|2|1 second}}''' to finish. |
+ | Survivors are given the opportunity to unhook their dying teammate, unhooking takes '''{{#Invoke:Utils|clr|2|1 second}}''' to finish. |
| − | Hooked Survivors may attempt to unhook themselves from the hook, this action takes '''{{clr|6|1.5 seconds}}''' per attempt. |
+ | Hooked Survivors may attempt to unhook themselves from the hook, this action takes '''{{#Invoke:Utils|clr|6|1.5 seconds}}''' per attempt. |
| + | Unhooked Survivors are put into {{#Invoke:Utils|IconLink|Injured State}}.<br>Any Healing Progress they might have accumulated in the Dying State is reset.<br>Additionally, unhooked Survivors are temporarily (for '''{{#Invoke:Utils|clr|8|10 seconds}}''') protected by the '''''{{#Invoke:Utils|IconLink|Endurance}}''''' '''Status Effect''' and receive a '''{{#Invoke:Utils|clr|4|10 %}}''' '''''{{#Invoke:Utils|IconLink|Haste}}''''' '''Status Effect''' for the same duration. |
||
| − | === Hook Stages === |
||
| + | |||
| + | === Unhook Types === |
||
| + | There are '''{{#Invoke:Utils|clr|4|2}} Unhook Types''' in ''Dead by Daylight'': safe and unsafe Unhooks. |
||
| + | |||
| + | ==== Safe Unhooks ==== |
||
| + | A ''Safe Unhook'' is first and foremost a ''[[Score Event]]'', which was added to discourage Survivors from hook-diving (i.e. unhooking right after the Killer hooked someone without waiting for them to leave the area first) and farming points.<br>Later, it also became an activation or completion condition for certain Perk Effects and [[Tome]] Challenges. |
||
| + | |||
| + | In order for the ''Score Event'' to trigger successfully, the freshly unhooked Survivor '''''{{#Invoke:Utils|clr|8|must not}}''''' go down (i.e. enter the {{#Invoke:Utils|IconLink|Dying State}}) for the next '''{{#Invoke:Utils|clr|3|15 seconds}}'''. |
||
| + | |||
| + | ==== Unsafe Unhooks ==== |
||
| + | An ''Unsafe Unhook'' is essentially a failed ''Safe Unhook'', meaning the freshly unhooked Survivor went down (i.e. entered the Dying State) within '''{{#Invoke:Utils|clr|10|15 seconds}}''' of having been unhooked. |
||
| + | |||
| + | |||
| + | == Anti-Camping Feature == |
||
| + | [[File:Hook antiCampMeter empty.png|thumb|right|The Anti-Camp Meter when empty (small bar)]] |
||
| + | :''This feature was introduced in [[Patch 7.3.0]].'' |
||
| + | Survivors on a '''Hook''' have an internal ''Camp Meter'', which tracks the Killer's proximity to the hooked Survivor and fills the meter whenever the Killer is within '''{{#Invoke:Utils|clr|2|16 metres}}''' of it; the closer, the faster. |
||
| + | |||
| + | Once the meter is full, the hooked Survivor is granted the ability to successfully unhook themselves, after which they benefit from the following effects for '''{{#Invoke:Utils|clr|6|15 seconds}}''' ('''5 seconds''' longer than normal): |
||
| + | * Grants the '''''{{#Invoke:Utils|IconLink|Endurance}}''''' '''Status Effect'''. |
||
| + | * Grants a '''{{#Invoke:Utils|clr|8|+10 %}}''' '''''{{#Invoke:Utils|IconLink|Haste}}''''' '''Status Effect'''. |
||
| + | |||
| + | This ability can be granted both during the first and the second ''Hook Stage'' and is '''''{{#Invoke:Utils|clr|19|deactivated completely}}''''' as soon as the '''Exit Gates''' are powered. |
||
| + | |||
| + | === Grace Period === |
||
| + | After hooking a Survivor, there is a grace period of '''{{#Invoke:Utils|clr|4|7 seconds}}''' before the meter starts filling up, giving the Killer the opportunity to leave the area without being immediately penalised, as well as leaving some wiggle room to damage a nearby '''Generator''' or reload at a '''Locker''' if applicable. |
||
| + | |||
| + | === Other Survivors === |
||
| + | The ''Camp Meter'' is not only affected by the Killer's presence, but that of other Survivors as well. |
||
| + | |||
| + | If a healthy, injured, or dying Survivor is also within '''{{#Invoke:Utils|clr|3|16 metres}}''' of a hooked Survivor, the ''Camp Meter'' will be slowed. |
||
| + | |||
| + | If the Killer carries a Survivor into the camping zone, the ''Camp Meter'' will be paused completely.<br>This is so the Killer is not unfairly penalised for hooking multiple Survivors on the '''Basement Hooks'''. |
||
| + | |||
| + | === Verticality === |
||
| + | Currently, the ''Camp Meter'' treats both horizontal and vertical distance to the hooked Survivor equally, unfairly penalising Killers for passing by a hooked Survivor on a different floor (e.g. [[The Game]], [[Midwich Elementary School]]), even though the shortest walkable path to the hooked Survivor is rather long. |
||
| + | |||
| + | In a future update, the ''Camp Meter'' will be balanced more towards the horizontal distance, allowing it to be more forgiving for Killers on different floors. |
||
| + | |||
| + | === Charge Times === |
||
| + | The ''Camp Meter'' fills at default rate of '''{{#Invoke:Utils|clr|10|1 c/s}}''', which is modified depending on the Killer's distance to the hooked Survivor.<br>The ability to self-unhook is granted after reaching a threshold of '''{{#Invoke:Utils|clr|11|100 Charges}}''': |
||
| + | {| class="wikitable" |
||
| + | |- |
||
| + | ! Distance || Modifier || Interpolation |
||
| + | |- |
||
| + | ! 16 metres |
||
| + | | x0.5 || rowspan="13" | Linear (x<sup>1</sup>) |
||
| + | |- |
||
| + | ! 15 metres |
||
| + | | x0.75 |
||
| + | |- |
||
| + | ! 14 metres |
||
| + | | x1 |
||
| + | |- |
||
| + | ! 13 metres |
||
| + | | x1.25 |
||
| + | |- |
||
| + | ! 12 metres |
||
| + | | x1.5 |
||
| + | |- |
||
| + | ! 11 metres |
||
| + | | x1.75 |
||
| + | |- |
||
| + | ! 10 metres |
||
| + | | x2 |
||
| + | |- |
||
| + | ! 9 metres |
||
| + | | x2.5 |
||
| + | |- |
||
| + | ! 8 metres |
||
| + | | x3 |
||
| + | |- |
||
| + | ! 7 metres |
||
| + | | x3.5 |
||
| + | |- |
||
| + | ! 6 metres |
||
| + | | x4 |
||
| + | |- |
||
| + | ! 5 metres |
||
| + | | x4.5 |
||
| + | |- |
||
| + | ! 0-4 metres |
||
| + | | x5 |
||
| + | |} |
||
| + | |||
| + | |||
| + | == Hook Stages == |
||
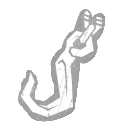
For Survivors, '''Hooks''' have three different stages: |
For Survivors, '''Hooks''' have three different stages: |
||
{| class="wikitable" |
{| class="wikitable" |
||
|- |
|- |
||
| − | ! |
+ | ! Stage !! Name !! Duration &<br>Life Bar Drainage !! Available Interactions !! Description |
|- |
|- |
||
| − | ! |
+ | ! 1 !! ''Summoning Phase'' |
| − | | '''{{clr|2|60 seconds}}''' |
+ | | '''{{#Invoke:Utils|clr|2|60 seconds}};'''<br>'''{{#Invoke:Utils|clr|6|100 to 51 %}}''' |
| + | | Hooked Survivor: |
||
| − | Survivors enter this stage the '''{{clr|2|first time}}''' they are hooked.<br>In this stage, they can be rescued by other Survivors, attempt to unhook themselves or hang still. |
||
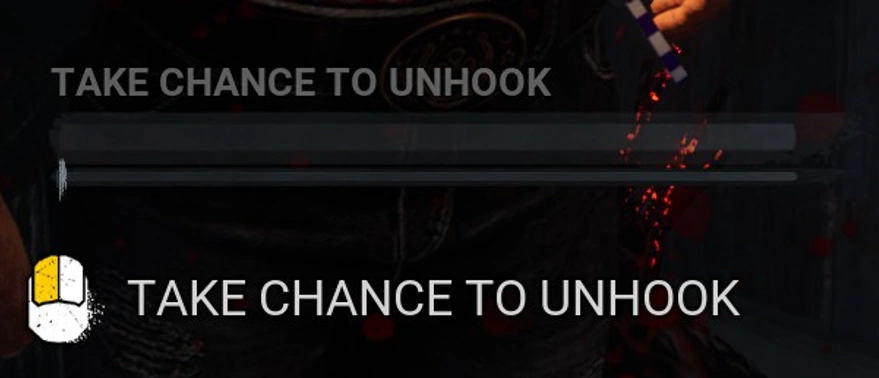
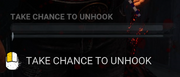
| + | * ''Take Chance to Unhook'' Action<br>(a.k.a. ''Self-Unhook'') |
||
| − | * Self-Unhook attempts have a default chance of '''{{clr|6|4 %}}''' to succeed, which can be increased with various [[Unlockables]]. |
||
| + | |||
| − | * A failed attempt will incur a penalty, draining the life bar by '''{{clr|6|-20 seconds}}''', allowing by default at most for '''{{clr|8|3 attempts}}'''. |
||
| + | Other Survivors: |
||
| − | Once the life bar drains to '''{{clr|4|50 %}}''', a Survivor will automatically enter the next Hook Stage. |
||
| + | * ''Unhook'' Action |
||
| + | | Survivors enter the first Hook Stage only when they are hooked for the '''{{#Invoke:Utils|clr|2|first time}}'''. |
||
| + | In the first Hook Stage, Survivors have the following options: |
||
| + | * Hang still or use incomplete ''Self-Unhook'' Attempts to warn other Survivors of a camping Killer (see [[#Hook Gymnastics]]). |
||
| + | * Attempt to ''Self-Unhook'', which has a default Success Chance of '''{{#Invoke:Utils|clr|6|4 %}} per attempt'''. |
||
| + | ** Failed attempts penalise the Survivor by reducing the Hook Stage duration by '''{{#Invoke:Utils|clr|8|-20 seconds}}''' each, thus allowing for a maximum of '''{{#Invoke:Utils|clr|4|3}} attempts'''. |
||
| + | |||
| + | Once a hooked Survivor's Life Bar drains to '''{{#Invoke:Utils|clr|3|50 %}}''' remaining, they automatically enter the second Hook Stage. |
||
|- |
|- |
||
| + | ! colspan="5" | [[File:Nothing.png]] |
||
| − | ! Stage 2:<br>''Struggle Phase'' |
||
| − | | '''{{clr|8|60 seconds}}''' || '''{{clr|4|50 to 1 %}}''' || Struggling || |
||
| − | Survivors enter this stage the '''{{clr|2|second time}}''' they are hooked or if their life bar drained to '''{{clr|6|50 %}}''' the first time they were hooked.<br>In this stage, they can still be rescued by other Survivors, but are unable to unhook themselves or hang still as in this stage, The {{IconLink|Entity}} attempts to sacrifice the Survivor.<br>This stage will continuously trigger {{IconLink|Skill Checks}}: |
||
| − | * Succeeding the Skill Check will continue the ''Struggle Phase'' |
||
| − | * The Success zones of each Skill Check becomes increasingly smaller |
||
| − | * Failing the Skill Check will incur a penalty, draining the life bar by '''{{clr|8|-20 seconds}}''', allowing by default at most for '''{{clr|4|3 failed Skill Checks}}'''. |
||
| − | Once the life bar drains to '''{{clr|3|0 %}}''' or if a Survivor fails to give any input for '''{{clr|10|2 successive Skill Checks}}''', they enter the next Hook Stage, completing the sacrifice. |
||
|- |
|- |
||
| + | |- |
||
| − | ! Stage 3:<br>''Sacrifice'' |
||
| + | ! 2 !! ''Struggle Phase''<br>[[File:IconHelp hookStruggle.png|64px]] |
||
| − | | '''{{clr|3|instant}}''' || '''{{clr|10|0 %}}''' || Sacrifice || |
||
| + | | '''{{#Invoke:Utils|clr|8|60 seconds}};'''<br>'''{{#Invoke:Utils|clr|4|50 to 1 %}}''' |
||
| − | Survivors enter this stage the '''{{clr|2|third time}}''' they are hooked or if their life bar drained to '''{{clr|6|0 %}}''' the first or second time they were hooked.<br>In this stage, the Survivor lost the struggle against The Entity and is instantly sacrificed. |
||
| + | | Hooked Survivor: |
||
| + | * ''Struggle'' Skill Checks |
||
| + | |||
| + | Other Survivors: |
||
| + | * ''Unhook'' Action |
||
| + | | Survivors have several ways to enter the second Hook Stage: |
||
| + | * Be hooked for the '''{{#Invoke:Utils|clr|2|second time}}''', after having been rescued from the first Hook Stage. |
||
| + | * Fail to be rescued by other Survivors during the first Hook Stage, causing the Life Bar to drain to '''{{#Invoke:Utils|clr|6|50 %}}'''. |
||
| + | * Fail too many ''Self-Unhook'' attempts during the first Hook Stage, causing the Life Bar to drain to '''{{#Invoke:Utils|clr|8|50 %}}'''. |
||
| + | In the second Hook Stage, Survivors have the following options: |
||
| + | * Struggle against The {{#Invoke:Utils|IconLink|Entity}} by succeeding the ''Struggle'' {{#Invoke:Utils|IconLink|Skill Checks}} ('''11 in total''', which spawn continuously throughout the Hook Stage. |
||
| + | ** Succeeded Skill Checks continue the ''Struggle Phase'', but progressively reduce the Success Zone of subsequent Skill Checks. |
||
| + | ** Failed Skill Checks penalise the Survivor by reducing the Hook Stage duration by '''{{#Invoke:Utils|clr|4|-20 seconds}}''' each, thus allowing for a maximum of '''{{#Invoke:Utils|clr|3|3}} failed Skill Checks'''. |
||
| + | |||
| + | The duration of the second Hook Stage can be increased using either {{#Invoke:Utils|IconLink|Kinship}} or {{#Invoke:Utils|IconLink|Reassurance}}. |
||
| + | |||
| + | Once a hooked Survivor's Life Bar drains to '''{{#Invoke:Utils|clr|11|0 %}}''' remaining, or they fail to give input on '''{{#Invoke:Utils|clr|10|2}} consecutive Skill Checks''', they automatically enter the third and final Hook Stage, completing the Sacrifice process. |
||
| + | |- |
||
| + | ! colspan="5" | [[File:Nothing.png]] |
||
| + | |- |
||
| + | |- |
||
| + | ! 3 !! ''Sacrifice'' |
||
| + | | '''{{#Invoke:Utils|clr|3|instantaneous}};'''<br>'''{{#Invoke:Utils|clr|10|0 %}}''' |
||
| + | | None available. |
||
| + | | Survivors have several ways to enter the third Hook Stage: |
||
| + | * Be hooked for the '''{{#Invoke:Utils|clr|2|third time}}''', after having been rescued both from the first and the second Hook Stage respectively. |
||
| + | * Be hooked for the '''{{#Invoke:Utils|clr|6|second time}}''', after having been rescued only from the second Hook Stage, or if you had been rescued from the first Hook Stage, but are the Last Survivor Standing now. |
||
| + | * Be hooked for the '''{{#Invoke:Utils|clr|8|first time}}''', if you are the Last Survivor Standing, regardless of whether you had been hooked previously or not. |
||
| + | * Fail to be rescued by other Survivors during the second Hook Stage, causing the Life Bar to drain to '''{{#Invoke:Utils|clr|4|0 %}}'''. |
||
| + | * Fail too many ''Struggle'' Skill Checks during the second Hook Stage, causing the Life Bar to drain to '''{{#Invoke:Utils|clr|3|0 %}}'''. |
||
| + | * Fail to give input on '''{{#Invoke:Utils|clr|10|2}} consecutive ''Struggle'' Skill Checks''' during the second Hook Stage, causing the Life Bar to drain to '''{{#Invoke:Utils|clr|11|0 %}}'''. |
||
| + | |||
| + | In the third Hook Stage, Survivors have lost their struggle against The Entity and are sacrificed, completing the process. |
||
|} |
|} |
||
| − | === Sabotage === |
||
| − | Survivors with a {{IconLink|Toolbox}} (6 Charges) or just the Perk {{IconLink|Saboteur}} equipped, have the opportunity to walk up to a Hook and sabotage it, breaking it temporarily in the process. This action takes '''{{clr|2|3 seconds}}''' with either option. |
||
| + | == Hook Sabotage == |
||
| − | Killers are unable to hook a Survivor onto a sabotaged Hook, and will have to look elsewhere, potentially losing the Survivor on their shoulder if another Hook is outside of their remaining carrying range before the Survivor wiggles off. |
||
| + | Survivors can sabotage '''Hooks''', which temporarily breaks them and thus renders them unusable for the Killer for that time, by using a {{#Invoke:Utils|IconLink|Toolboxes|Toolboxes|Toolbox}} on it.<br>This can also be done without a '''Toolbox''' if a Survivor has the Perk {{#Invoke:Utils|IconLink|Saboteur}} equipped. |
||
| + | |||
| + | The ''Hook Sabotage'' action takes a default time of '''{{#Invoke:Utils|clr|2|3 seconds}}''' to complete and will always consume '''{{#Invoke:Utils|clr|6|6 Charges}}''' from the '''Toolbox''', as the ''Hook Sabotage'' action has a higher default Item Consumption rate of '''{{#Invoke:Utils|clr|8|-2 c/s}}'''. |
||
| + | |||
| + | Since Killers are unable to hook Survivors onto sabotaged '''Hooks''' while they are broken, they will have to walk to a different '''Hook''' instead, potentially leaving enough time for the carried Survivor to wiggle free in the mean time, making sabotage a strategic gameplay mechanic. |
||
| + | |||
| + | === Auto-Repair Mechanic === |
||
| + | '''The Entity''' auto-repairs all sabotaged '''Hooks''' after a default time of '''{{#Invoke:Utils|clr|4|30 seconds}}'''.<br>This timer can be modified using certain Perks or completing the ''Hook Sabotage'' action with a '''Toolbox''' that has certain Add-ons equipped. |
||
| + | |||
| + | === Sabotage Notifications === |
||
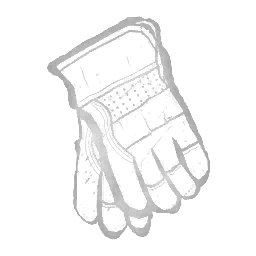
| + | It should be noted that sabotaging a '''Hook''' always creates a ''[[Loud Noise Notification]]'', which will inform the Killer of the sabotage.<br>This notification can be suppressed by completing the ''Hook Sabotage'' action with a '''Toolbox''' that has the {{#Invoke:Utils|IconLink|Protective Gloves}} Add-on equipped. |
||
| + | === Basement Hooks Sabotage Immunity === |
||
| − | Hook Sabotage grants '''500''' {{IconLink|Bloodpoints}} in the ''Boldness'' Category. |
||
| + | The four '''Basement Hooks''' '''''{{#Invoke:Utils|clr|8|cannot}}''''' be sabotaged under any circumstances and are immune to it. |
||
| + | This immunity also used to apply to special '''{{#Invoke:Utils|clr|14|Event Hooks}}''', back when ''Dead by Daylight's'' major [[Events]] only featured a limited number of such '''Hooks''' in a Trial and their numbers could be influenced using the associated '''{{#Invoke:Utils|clr|14|Event Offering}}'''.<br>Since these Events now convert every single '''Hook''' on the Map into '''{{#Invoke:Utils|clr|14|Event Hooks}}''', this immunity was removed and they can be sabotaged like any regular '''Hook'''. |
||
| − | The Entity auto-repairs sabotaged Hooks after '''{{clr|6|30 seconds}}'''. |
||
| − | * That time can be increased by Survivors using the {{IconLink|Grip Wrench}} Add-on on a Toolbox. |
||
| − | The '''Basement Hooks''' and '''Event-specific Hooks''' '''''{{clr|8|cannot}}''''' be sabotaged. |
||
| + | == Special Hooks == |
||
=== Basement Hooks === |
=== Basement Hooks === |
||
| + | :''Related Article: {{#Invoke:Utils|IconLink|Basement}}'' |
||
[[File:Dbd-journal-basement.png|200px|frameless|right]] |
[[File:Dbd-journal-basement.png|200px|frameless|right]] |
||
| − | The Basement Hooks are a unique set of four Hooks |
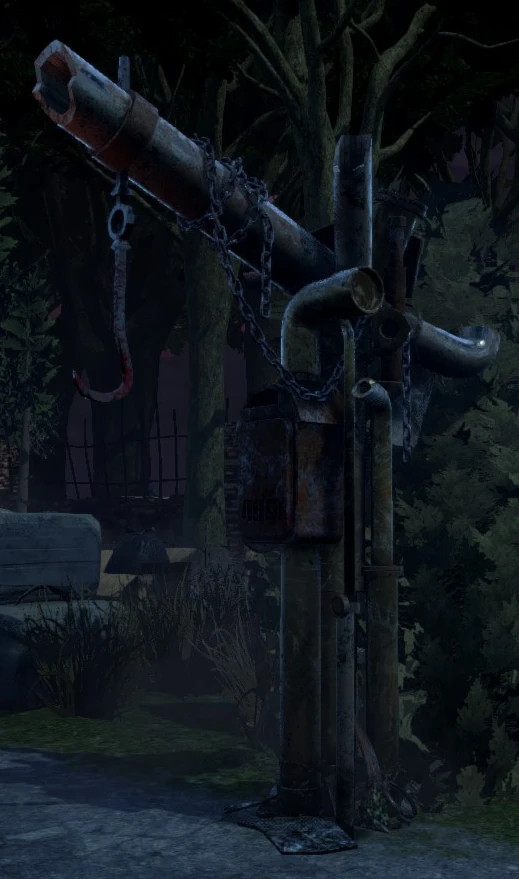
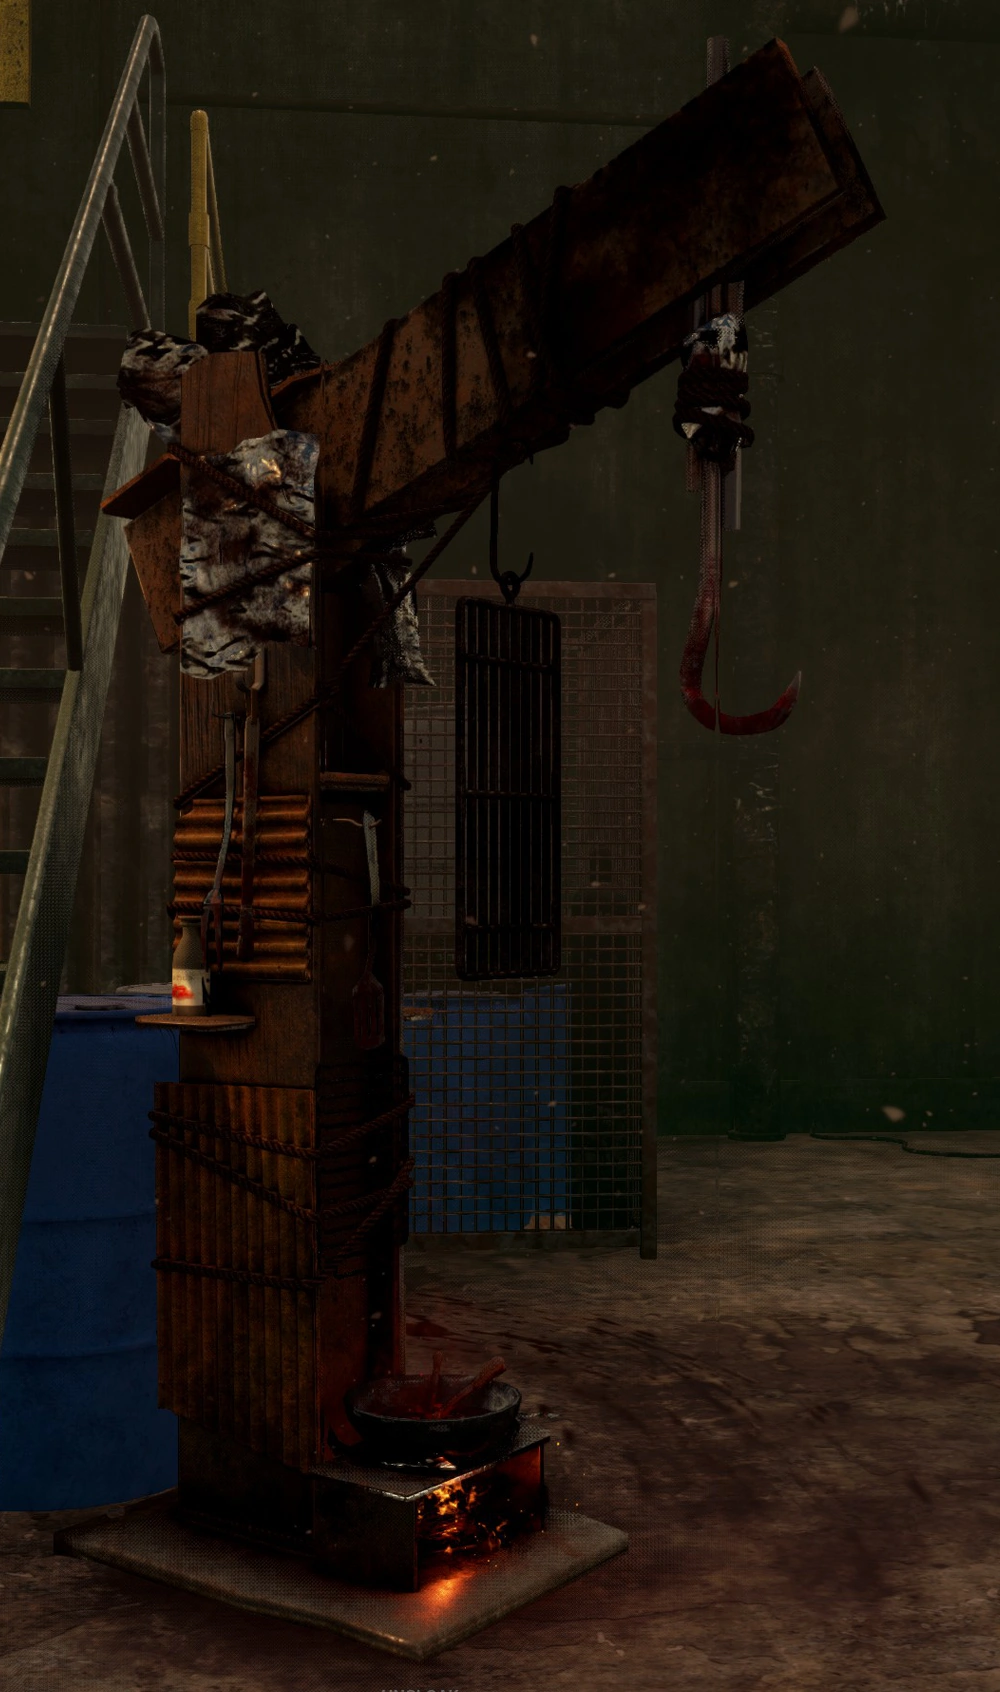
+ | The '''Basement Hooks''' are a unique set of four Hooks attached to a single post located in the {{#Invoke:Utils|IconLink|Basement}}. |
| + | The '''Basement Hooks''' are impervious to any form of damage: they '''''{{#Invoke:Utils|clr|8|cannot}}''''' be sabotaged by Survivors and also '''''{{#Invoke:Utils|clr|8|do not}}''''' break when a hooked Survivor is sacrificed or a Survivor using {{#Invoke:Utils|IconLink|Breakdown}} is unhooked.<br>Originally, when sabotaged Hooks were destroyed permanently, they were the last resort for a Killer to still hook and sacrifice Survivors.{{-}} |
||
| − | === Lunar Hook === |
||
| − | The '''Lunar Hook''' are a special Hook model that is featured during the recurring Lunar Events [[Howling Grounds]] and [[Moonrise]]. For every burnt {{IconLink|Red Envelope}}, a '''Lunar Hook''' would spawn on the [[Map]]. Its {{IconLink|Aura}} would be displayed to the Killer in a '''{{clr|10|blue}}''' colour. During '''Howling Grounds''', hooking a Survivor for the first time on such a Hook would grant the Killer one '''Burnt Coin''' [[File:eventObjective burntCoins.png|32px]], '''40''' of which would unlock the '''The Hound''' customisation option for The [[Huntress]]. During '''Moonrise''', this was changed to grant points that could then incrementally be turned into a '''Gold Coin''' [[File:eventObjective goldCoins.png|32px]], a temporary currency, of which up to '''9''' could be exchanged for special Event cosmetic pieces. |
||
| − | === |
+ | === Scourge Hooks === |
| + | :''Related Article: {{#Invoke:Utils|IconLink|Scourge Hook Perks}}'' |
||
| − | The '''Grill Hook''' was a special Hook model that was featured during the [[Scorching Summer BBQ]] Event. For every burnt {{IconLink|BBQ Invitation}} in addition to '''2''' default ones, a '''Grill Hook''' would spawn on the [[Map]]. Its {{IconLink|Aura}} would be displayed to the Killer in a '''{{clr|10|blue}}''' colour. Hooking a Survivor for the first time on such a Hook would grant the Killer one '''Survivor Chop''' [[File:eventObjective summer18 killer.png|32px]], '''50''' of which would unlock the '''Pro-Pain Hammer''' customisation option for The [[Hillbilly]]. |
||
| + | '''Scourge Hooks''' are no different from regular Hooks in appearance, but in effect. |
||
| + | In a Trial in which The Killer uses a {{#Invoke:Utils|IconLink|Scourge Hook Perk}}, a few Hooks are selected at random to become '''Scourge Hooks'''.<br>The Killer will see those Hooks highlighted in a '''{{#Invoke:Utils|clr|16|white}}''' Aura.<br>Hooking a Survivor onto a '''Scourge Hook''' will apply the effect of the associated '''Scourge Hook Perk'''. |
||
| − | === Cankerous Hook === |
||
| − | The '''Cankerous Hook''' are a special Hook model that is featured during the recurring [[Blight]] Events. They are spawned naturally throughout the Trial Grounds during the Event and their number can be increased by burning {{IconLink|Pustula Petals}} Offerings. A Cankerous Hook's {{IconLink|Aura}} will be displayed to the Killer in an '''{{clr|6|orange}}''' colour. During '''The Hallowed Blight''', hooking a Survivor for the first time on such a Hook would fill the Killer's '''Nectar Vial''' by one sixth with '''Putrid Nectar''', with a filled Vial granting one {{IconLink|Putrid Serum}}, a temporary currency that could be used to buy the Event cosmetics from the In-Game Store. During the '''Withering Blight''' Event, this was changed to just award Bonus Bloodpoints. |
||
| + | |||
| + | === Event Hooks === |
||
| + | :''Related Article: [[Events]]'' |
||
| + | ==== Lunar Hook ==== |
||
| + | :''Related Articles: [[Howling Grounds]] & [[Moonrise]]'' |
||
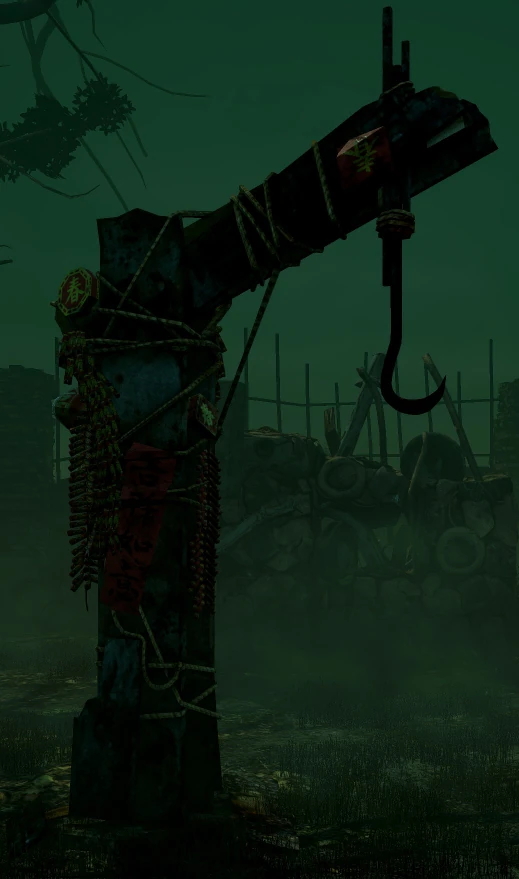
| + | The '''Lunar Hook''' are a special Hook model that is featured during the recurring Lunar Events [[Howling Grounds]] and [[Moonrise]]. |
||
| + | |||
| + | For every burnt {{#Invoke:Utils|IconLink|Red Envelope}}, a '''Lunar Hook''' would spawn on the [[Realm|Map]].<br>Its {{#Invoke:Utils|IconLink|Aura}} would be displayed to the Killer in a '''{{#Invoke:Utils|clr|10|blue}}''' colour. |
||
| + | |||
| + | During '''Howling Grounds''', hooking a Survivor for the first time on such a Hook would grant the Killer one '''Burnt Coin''' [[File:eventObjective burntCoins.png|32px]], '''40''' of which would unlock the '''The Hound''' customisation option for The Huntress.<br>During '''Moonrise''', this was changed to grant points that could then incrementally be turned into a '''Gold Coin''' [[File:eventObjective goldCoins.png|32px]], a temporary currency, of which up to '''9''' could be exchanged for special Event cosmetic pieces. |
||
| + | |||
| + | ==== Grill Hook ==== |
||
| + | :''Related Article: [[Scorching Summer BBQ]]'' |
||
| + | The '''Grill Hook''' was a special Hook model that was featured during the [[Scorching Summer BBQ]] Event. |
||
| + | |||
| + | For every burnt {{#Invoke:Utils|IconLink|BBQ Invitation}} in addition to '''2''' default ones, a '''Grill Hook''' would spawn on the [[Realm|Map]].<br>Its {{#Invoke:Utils|IconLink|Aura}} would be displayed to the Killer in a '''{{#Invoke:Utils|clr|10|blue}}''' colour. |
||
| + | |||
| + | Hooking a Survivor for the first time on such a Hook would grant the Killer one '''Survivor Chop''' [[File:eventObjective summer18 killer.png|32px]], '''50''' of which would unlock the '''Pro-Pain Hammer''' customisation option for The Hillbilly. |
||
| + | |||
| + | ==== Cankerous Hook ==== |
||
| + | The '''Cankerous Hook''' was a special Hook model that was featured during the past [[Halloween Events]]. |
||
| + | |||
| + | They spawned naturally throughout the Trial Grounds during the Event and their number could be increased by burning {{#Invoke:Utils|IconLink|Pustula Petals}} Offerings.<br>A Cankerous Hook's {{#Invoke:Utils|IconLink|Aura}} would be displayed to the Killer in an '''{{#Invoke:Utils|clr|6|orange}}''' colour. |
||
| + | |||
| + | During '''The Hallowed Blight''', hooking a Survivor for the first time on such a Hook would fill the Killer's '''Nectar Vial''' by one sixth with '''Putrid Nectar''', with a filled Vial granting one {{#Invoke:Utils|IconLink|Putrid Serum}}, a temporary currency that could be used to buy the Event cosmetics from the In-Game Store.<br>During the '''Withering Blight''' Event, this was changed to just award Bonus Bloodpoints. |
||
| + | |||
| + | ==== Tangled Hook ==== |
||
| + | The '''Tangled Hook''' is a special Hook model that is featured during [[The Midnight Grove]] Halloween Event. |
||
| + | |||
| + | They spawn naturally throughout the Trial Grounds during the Event and their number could be increased by burning {{#Invoke:Utils|IconLink|Cursed Seed}} Offerings.<br>A Tangled Hook's {{#Invoke:Utils|IconLink|Aura}} would be displayed to the Killer in an '''{{#Invoke:Utils|clr|6|orange}}''' colour. |
||
| + | |||
| + | During '''The Midnight Grove''', hooking a Survivor on a '''Tangled Hook'''' award Bonus Bloodpoints. |
||
| + | |||
| + | ==== Bone Chill Hook ==== |
||
| + | The '''Bone Chill Hook''' is a special Hook model featured during the [[Bone Chill]] Winter Events. |
||
| + | <br>By default all Hooks on the Map spawn as '''Bone Chill Hooks'''. |
||
| + | |||
| + | ==== Esoteric Hook ==== |
||
| + | The '''Esoteric Hook''' is a special Hook model featured during the [[Haunted by Daylight]] Halloween Event. |
||
| + | <br>By default all Hooks on the Map spawn as '''Esoteric Hooks'''. |
||
| + | <br>Hooking a Survivor on the '''Esoteric Hook''' grants Killers ''[[Void Energy]]'' which could be transferred into '''[[Unstable Rifts]]'''. |
||
== Hook Designs == |
== Hook Designs == |
||
| Line 89: | Line 267: | ||
Survivors quickly learnt that they could identify a Killer by taking a look at the design of the nearest Hook shortly after spawning. Thus Killers relying on the element of surprise were revealed too early to the Survivors and popular tactics, like to hold off on using one's Power if it made distinct noises to disguise one's identity for as long as possible, were nullified. |
Survivors quickly learnt that they could identify a Killer by taking a look at the design of the nearest Hook shortly after spawning. Thus Killers relying on the element of surprise were revealed too early to the Survivors and popular tactics, like to hold off on using one's Power if it made distinct noises to disguise one's identity for as long as possible, were nullified. |
||
| − | The Developers realised this and changed Hooks to no longer be tied to a Killer prior to the release of |
+ | The Developers realised this and changed Hooks to no longer be tied to a Killer prior to the release of [[CHAPTER 2: The HALLOWEEN® Chapter]].<br>They were from then on bound to the Realm, with one exception: playing against The {{#Invoke:Utils|IconLink|Xenomorph}} ([[CHAPTER 29: Alien]]) will always spawn its special '''Hook''', regardless of the Realm. |
It can still be clearly seen that the three original Hooks were designed to have similar features to their respective Killers. Newer Hooks were designed to fit more into the general theme of their Realm. |
It can still be clearly seen that the three original Hooks were designed to have similar features to their respective Killers. Newer Hooks were designed to fit more into the general theme of their Realm. |
||
| Line 95: | Line 273: | ||
{| class="wikitable" |
{| class="wikitable" |
||
|- |
|- |
||
| − | ![[MacMillan Estate]] !! [[Autohaven Wreckers]] !! [[Coldwind Farm]] !! [[Crotus Prenn Asylum]] !! [[Haddonfield]] !! [[Backwater Swamp]] |
+ | ! [[MacMillan Estate]] !! [[Autohaven Wreckers]] !! [[Coldwind Farm]] !! [[Crotus Prenn Asylum]] !! [[Haddonfield]] !! [[Backwater Swamp]] |
|- |
|- |
||
| [[File:Hook_MacMillanEstate.jpg|250x423px|center]] |
| [[File:Hook_MacMillanEstate.jpg|250x423px|center]] |
||
| Line 104: | Line 282: | ||
| [[File:Hook_BackwaterSwamp.jpg|250x423px|center]] |
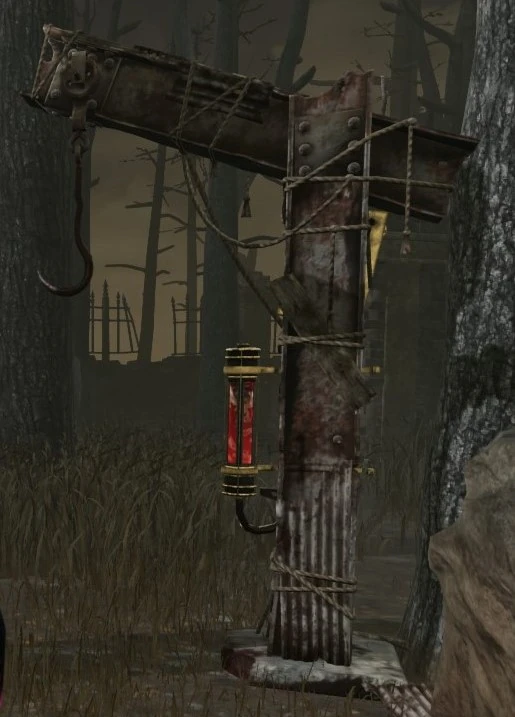
| [[File:Hook_BackwaterSwamp.jpg|250x423px|center]] |
||
|- style="text-align:center" |
|- style="text-align:center" |
||
| − | | |
+ | | Originally '''The Trapper's''' Hook: two steel bars tied together with some thick rope, reminiscent of his family's iron foundry. |
| − | | |
+ | | Originally '''The Wraith's''' Hook: wooden beams with bandages wound around and twigs and branches sticking out of them. |
| − | | |
+ | | Originally '''The Hillbilly's''' Hook: tinkered together from lots of scrap metal. |
| − | | |
+ | | Originally '''The Nurse's''' Hook: cast metal with intricate ornament and a broken birdcage on top of it. |
| − | | |
+ | | Fashioned to the likes of fancy street lanterns found in the Haddonfield neighbourhood. |
| − | | |
+ | | A rotting, mushroom infested wooden beam with a thick wood branch attached to it with some rope. |
|- |
|- |
||
| colspan="6" | [[File:nothing.png]] |
| colspan="6" | [[File:nothing.png]] |
||
| Line 122: | Line 300: | ||
| [[File:Hook_HowlingGrounds.jpg|250x423px|center]] |
| [[File:Hook_HowlingGrounds.jpg|250x423px|center]] |
||
|- style="text-align:center" |
|- style="text-align:center" |
||
| − | | |
+ | | Fashioned from medical gear and machinery found throughout the medical Institute. |
| − | | |
+ | | Tinkered together from a couple of smaller branches, adorned with animal hide. |
| − | | |
+ | | Put together from the plumbing of old-fashioned central heating units found in the Boiler Room, held together with chains. |
| − | | |
+ | | Known as the old '''Winter Hook''': a steel bar Hook hung with light ornaments in order to celebrate the Winter Solstice and Christmas, it spawned during the ''Winter Solstice'' Events. |
| − | | |
+ | | A steel bar Hook adorned with many of Jigsaw's contraptions. |
| − | | |
+ | | A steel bar Hook with Chinese Firecrackers and decorated with Chinese symbols, celebrating the Lunar New Year. |
|- |
|- |
||
| colspan="6" | [[File:nothing.png]] |
| colspan="6" | [[File:nothing.png]] |
||
| Line 140: | Line 318: | ||
| [[File:Hook_GraveOfGlenvale.jpg|250x423px|center]] |
| [[File:Hook_GraveOfGlenvale.jpg|250x423px|center]] |
||
|- style="text-align:center" |
|- style="text-align:center" |
||
| − | | |
+ | | Known as the '''Grill Hook''' or '''Summer Hook''': a steel bar Hook hung with grills, a little spice tray, tongs, aluminium paper and a bowl of cooking chilli at its foot, it spawned during the ''Summer BBQ'' Events. |
| − | | |
+ | | A wooden Hook mounted atop a carved stone pillar with a Japanese-style roof perched atop it. |
| − | | |
+ | | Known as the '''Cankerous Hook''': a steel bar Hook engulfed half-way by a cankerous growth and adorned with Pustula Petals, it spawned during the first two ''Blighted'' Halloween Events. |
| − | | |
+ | | A miniature ski lift pylon with a yellow rubber mat surrounding the lower half. |
| − | | |
+ | | A rat-infested Hook made from material resembling that found in the Rift Lab. |
| − | | |
+ | | Fashioned from splintered, old wood and adorned with simple mechanical contraptions. |
| + | |- |
||
| + | | colspan="6" | [[File:nothing.png]] |
||
| + | |- |
||
| + | ! [[Silent Hill (Realm)|Silent Hill]] !! [[Raccoon City]] !! [[The Midnight Grove]] (Event) !! [[Forsaken Boneyard]] !! [[Bone Chill]] (Event) !! [[Garden of Joy]] |
||
| + | |- |
||
| + | | [[File:Hook_SilentHill.jpg|250x423px|center]] |
||
| + | | [[File:Hook_RaccoonCity.jpg|250x423px|center]] |
||
| + | | [[File:Hook_TheMidnightGrove.jpg|250x423px|center]] |
||
| + | | [[File:Hook_ForsakenBoneyard.jpg|250x423px|center]] |
||
| + | | [[File:Hook_BoneChill.jpg|250x423px|center]] |
||
| + | | [[File:Hook_GardenOfJoy.jpg|250x423px|center]] |
||
| + | |- style="text-align:center" |
||
| + | | A metal Hook formed from sharp-edged steel, adorned with mesh-grating and sharp, spikey sheets of metal. |
||
| + | | A metal Hook overgrown with cancerous tissue growths and adorned with spikes and vines. |
||
| + | | Known as the '''Tangled Hook''': a steel bar Hook engulfed half-way by a tangled, vine-like growth, it spawned during the last ''Blighted'' Halloween Event. |
||
| + | | An ornate Hook consisting of carved stone with antique patterns, overrun by roots. |
||
| + | | Known as the new '''Winter Hook''': a rusty metal Hook held together by rusted bolts and screws, adorned with red and green Christmas lights and lined by gifts at the base, it spawns during the ''Bone Chill'' Winter Events. |
||
| + | | A rusty metal Hook made of rusted iron, lit up by fluorescent bulbs, topped off by a wind vane, and overrun by vines. |
||
| + | |- |
||
| + | | colspan="6" | [[File:nothing.png]] |
||
| + | |- |
||
| + | ! [[Haunted by Daylight]] !! [[The Decimated Borgo]] !! [[Toba Landing]] !! [[Nostromo Wreckage]] !! !! |
||
| + | |- |
||
| + | | [[File:Hook_HauntedByDaylight.jpg|250x423px|center]] |
||
| + | | [[File:Hook_TheDecimatedBorgo.jpg|250x423px|center]] |
||
| + | | [[File:Hook_TobaLanding.jpg|250x423px|center]] |
||
| + | | [[File:Hook_NostromoWreckage.jpg|250x423px|center]] |
||
| + | | |
||
| + | | |
||
| + | |- style="text-align:center" |
||
| + | | Known as the '''Esoteric Hook''': a metal Hook adorned with an energy canister, it spawns during the ''Haunted by Daylight'' Halloween Events. |
||
| + | | A wooden Hook decorated with metal spikes and spiky gears. |
||
| + | | A Hook made of scrapped machinery, tubing, wires, and metal glued together by pink organic matter. |
||
| + | | Known as the '''Alien Hook''': a metal Hook made of a large, dark grey metal part surrounded by black alien growth.<br>It spawns whenever the Killer is '''The Xenomorph'''. |
||
| + | | |
||
| + | | |
||
|} |
|} |
||
| Line 151: | Line 365: | ||
== History == |
== History == |
||
=== Original Hook Stages === |
=== Original Hook Stages === |
||
| − | For Survivors, Hooks have three different stages. Stages 1 and 2 each have a duration of '''{{clr|2|45 seconds}}''': |
+ | For Survivors, Hooks have three different stages. Stages 1 and 2 each have a duration of '''{{#Invoke:Utils|clr|2|45 seconds}}''': |
{| class="wikitable" |
{| class="wikitable" |
||
|- |
|- |
||
| Line 161: | Line 375: | ||
A Survivor being hooked for the first time will enter ''Stage One''. |
A Survivor being hooked for the first time will enter ''Stage One''. |
||
A Survivor in ''Stage One'' can be rescued by another Survivor or attempt to free themselves from the Hook. |
A Survivor in ''Stage One'' can be rescued by another Survivor or attempt to free themselves from the Hook. |
||
| − | * Each attempt has a '''{{clr|6|4 %}}''' chance to succeed and will cost 16.666% (or 20 seconds) of the remaining Health Bar. |
+ | * Each attempt has a '''{{#Invoke:Utils|clr|6|4 %}}''' chance to succeed and will cost 16.666% (or 20 seconds) of the remaining Health Bar. |
| − | * The chance to escape from the Hook can be increased with [[Luck (Offerings)|Luck Offerings]] or {{IconLink|Up the Ante}}. |
+ | * The chance to escape from the Hook can be increased with [[Luck (Offerings)|Luck Offerings]] or {{#Invoke:Utils|IconLink|Up the Ante}}. |
| − | * The number of times a Survivor can attempt to free themselves can be increased by {{IconLink|Slippery Meat}}. |
+ | * The number of times a Survivor can attempt to free themselves can be increased by {{#Invoke:Utils|IconLink|Slippery Meat}}. |
Once the Health Bar drops to '''50 %''', the Survivor will enter ''Stage Two''. |
Once the Health Bar drops to '''50 %''', the Survivor will enter ''Stage Two''. |
||
|- |
|- |
||
| Line 171: | Line 385: | ||
If a hooked Survivor's health bar reaches half (default 60 seconds or 3 failed escape attempts), will enter ''Stage Two''. If they are rescued before reaching ''Stage Two'' , they will start at ''Stage Two'' the next time they are hooked. |
If a hooked Survivor's health bar reaches half (default 60 seconds or 3 failed escape attempts), will enter ''Stage Two''. If they are rescued before reaching ''Stage Two'' , they will start at ''Stage Two'' the next time they are hooked. |
||
A Survivor in ''Stage Two'', also known as ''"Struggle Phase"'', can still be rescued by another Survivor, but will have to struggle against The Entity trying to kill them. |
A Survivor in ''Stage Two'', also known as ''"Struggle Phase"'', can still be rescued by another Survivor, but will have to struggle against The Entity trying to kill them. |
||
| − | * The time one can struggle against The Entity can be extended by using {{IconLink|Camaraderie}}, if another Survivor comes within range of the hooked Survivor (who has the Perk equipped). |
||
| − | Once the Health Bar drops to '''0 %''' or if the Survivor stops struggling, they will enter ''Stage Three''. |
||
|- |
|- |
||
! 3 |
! 3 |
||
| Line 185: | Line 397: | ||
== Change Log == |
== Change Log == |
||
=== [[Patch 1.2.0]] === |
=== [[Patch 1.2.0]] === |
||
| − | * |
+ | * '''''{{#Invoke:Utils|clr|3|Change}}:''''' the specific Hook Model is now dependent on the Realm of the Map, rather than on the Killer. |
| + | ** Before this change, the Hook Models would be chosen based on the Killer, meaning that if the Killer was a Nurse, each Hook would spawn the model currently used in [[Crotus Prenn Asylum]], regardless of whether the Trial played on [[The MacMillan Estate]], [[Autohaven Wreckers]], or [[Coldwind Farm]] (the only other available Realms at the time). |
||
| − | ** This change was motivated by Survivors having been able to guess the chosen Killer by looking at the '''Hook''', removing the surprise aspect from stealthy ones. |
||
| + | ** This allowed Survivors to identify a Killer immediately based on the Hook Model, removing the element of surprise (Killers did not have a unique Terror Radius at the time). |
||
| + | ** The change was also motivated by artistic choices, as the newest Hook Model at the time ([[Haddonfield]]) would have looked quite misplaced on other Realms. |
||
=== [[Patch 1.5.3]] === |
=== [[Patch 1.5.3]] === |
||
| − | * |
+ | * '''''{{#Invoke:Utils|clr|8|Killer Nerf}}:''''' increased the maximum duration of the ''Summoning Phase'' and the ''Struggle Phase'' (Hook Stages 1 & 2) from '''{{#Invoke:Utils|clr|2|45 seconds}}''' each to '''{{#Invoke:Utils|clr|6|60 seconds}}''' each. |
=== [[Patch 1.8.0]] === |
=== [[Patch 1.8.0]] === |
||
| + | * '''''{{#Invoke:Utils|clr|2|Survivor Buff}}:''''' increased the Wiggle Progression bonus from being dropped by the Killer (a.k.a. ''"dribbling"'') from '''{{#Invoke:Utils|clr|2|+25 %}}''' to '''{{#Invoke:Utils|clr|6|+33 %}}'''. |
||
| − | * Added the ability to unhook a Survivor from all possible angles, also known as ''"Swivel Hooks"''. |
||
| + | * '''''{{#Invoke:Utils|clr|6|Survivor QoL}}:''''' added so-called ''"Swivel Hook"'', allowing Survivors to unhook other Survivors from any angle instead of straight up front. |
||
| − | * Decreased the Skill Check Trigger odds when sabotaging '''Hooks''' with {{IconLink|Saboteur}} from '''{{clr|2|15 %}}''' to '''{{clr|6|10.5 %}}'''. |
||
| + | ** This change was added to remove the Killer's ability to completely body-block the Unhook Prompt by standing in front of the hooked Survivor. |
||
=== [[Patch 2.0.0]] === |
=== [[Patch 2.0.0]] === |
||
| − | * The number of '''Hooks''' spawning in the Trial Grounds is now fixed to the '''{{clr|2|number of Map Tiles divided by 3}}'''. |
+ | * The number of '''Hooks''' spawning in the Trial Grounds is now fixed to the '''{{#Invoke:Utils|clr|2|number of Map Tiles divided by 3}}'''. |
=== [[Patch 2.2.0]] === |
=== [[Patch 2.2.0]] === |
||
* Survivors that are being unhooked or unhook themselves no longer take any damage before they regain control of their Character model. |
* Survivors that are being unhooked or unhook themselves no longer take any damage before they regain control of their Character model. |
||
| − | * The '''Self-Unhook''' animation has been halved from '''{{clr|2|2.4 seconds}}''' to '''{{clr|6|1.2 seconds}}'''. |
+ | * The '''Self-Unhook''' animation has been halved from '''{{#Invoke:Utils|clr|2|2.4 seconds}}''' to '''{{#Invoke:Utils|clr|6|1.2 seconds}}'''. |
=== [[Patch 2.3.0]] === |
=== [[Patch 2.3.0]] === |
||
| − | * The '''Hook''' animation has been shortened from '''{{clr|2|2 seconds}}''' to '''{{clr|6|1.5 seconds}}'''. |
+ | * The '''Hook''' animation has been shortened from '''{{#Invoke:Utils|clr|2|2 seconds}}''' to '''{{#Invoke:Utils|clr|6|1.5 seconds}}'''. |
=== [[Patch 2.5.0]] === |
=== [[Patch 2.5.0]] === |
||
* All Maps now feature a minimum and maximum number of '''Hooks''' able to spawn. |
* All Maps now feature a minimum and maximum number of '''Hooks''' able to spawn. |
||
| − | * The minimum spawn distance in-between '''Hooks''' is now dependent on the Map and can be affected by {{IconLink|Offerings}}. |
+ | * The minimum spawn distance in-between '''Hooks''' is now dependent on the Map and can be affected by {{#Invoke:Utils|IconLink|Offerings}}. |
| − | * Reduced Basement-to-next-Hook minimum distance to '''{{clr|2|16 metres}}''' and moved the reference point from the middle of the Basement to the top of the stairs. |
+ | * Reduced Basement-to-next-Hook minimum distance to '''{{#Invoke:Utils|clr|2|16 metres}}''' and moved the reference point from the middle of the Basement to the top of the stairs. |
=== [[Patch 3.6.0]] === |
=== [[Patch 3.6.0]] === |
||
| + | * '''''{{#Invoke:Utils|clr|2|Killer Buff}}:''''' reduced the Wiggle penalty for dropping a Survivor from {{#Invoke:Utils|clror|+33 %}} back to {{#Invoke:Utils|clro|+25 %}}. |
||
| − | * Vastly reduced '''Hook''' Sabotage time from '''{{clr|2|15 seconds}}''' to '''{{clr|6|3 seconds}}'''. |
||
| − | * |
+ | * '''''{{#Invoke:Utils|clr|2|Killer Buff}}:''''' reduced the '''Hook''' Repair timer from {{#Invoke:Utils|clro|180 seconds}} to {{#Invoke:Utils|clro|30 seconds}}. |
| + | * '''''{{#Invoke:Utils|clr|2|Survivor Buff}}:''''' reduced the Sabotage time from {{#Invoke:Utils|clro|16 seconds}} to {{#Invoke:Utils|clro|3 seconds}}. |
||
| − | * Removed Skill Checks from the '''Hook''' Sabotage action. |
||
| + | * '''''{{#Invoke:Utils|clr|6|Survivor QoL}}:''''' removed Sabotage Skill Checks. |
||
| − | * Removed the ability for Killers to hook Survivors onto '''Hooks''' mid-sabotage. |
||
| + | * '''''{{#Invoke:Utils|clr|8|Killer Nerf}}:''''' removed the ability to hook Survivors mid-sabotage. |
||
=== [[Patch 3.7.0]] === |
=== [[Patch 3.7.0]] === |
||
* In case of all remaining Survivors reaching the ''Struggle Phase'', The Entity will now instantly drain their remaining life bar and sacrifice them. |
* In case of all remaining Survivors reaching the ''Struggle Phase'', The Entity will now instantly drain their remaining life bar and sacrifice them. |
||
* Added additional effects for when Survivors attempt to unhook themselves, making it clearer that this is potentially hurtful and will accelerate the sacrifice process. |
* Added additional effects for when Survivors attempt to unhook themselves, making it clearer that this is potentially hurtful and will accelerate the sacrifice process. |
||
=== [[Patch 4.7.0]] === |
=== [[Patch 4.7.0]] === |
||
| − | * Reworked the ''Struggle Phase'' from mashing buttons/keys to now continuously trigger Skill Checks (akin to {{IconLink|Cages of Atonement}}). |
+ | * Reworked the ''Struggle Phase'' from mashing buttons/keys to now continuously trigger Skill Checks (akin to {{#Invoke:Utils|IconLink|Cages of Atonement}}). |
| − | ** Failing to give input for '''{{clr|2|2 successive Skill Checks}}''' will instantly complete the sacrifice. |
+ | ** Failing to give input for '''{{#Invoke:Utils|clr|2|2 successive Skill Checks}}''' will instantly complete the sacrifice. |
** Missing a Skill Check will decrease the remaining life bar. |
** Missing a Skill Check will decrease the remaining life bar. |
||
| + | === [[Patch 6.1.0]] === |
||
| + | * '''''{{#Invoke:Utils|clr|2|Survivor Buff}}:''''' Survivors now receive the '''''{{#Invoke:Utils|IconLink|Endurance}}''''' and '''''{{#Invoke:Utils|IconLink|Haste}}''''' '''Status Effects''' for '''{{#Invoke:Utils|clr|2|5 seconds}}''' after being unhooked. |
||
| + | ** The '''''Haste''''' '''Status Effect''' has a strength of '''{{#Invoke:Utils|clr|2|+7 %}}'''. |
||
| + | * '''''{{#Invoke:Utils|clr|8|Survivor Nerf}}:''''' extended the timer for unhooks to be considered ''"Safe Unhooks"'' from '''{{#Invoke:Utils|clr|6|10 seconds}}''' to '''{{#Invoke:Utils|clr|8|15 seconds}}'''. |
||
| + | === [[Patch 6.2.0]] === |
||
| + | * '''''{{#Invoke:Utils|clr|2|Survivor Buff}}:''''' increased the duration of the '''''Endurance''''' and '''''Haste''''' '''Status Effects''' from '''{{#Invoke:Utils|clr|2|5 seconds}}''' to '''{{#Invoke:Utils|clr|6|10 seconds}}'''. |
||
| + | * '''''{{#Invoke:Utils|clr|2|Survivor Buff}}:''''' increased the strength of the '''''Haste''''' '''Status Effect''' from '''{{#Invoke:Utils|clr|8|+7 %}}''' to '''{{#Invoke:Utils|clr|4|+10 %}}'''. |
||
| + | === [[Patch 7.1.0]] === |
||
| + | * '''''{{#Invoke:Utils|clr|8|Killer Nerf}}:''''' removed the ability for Killers to grab healthy or injured Survivors while they are unhooking the hooked Survivor. |
||
| + | === [[Patch 7.3.0]] === |
||
| + | * '''''{{#Invoke:Utils|clr|4|Rework}}:''''' introduced an Anti-Camping mechanic to '''Hooks'''. |
||
| + | ** This feature allows Survivors to self-unhook and gain an extended '''''Endurance''''' '''Status Effect''', if the Killer camps the '''Hook''' for too long. |
||
| + | ** This feature becomes inactive as soon as the '''Exit Gates''' are powered. |
||
| + | === [[Patch 7.7.0]] === |
||
| + | * '''''{{#Invoke:Utils|clr|8|Survivor Nerf}}:''''' removed the ability to cancel the ''Unhook'' interaction partway through. |
||
| + | ** This change was motivated by some Survivors abusing this mechanic to maliciously keep someone on the '''Hook'''. |
||
== Trivia == |
== Trivia == |
||
| − | * ''' |
+ | * '''Hooks''' were also referred to as ''"Meathooks"''. |
| − | * The ''' |
+ | * The '''Hooks''' mechanic was inspired by a scene in [https://en.wikipedia.org/wiki/The_Texas_Chain_Saw_Massacre The Texas Chainsaw Massacre], where Leatherface (or [[The Cannibal]]) catches Pam and puts her on a Meathook. |
* There's an unreleased Hook model named '''''Deer Hanger''''' in the Game files. It is stored in a folder titled '''Improvised Hooks'''. It is possible that Killers might have been able to fashion their own Hook from scrap materials at one point during Development, in cases of Survivors having sabotaged all other Hooks. |
* There's an unreleased Hook model named '''''Deer Hanger''''' in the Game files. It is stored in a folder titled '''Improvised Hooks'''. It is possible that Killers might have been able to fashion their own Hook from scrap materials at one point during Development, in cases of Survivors having sabotaged all other Hooks. |
||
| Line 233: | Line 465: | ||
Each Map has a minimum and maximum amount of '''Hooks''' that may spawn on it: |
Each Map has a minimum and maximum amount of '''Hooks''' that may spawn on it: |
||
* '''Hooks''' must have a minimal spawn distance in-between each other unless the minimum amount of spawns is not reached, then they may spawn closer together. |
* '''Hooks''' must have a minimal spawn distance in-between each other unless the minimum amount of spawns is not reached, then they may spawn closer together. |
||
| − | ** This minimal spawn distance may be affected by {{IconLink|Offerings}}. |
+ | ** This minimal spawn distance may be affected by {{#Invoke:Utils|IconLink|Offerings}}. |
| Line 250: | Line 482: | ||
[[de: Haken]] |
[[de: Haken]] |
||
[[es: Ganchos]] |
[[es: Ganchos]] |
||
| + | [[fr: Crochets]] |
||
[[it: Ganci Sacrificali]] |
[[it: Ganci Sacrificali]] |
||
[[pl: Haki]] |
[[pl: Haki]] |
||
Latest revision as of 15:37, 4 April 2024
|
These vicious hooks, strewn about this nightmarish world, represent the true horror of the thing that rules this place - this Entity. Killers bring their prey to the hooks to torture them before that twisted mess of claws comes down for the finishing blow. There is still a chance of escape once hung from a hook. Either by enduring excruciating pain as you twist and turn to attempt to escape with a shoulder in pieces, or sometimes you might even get help from others that also reside within this nightmare.
One of the most horrific scenes is not always to be the one on the hook, but rather a witness. To see fear as someone else struggles for freedom is something I wish I could unsee. Limbs moving in unnatural ways and also my own inside struggle. Sometimes I try to help. But many times my fear of the hooks grows too big. What is survival with blood on your hands?'' |
||
| ~ Benedict Baker's Journal |

|
I attempted this escape many a time, much to my own folly. It was a fool's quest that resulted in more pain than it was often worth. | ||
| ~ Mysterious Note |
|
Do not waste precious time! Find the otherssss! Quickly!
The Entity is pleased! Kill more meat!'' |
||
| ~ The Voices |
Hooks are one of 27 Props featured in Dead by Daylight![]() .
.


Overview
The Hooks are used by the Killer to progress their main objective of sacrificing Survivors to The Entity![]() .
.


Each Map spawns several Hooks placed randomly throughout the environment, as well as a fixed set of Basement Hooks.
Hook Mechanics
Carrying
Before hooking a Survivor, Killers must pick up the Survivor and carry them to a hook. During this time, the Killer's speed is reduced to 3.68 m/s or 92 % for all Killers by default.
Wiggling
- Main Article: Wiggle
While being carried, the Survivor can wiggle, causing the Killer to randomly strafe side-to-side, and eventually wiggling free from their grasp after 16 seconds.
Hooking
When in proximity to a Hook that has not been sabotaged or broken from an earlier sacrifice, the Killer carrying a Survivor is given the opportunity to hook that Survivor, placing them onto the Hook, this action takes 1.5 seconds.
If a Survivor is killed by the Entity on the Hook, the Killer will be unable to use the same Hook on another Survivor. The Basement Hooks are an exception to that.
Unhooking
Survivors are given the opportunity to unhook their dying teammate, unhooking takes 1 second to finish.
Hooked Survivors may attempt to unhook themselves from the hook, this action takes 1.5 seconds per attempt.
Unhooked Survivors are put into Injured State![]() .
.
Any Healing Progress they might have accumulated in the Dying State is reset.
Additionally, unhooked Survivors are temporarily (for 10 seconds) protected by the Endurance![]() Status Effect and receive a 10 % Haste
Status Effect and receive a 10 % Haste![]() Status Effect for the same duration.
Status Effect for the same duration.


Unhook Types
There are 2 Unhook Types in Dead by Daylight: safe and unsafe Unhooks.
Safe Unhooks
A Safe Unhook is first and foremost a Score Event, which was added to discourage Survivors from hook-diving (i.e. unhooking right after the Killer hooked someone without waiting for them to leave the area first) and farming points.
Later, it also became an activation or completion condition for certain Perk Effects and Tome Challenges.
In order for the Score Event to trigger successfully, the freshly unhooked Survivor must not go down (i.e. enter the Dying State![]() ) for the next 15 seconds.
) for the next 15 seconds.


Unsafe Unhooks
An Unsafe Unhook is essentially a failed Safe Unhook, meaning the freshly unhooked Survivor went down (i.e. entered the Dying State) within 15 seconds of having been unhooked.
Anti-Camping Feature
The Anti-Camp Meter when empty (small bar)
- This feature was introduced in Patch 7.3.0.
Survivors on a Hook have an internal Camp Meter, which tracks the Killer's proximity to the hooked Survivor and fills the meter whenever the Killer is within 16 metres of it; the closer, the faster.
Once the meter is full, the hooked Survivor is granted the ability to successfully unhook themselves, after which they benefit from the following effects for 15 seconds (5 seconds longer than normal):
This ability can be granted both during the first and the second Hook Stage and is deactivated completely as soon as the Exit Gates are powered.
Grace Period
After hooking a Survivor, there is a grace period of 7 seconds before the meter starts filling up, giving the Killer the opportunity to leave the area without being immediately penalised, as well as leaving some wiggle room to damage a nearby Generator or reload at a Locker if applicable.
Other Survivors
The Camp Meter is not only affected by the Killer's presence, but that of other Survivors as well.
If a healthy, injured, or dying Survivor is also within 16 metres of a hooked Survivor, the Camp Meter will be slowed.
If the Killer carries a Survivor into the camping zone, the Camp Meter will be paused completely.
This is so the Killer is not unfairly penalised for hooking multiple Survivors on the Basement Hooks.
Verticality
Currently, the Camp Meter treats both horizontal and vertical distance to the hooked Survivor equally, unfairly penalising Killers for passing by a hooked Survivor on a different floor (e.g. The Game, Midwich Elementary School), even though the shortest walkable path to the hooked Survivor is rather long.
In a future update, the Camp Meter will be balanced more towards the horizontal distance, allowing it to be more forgiving for Killers on different floors.
Charge Times
The Camp Meter fills at default rate of 1 c/s, which is modified depending on the Killer's distance to the hooked Survivor.
The ability to self-unhook is granted after reaching a threshold of 100 Charges:
| Distance | Modifier | Interpolation |
|---|---|---|
| 16 metres | x0.5 | Linear (x1) |
| 15 metres | x0.75 | |
| 14 metres | x1 | |
| 13 metres | x1.25 | |
| 12 metres | x1.5 | |
| 11 metres | x1.75 | |
| 10 metres | x2 | |
| 9 metres | x2.5 | |
| 8 metres | x3 | |
| 7 metres | x3.5 | |
| 6 metres | x4 | |
| 5 metres | x4.5 | |
| 0-4 metres | x5 |
Hook Stages
For Survivors, Hooks have three different stages:
| Stage | Name | Duration & Life Bar Drainage |
Available Interactions | Description |
|---|---|---|---|---|
| 1 | Summoning Phase | 60 seconds; 100 to 51 % |
Hooked Survivor:
Other Survivors:
|
Survivors enter the first Hook Stage only when they are hooked for the first time.
In the first Hook Stage, Survivors have the following options:
Once a hooked Survivor's Life Bar drains to 50 % remaining, they automatically enter the second Hook Stage. |
| 2 | Struggle Phase
|
60 seconds; 50 to 1 % |
Hooked Survivor:
Other Survivors:
|
Survivors have several ways to enter the second Hook Stage:
In the second Hook Stage, Survivors have the following options:
The duration of the second Hook Stage can be increased using either Kinship Once a hooked Survivor's Life Bar drains to 0 % remaining, or they fail to give input on 2 consecutive Skill Checks, they automatically enter the third and final Hook Stage, completing the Sacrifice process. |
| 3 | Sacrifice | instantaneous; 0 % |
None available. | Survivors have several ways to enter the third Hook Stage:
In the third Hook Stage, Survivors have lost their struggle against The Entity and are sacrificed, completing the process. |


Hook Sabotage
Survivors can sabotage Hooks, which temporarily breaks them and thus renders them unusable for the Killer for that time, by using a Toolbox![]() on it.
on it.
This can also be done without a Toolbox if a Survivor has the Perk Saboteur![]() equipped.
equipped.


The Hook Sabotage action takes a default time of 3 seconds to complete and will always consume 6 Charges from the Toolbox, as the Hook Sabotage action has a higher default Item Consumption rate of -2 c/s.
Since Killers are unable to hook Survivors onto sabotaged Hooks while they are broken, they will have to walk to a different Hook instead, potentially leaving enough time for the carried Survivor to wiggle free in the mean time, making sabotage a strategic gameplay mechanic.
Auto-Repair Mechanic
The Entity auto-repairs all sabotaged Hooks after a default time of 30 seconds.
This timer can be modified using certain Perks or completing the Hook Sabotage action with a Toolbox that has certain Add-ons equipped.
Sabotage Notifications
It should be noted that sabotaging a Hook always creates a Loud Noise Notification, which will inform the Killer of the sabotage.
This notification can be suppressed by completing the Hook Sabotage action with a Toolbox that has the Protective Gloves![]() Add-on equipped.
Add-on equipped.

Basement Hooks Sabotage Immunity
The four Basement Hooks cannot be sabotaged under any circumstances and are immune to it.
This immunity also used to apply to special Event Hooks, back when Dead by Daylight's major Events only featured a limited number of such Hooks in a Trial and their numbers could be influenced using the associated Event Offering.
Since these Events now convert every single Hook on the Map into Event Hooks, this immunity was removed and they can be sabotaged like any regular Hook.
Special Hooks
Basement Hooks
- Related Article: Basement


The Basement Hooks are a unique set of four Hooks attached to a single post located in the Basement![]() .
.
The Basement Hooks are impervious to any form of damage: they cannot be sabotaged by Survivors and also do not break when a hooked Survivor is sacrificed or a Survivor using Breakdown![]() is unhooked.
is unhooked.
Originally, when sabotaged Hooks were destroyed permanently, they were the last resort for a Killer to still hook and sacrifice Survivors.


Scourge Hooks
- Related Article: Scourge Hook Perks


Scourge Hooks are no different from regular Hooks in appearance, but in effect.
In a Trial in which The Killer uses a Scourge Hook Perk![]() , a few Hooks are selected at random to become Scourge Hooks.
, a few Hooks are selected at random to become Scourge Hooks.
The Killer will see those Hooks highlighted in a white Aura.
Hooking a Survivor onto a Scourge Hook will apply the effect of the associated Scourge Hook Perk.
Event Hooks
- Related Article: Events
Lunar Hook
- Related Articles: Howling Grounds & Moonrise
The Lunar Hook are a special Hook model that is featured during the recurring Lunar Events Howling Grounds and Moonrise.
For every burnt Red Envelope![]() , a Lunar Hook would spawn on the Map.
, a Lunar Hook would spawn on the Map.
Its Aura![]() would be displayed to the Killer in a blue colour.
would be displayed to the Killer in a blue colour.


During Howling Grounds, hooking a Survivor for the first time on such a Hook would grant the Killer one Burnt Coin ![]() , 40 of which would unlock the The Hound customisation option for The Huntress.
, 40 of which would unlock the The Hound customisation option for The Huntress.
During Moonrise, this was changed to grant points that could then incrementally be turned into a Gold Coin ![]() , a temporary currency, of which up to 9 could be exchanged for special Event cosmetic pieces.
, a temporary currency, of which up to 9 could be exchanged for special Event cosmetic pieces.
Grill Hook
- Related Article: Scorching Summer BBQ
The Grill Hook was a special Hook model that was featured during the Scorching Summer BBQ Event.
For every burnt BBQ Invitation![]() in addition to 2 default ones, a Grill Hook would spawn on the Map.
in addition to 2 default ones, a Grill Hook would spawn on the Map.
Its Aura![]() would be displayed to the Killer in a blue colour.
would be displayed to the Killer in a blue colour.

Hooking a Survivor for the first time on such a Hook would grant the Killer one Survivor Chop ![]() , 50 of which would unlock the Pro-Pain Hammer customisation option for The Hillbilly.
, 50 of which would unlock the Pro-Pain Hammer customisation option for The Hillbilly.
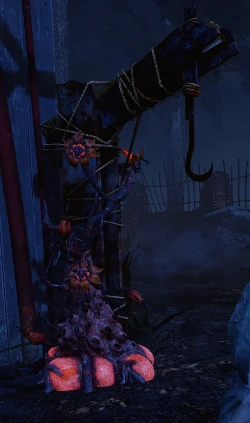
Cankerous Hook
The Cankerous Hook was a special Hook model that was featured during the past Halloween Events.
They spawned naturally throughout the Trial Grounds during the Event and their number could be increased by burning Pustula Petals![]() Offerings.
Offerings.
A Cankerous Hook's Aura![]() would be displayed to the Killer in an orange colour.
would be displayed to the Killer in an orange colour.

During The Hallowed Blight, hooking a Survivor for the first time on such a Hook would fill the Killer's Nectar Vial by one sixth with Putrid Nectar, with a filled Vial granting one Putrid Serum![]() , a temporary currency that could be used to buy the Event cosmetics from the In-Game Store.
, a temporary currency that could be used to buy the Event cosmetics from the In-Game Store.
During the Withering Blight Event, this was changed to just award Bonus Bloodpoints.


Tangled Hook
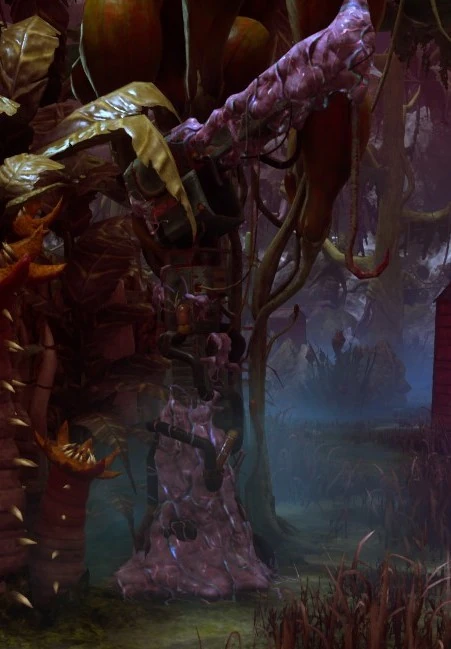
The Tangled Hook is a special Hook model that is featured during The Midnight Grove Halloween Event.
They spawn naturally throughout the Trial Grounds during the Event and their number could be increased by burning Cursed Seed![]() Offerings.
Offerings.
A Tangled Hook's Aura![]() would be displayed to the Killer in an orange colour.
would be displayed to the Killer in an orange colour.

During The Midnight Grove, hooking a Survivor on a Tangled Hook' award Bonus Bloodpoints.
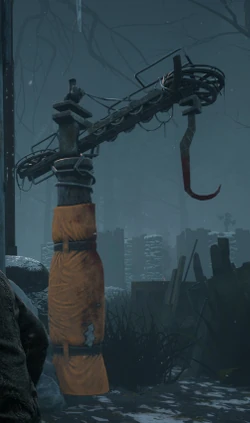
Bone Chill Hook
The Bone Chill Hook is a special Hook model featured during the Bone Chill Winter Events.
By default all Hooks on the Map spawn as Bone Chill Hooks.
Esoteric Hook
The Esoteric Hook is a special Hook model featured during the Haunted by Daylight Halloween Event.
By default all Hooks on the Map spawn as Esoteric Hooks.
Hooking a Survivor on the Esoteric Hook grants Killers Void Energy which could be transferred into Unstable Rifts.
Hook Designs
In the early days of the game, each Killer had their own personal Hook Design that was used on every Map they played on.
Survivors quickly learnt that they could identify a Killer by taking a look at the design of the nearest Hook shortly after spawning. Thus Killers relying on the element of surprise were revealed too early to the Survivors and popular tactics, like to hold off on using one's Power if it made distinct noises to disguise one's identity for as long as possible, were nullified.
The Developers realised this and changed Hooks to no longer be tied to a Killer prior to the release of CHAPTER 2: The HALLOWEEN® Chapter.
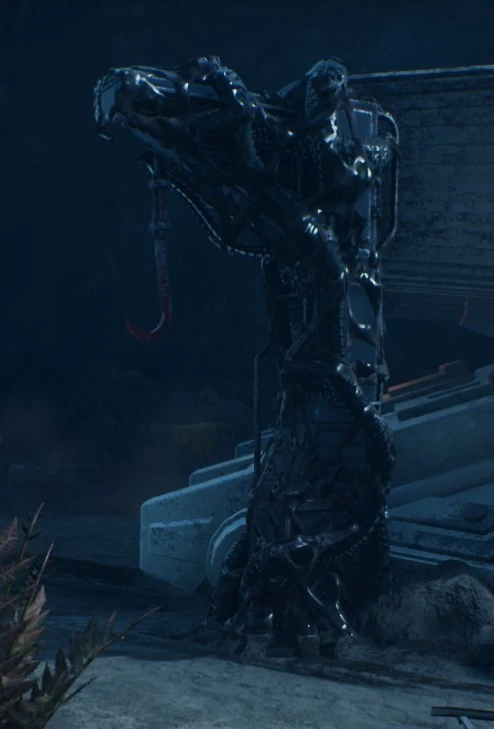
They were from then on bound to the Realm, with one exception: playing against The Xenomorph![]() (CHAPTER 29: Alien) will always spawn its special Hook, regardless of the Realm.
(CHAPTER 29: Alien) will always spawn its special Hook, regardless of the Realm.


It can still be clearly seen that the three original Hooks were designed to have similar features to their respective Killers. Newer Hooks were designed to fit more into the general theme of their Realm.
| MacMillan Estate | Autohaven Wreckers | Coldwind Farm | Crotus Prenn Asylum | Haddonfield | Backwater Swamp |
|---|---|---|---|---|---|
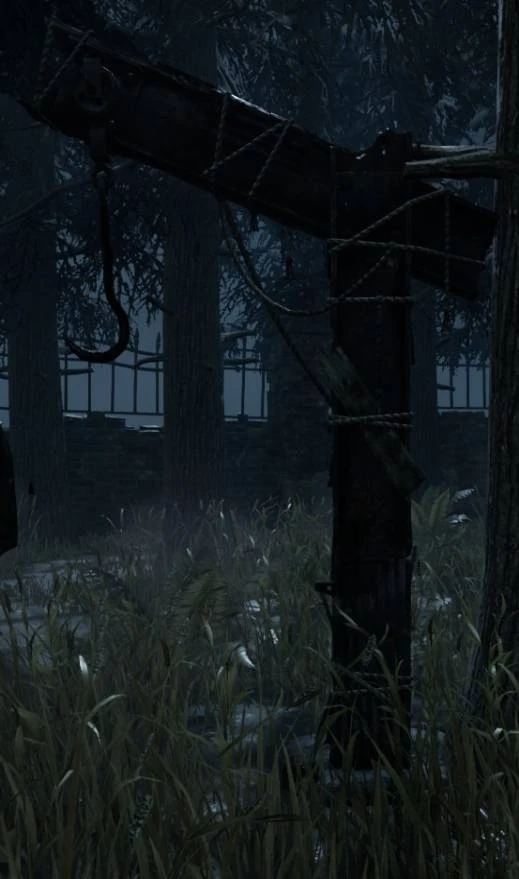 |
 |
 |
 |
 |
 |
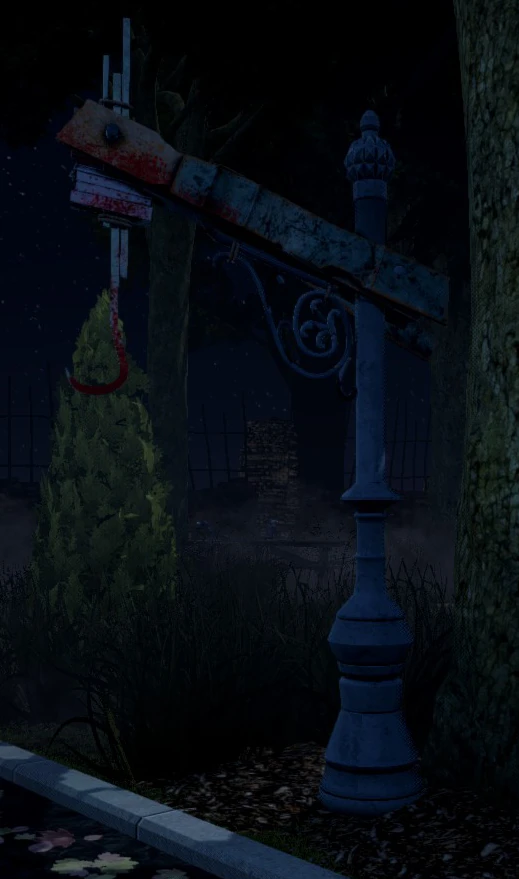
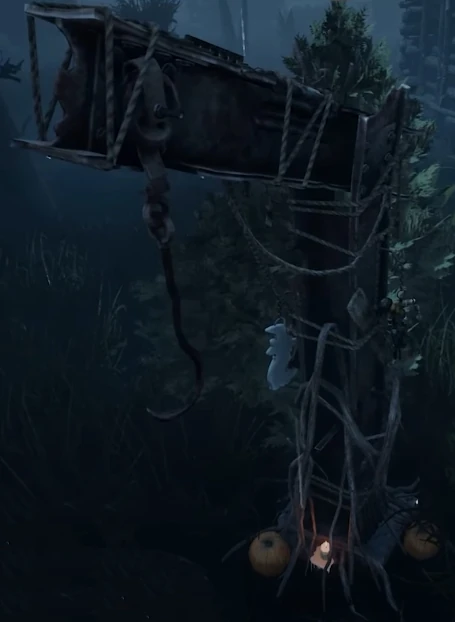
| Originally The Trapper's Hook: two steel bars tied together with some thick rope, reminiscent of his family's iron foundry. | Originally The Wraith's Hook: wooden beams with bandages wound around and twigs and branches sticking out of them. | Originally The Hillbilly's Hook: tinkered together from lots of scrap metal. | Originally The Nurse's Hook: cast metal with intricate ornament and a broken birdcage on top of it. | Fashioned to the likes of fancy street lanterns found in the Haddonfield neighbourhood. | A rotting, mushroom infested wooden beam with a thick wood branch attached to it with some rope. |
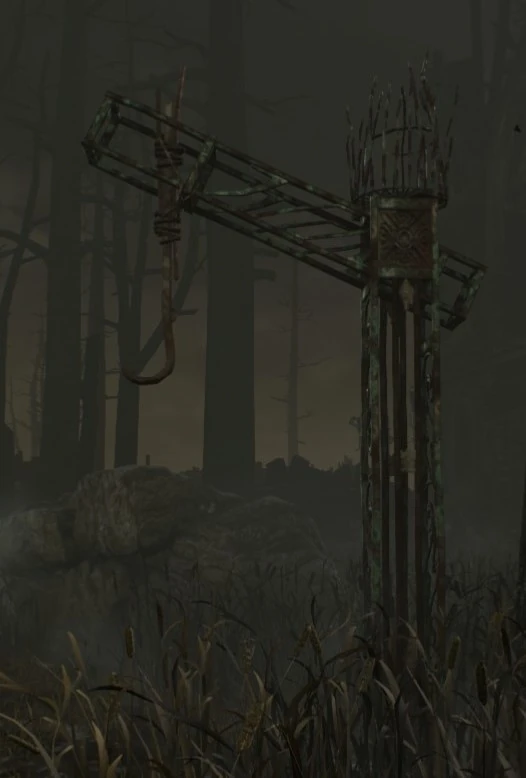
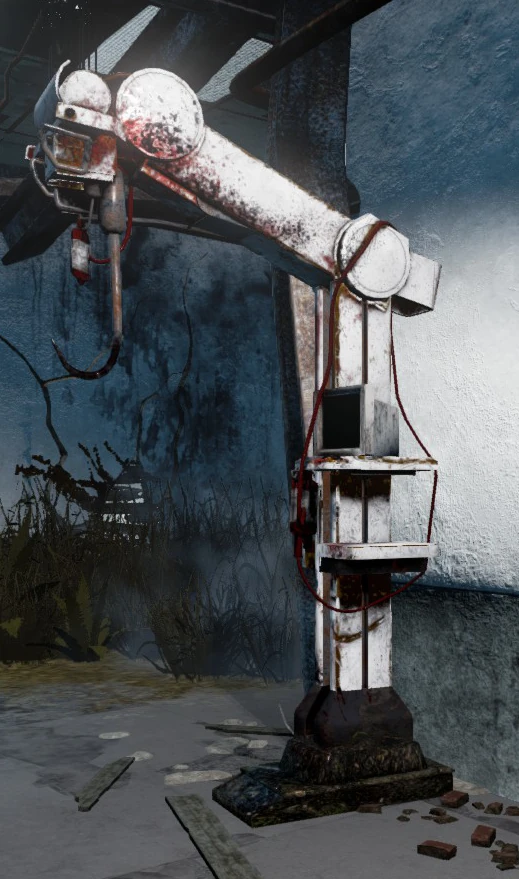
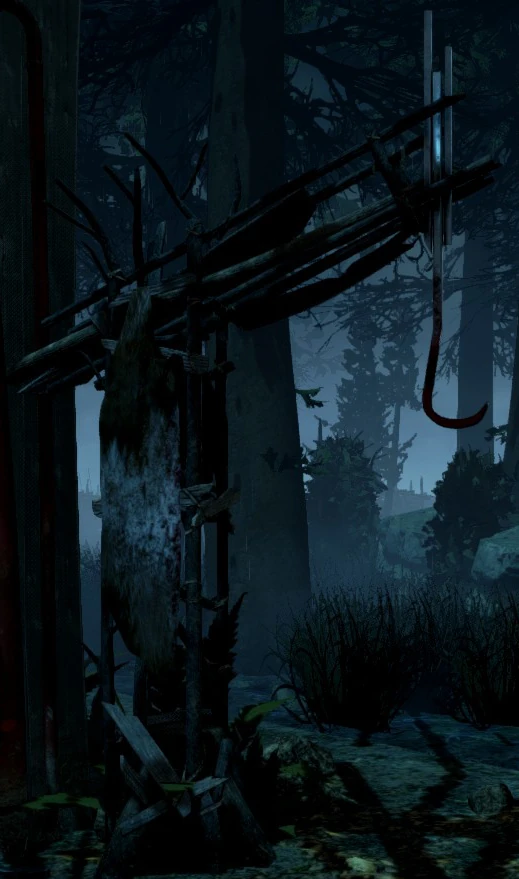
| Léry's Memorial Institute | Red Forest | Springwood | Winter Solstice (Event) | Gideon Meat Plant | Lunar New Year (Events) |
 |
 |
 |
 |
 |
 |
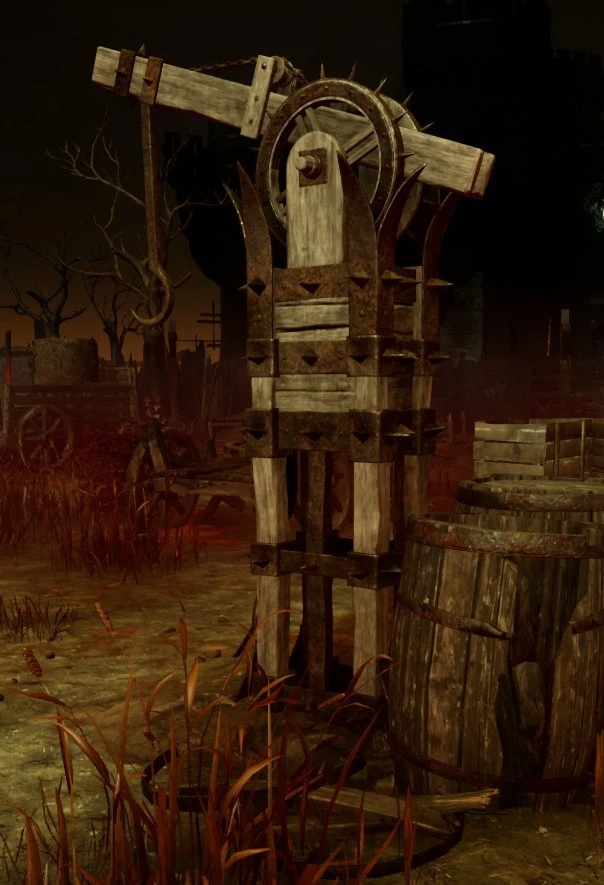
| Fashioned from medical gear and machinery found throughout the medical Institute. | Tinkered together from a couple of smaller branches, adorned with animal hide. | Put together from the plumbing of old-fashioned central heating units found in the Boiler Room, held together with chains. | Known as the old Winter Hook: a steel bar Hook hung with light ornaments in order to celebrate the Winter Solstice and Christmas, it spawned during the Winter Solstice Events. | A steel bar Hook adorned with many of Jigsaw's contraptions. | A steel bar Hook with Chinese Firecrackers and decorated with Chinese symbols, celebrating the Lunar New Year. |
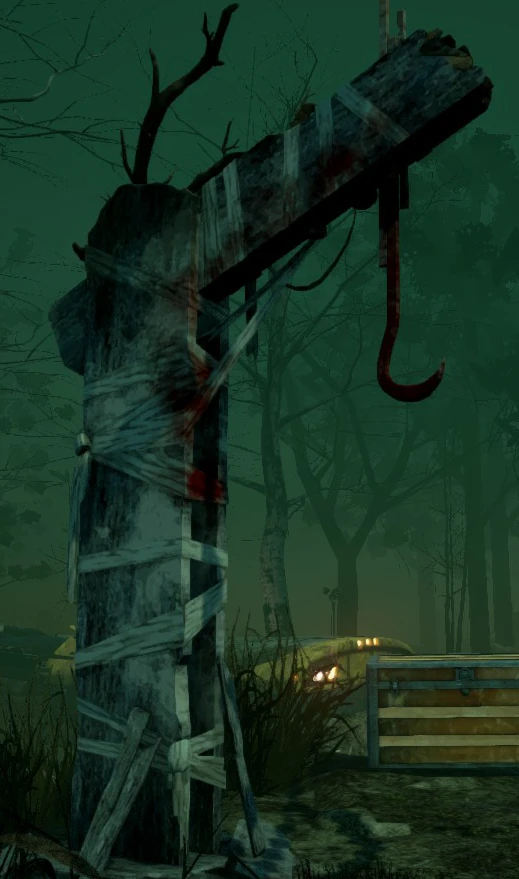
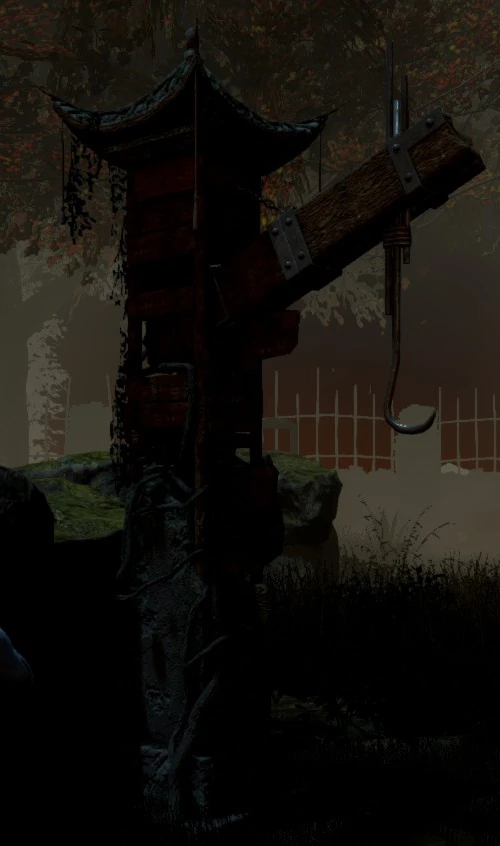
| Scorching Summer BBQ (Event) | Yamaoka Estate | The Hallowed Blight (Event) | Ormond | Hawkins National Laboratory | Grave of Glenvale |
 |
 |
 |
 |
 |
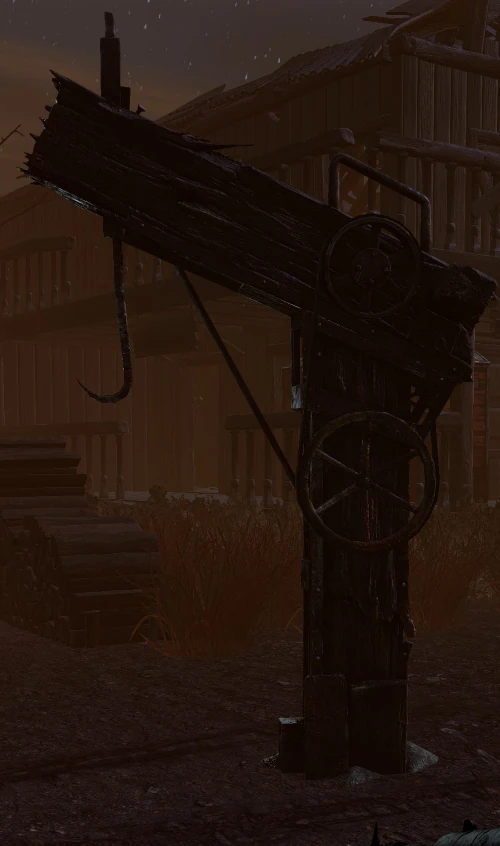 |
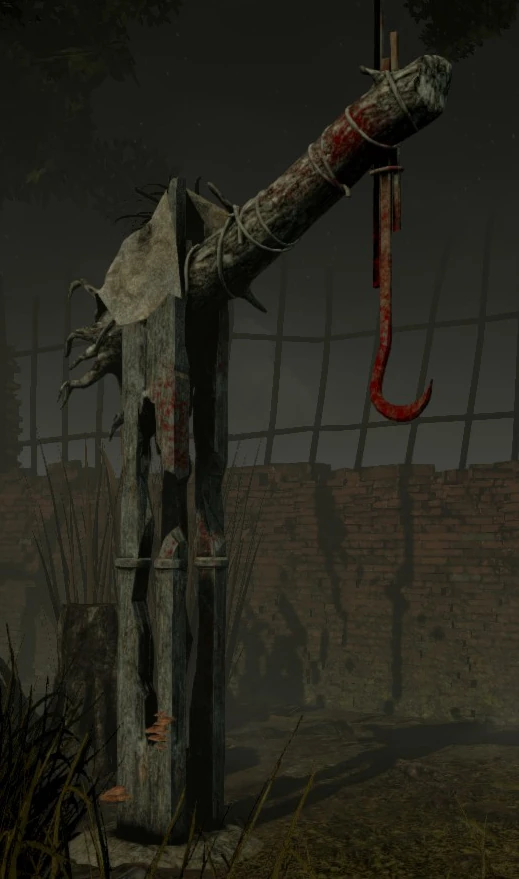
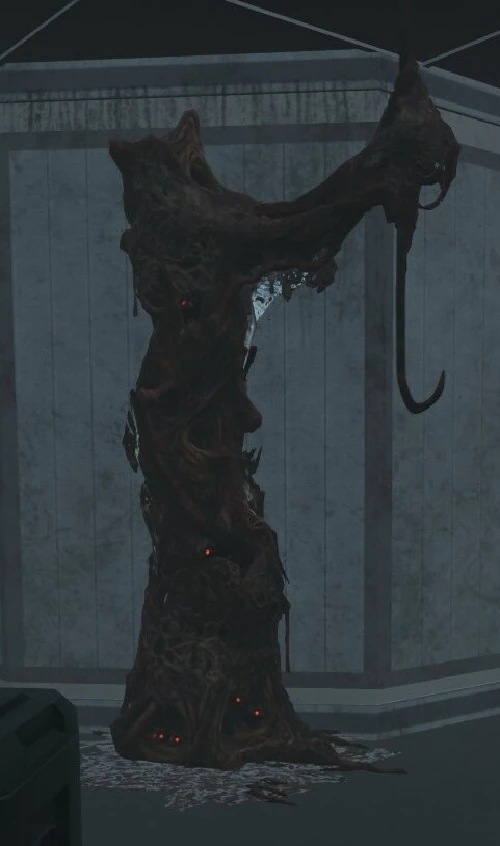
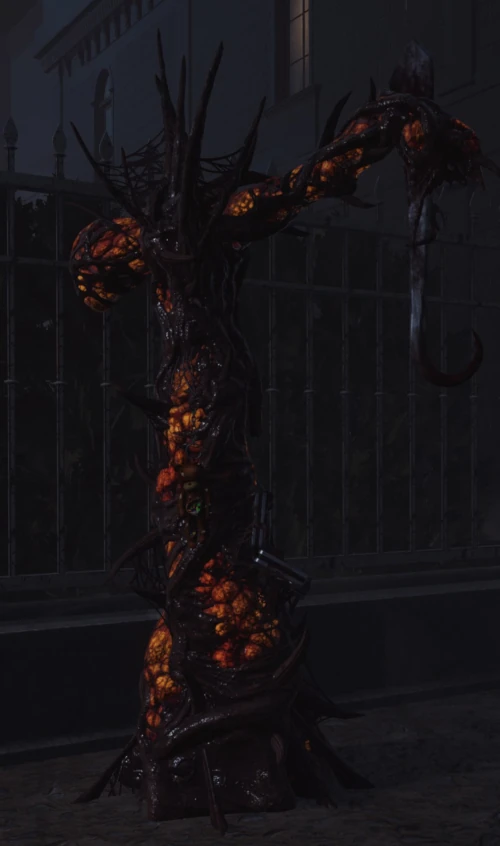
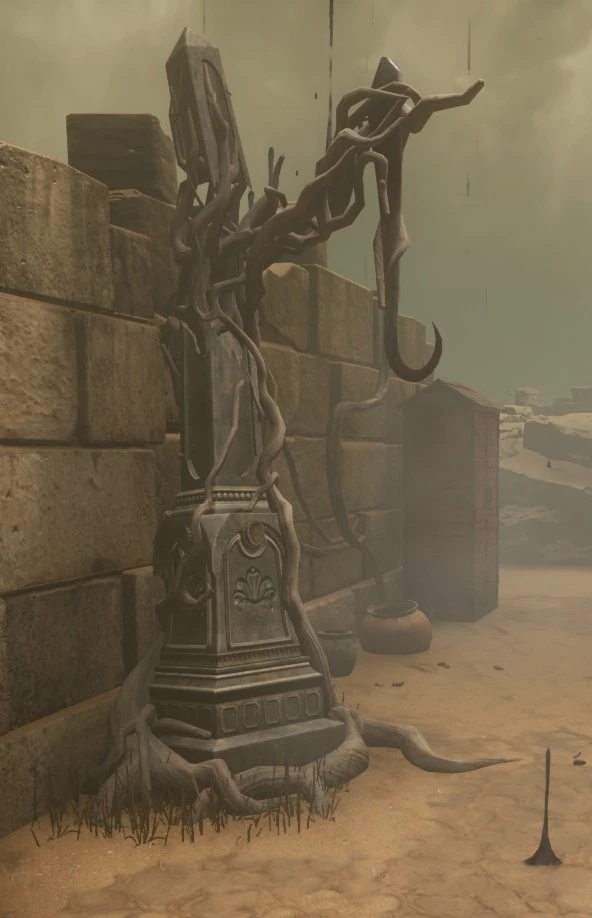
| Known as the Grill Hook or Summer Hook: a steel bar Hook hung with grills, a little spice tray, tongs, aluminium paper and a bowl of cooking chilli at its foot, it spawned during the Summer BBQ Events. | A wooden Hook mounted atop a carved stone pillar with a Japanese-style roof perched atop it. | Known as the Cankerous Hook: a steel bar Hook engulfed half-way by a cankerous growth and adorned with Pustula Petals, it spawned during the first two Blighted Halloween Events. | A miniature ski lift pylon with a yellow rubber mat surrounding the lower half. | A rat-infested Hook made from material resembling that found in the Rift Lab. | Fashioned from splintered, old wood and adorned with simple mechanical contraptions. |
| Silent Hill | Raccoon City | The Midnight Grove (Event) | Forsaken Boneyard | Bone Chill (Event) | Garden of Joy |
 |
 |
 |
 |
 |
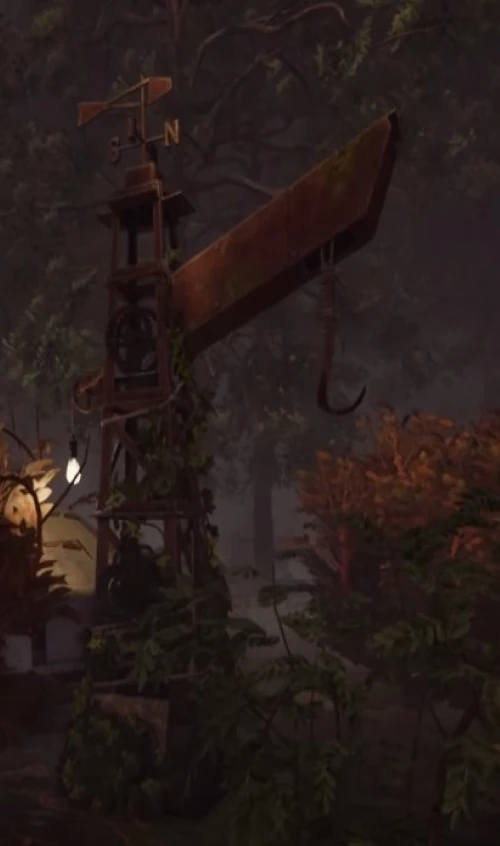 |
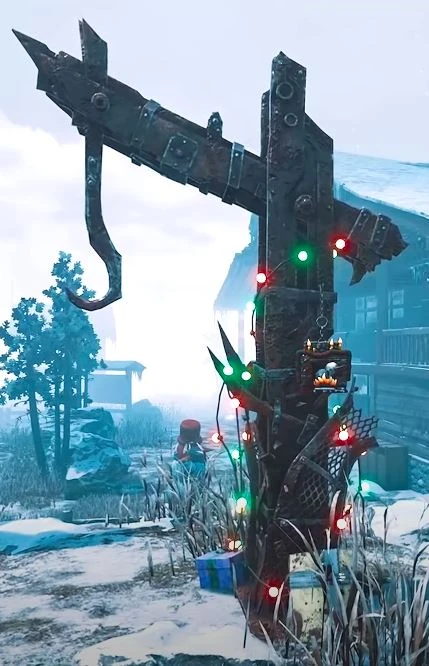
| A metal Hook formed from sharp-edged steel, adorned with mesh-grating and sharp, spikey sheets of metal. | A metal Hook overgrown with cancerous tissue growths and adorned with spikes and vines. | Known as the Tangled Hook: a steel bar Hook engulfed half-way by a tangled, vine-like growth, it spawned during the last Blighted Halloween Event. | An ornate Hook consisting of carved stone with antique patterns, overrun by roots. | Known as the new Winter Hook: a rusty metal Hook held together by rusted bolts and screws, adorned with red and green Christmas lights and lined by gifts at the base, it spawns during the Bone Chill Winter Events. | A rusty metal Hook made of rusted iron, lit up by fluorescent bulbs, topped off by a wind vane, and overrun by vines. |
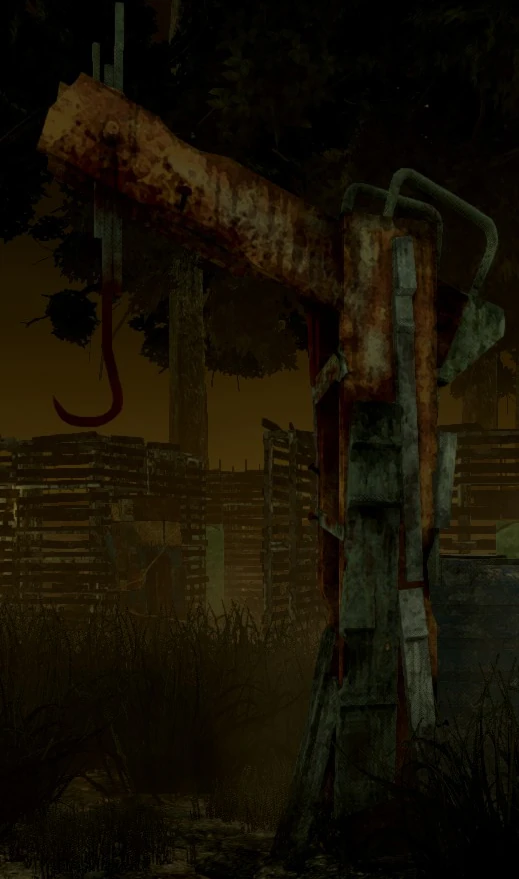
| Haunted by Daylight | The Decimated Borgo | Toba Landing | Nostromo Wreckage | ||
 |
 |
 |
 |
||
| Known as the Esoteric Hook: a metal Hook adorned with an energy canister, it spawns during the Haunted by Daylight Halloween Events. | A wooden Hook decorated with metal spikes and spiky gears. | A Hook made of scrapped machinery, tubing, wires, and metal glued together by pink organic matter. | Known as the Alien Hook: a metal Hook made of a large, dark grey metal part surrounded by black alien growth. It spawns whenever the Killer is The Xenomorph. |
||
History
Original Hook Stages
For Survivors, Hooks have three different stages. Stages 1 and 2 each have a duration of 45 seconds:
| Hook Stage | Health Bar | Actions | Explanation |
|---|---|---|---|
| 1 | 100 - 51 % | Escape Attempts |
A Survivor being hooked for the first time will enter Stage One. A Survivor in Stage One can be rescued by another Survivor or attempt to free themselves from the Hook.
Once the Health Bar drops to 50 %, the Survivor will enter Stage Two. |
| 2 | 50 - 1 % | Struggle Phase |
If a hooked Survivor's health bar reaches half (default 60 seconds or 3 failed escape attempts), will enter Stage Two. If they are rescued before reaching Stage Two , they will start at Stage Two the next time they are hooked. A Survivor in Stage Two, also known as "Struggle Phase", can still be rescued by another Survivor, but will have to struggle against The Entity trying to kill them. |
| 3 | 0 % | Sacrifice |
A Survivor being hooked the third time, required that they were rescued before reaching 0 % health, will enter Stage Three. This also happens if all other survivors are hooked (and no one is in stage 1), or dead. A Survivor in Stage Three gets killed by The Entity, completing the sacrifice. |


Change Log
Patch 1.2.0
- Change: the specific Hook Model is now dependent on the Realm of the Map, rather than on the Killer.
- Before this change, the Hook Models would be chosen based on the Killer, meaning that if the Killer was a Nurse, each Hook would spawn the model currently used in Crotus Prenn Asylum, regardless of whether the Trial played on The MacMillan Estate, Autohaven Wreckers, or Coldwind Farm (the only other available Realms at the time).
- This allowed Survivors to identify a Killer immediately based on the Hook Model, removing the element of surprise (Killers did not have a unique Terror Radius at the time).
- The change was also motivated by artistic choices, as the newest Hook Model at the time (Haddonfield) would have looked quite misplaced on other Realms.
Patch 1.5.3
- Killer Nerf: increased the maximum duration of the Summoning Phase and the Struggle Phase (Hook Stages 1 & 2) from 45 seconds each to 60 seconds each.
Patch 1.8.0
- Survivor Buff: increased the Wiggle Progression bonus from being dropped by the Killer (a.k.a. "dribbling") from +25 % to +33 %.
- Survivor QoL: added so-called "Swivel Hook", allowing Survivors to unhook other Survivors from any angle instead of straight up front.
- This change was added to remove the Killer's ability to completely body-block the Unhook Prompt by standing in front of the hooked Survivor.
Patch 2.0.0
- The number of Hooks spawning in the Trial Grounds is now fixed to the number of Map Tiles divided by 3.
Patch 2.2.0
- Survivors that are being unhooked or unhook themselves no longer take any damage before they regain control of their Character model.
- The Self-Unhook animation has been halved from 2.4 seconds to 1.2 seconds.
Patch 2.3.0
- The Hook animation has been shortened from 2 seconds to 1.5 seconds.
Patch 2.5.0
- All Maps now feature a minimum and maximum number of Hooks able to spawn.
- The minimum spawn distance in-between Hooks is now dependent on the Map and can be affected by Offerings.
- Reduced Basement-to-next-Hook minimum distance to 16 metres and moved the reference point from the middle of the Basement to the top of the stairs.


Patch 3.6.0
- Killer Buff: reduced the Wiggle penalty for dropping a Survivor from +33 % back to +25 %.
- Killer Buff: reduced the Hook Repair timer from 180 seconds to 30 seconds.
- Survivor Buff: reduced the Sabotage time from 16 seconds to 3 seconds.
- Survivor QoL: removed Sabotage Skill Checks.
- Killer Nerf: removed the ability to hook Survivors mid-sabotage.
Patch 3.7.0
- In case of all remaining Survivors reaching the Struggle Phase, The Entity will now instantly drain their remaining life bar and sacrifice them.
- Added additional effects for when Survivors attempt to unhook themselves, making it clearer that this is potentially hurtful and will accelerate the sacrifice process.
Patch 4.7.0
- Reworked the Struggle Phase from mashing buttons/keys to now continuously trigger Skill Checks (akin to Cages of Atonement).
- Failing to give input for 2 successive Skill Checks will instantly complete the sacrifice.
- Missing a Skill Check will decrease the remaining life bar.


Patch 6.1.0
- Survivor Buff: Survivors now receive the Endurance and Haste Status Effects for 5 seconds after being unhooked.
- The Haste Status Effect has a strength of +7 %.
- Survivor Nerf: extended the timer for unhooks to be considered "Safe Unhooks" from 10 seconds to 15 seconds.
Patch 6.2.0
- Survivor Buff: increased the duration of the Endurance and Haste Status Effects from 5 seconds to 10 seconds.
- Survivor Buff: increased the strength of the Haste Status Effect from +7 % to +10 %.
Patch 7.1.0
- Killer Nerf: removed the ability for Killers to grab healthy or injured Survivors while they are unhooking the hooked Survivor.
Patch 7.3.0
- Rework: introduced an Anti-Camping mechanic to Hooks.
- This feature allows Survivors to self-unhook and gain an extended Endurance Status Effect, if the Killer camps the Hook for too long.
- This feature becomes inactive as soon as the Exit Gates are powered.
Patch 7.7.0
- Survivor Nerf: removed the ability to cancel the Unhook interaction partway through.
- This change was motivated by some Survivors abusing this mechanic to maliciously keep someone on the Hook.
Trivia
- Hooks were also referred to as "Meathooks".
- The Hooks mechanic was inspired by a scene in The Texas Chainsaw Massacre, where Leatherface (or The Cannibal) catches Pam and puts her on a Meathook.
- There's an unreleased Hook model named Deer Hanger in the Game files. It is stored in a folder titled Improvised Hooks. It is possible that Killers might have been able to fashion their own Hook from scrap materials at one point during Development, in cases of Survivors having sabotaged all other Hooks.
Hook Gymnastics
- Early on in the Game's life, hooked Survivors had established a way to communicate a Killer's proximity to the other Survivors:
- Hanging still from the Hook meant something along the lines of: "The Killer is far enough away from me or preoccupied with something else, you can come and rescue me now!"
- Spamming the self-unhook animation meant something along the lines of: "The Killer is nearby, patrolling the Hook or camping it. It is not safe to attempt a rescue, stay away and let me hang!"
- This was jokingly referred to as "Hook Gymnastics".
- Many newer Survivors believed that the Hook Gymnastics worked the other way round and signalled a camping Killer by hanging still and struggled once the Killer was away.
- This issue propagates to present-day Dead by Daylight, with most Veteran Players sticking to the original Hook Gymnastics, leading to miscommunication with newer Players, due to the general consensus having been lost.
Hook Spawns
Each Map has a minimum and maximum amount of Hooks that may spawn on it:
- Hooks must have a minimal spawn distance in-between each other unless the minimum amount of spawns is not reached, then they may spawn closer together.
- This minimal spawn distance may be affected by Offerings.
- This minimal spawn distance may be affected by Offerings
Video
| The Outline of the Hook Asset |
|---|