
|
Every Killer has their own individual powers to learn and master. Each Killer has a different way to track and kill their prey. Try them all and experiment with different combinations of Perks and Add-ons. |
||
| ~ Killer Powers, Killer Tutorial |
Powers lists a compendium of all Killer Powers featured in Dead by Daylight.
Each Killer has a unique Power, creating their distinct and unique play-styles.
Additional information can be found in the Power Trivia section on each Killer's article page.
Bear Trap
Bear Traps are found lying around throughout the Trial Grounds, waiting to be picked up and set anywhere."
SPECIAL TRAP: BEAR TRAP
The Trapper starts the Trial with 2 Bear Traps equipped.
Additionally, 8 Disarmed Bear Traps spawn in random locations throughout the environment.
The Auras![]() of Bear Traps are revealed to The Trapper at all times.
of Bear Traps are revealed to The Trapper at all times.
SPECIAL INTERACTION: COLLECTING TRAPS
Press the Interaction button while standing near or above a Bear Trap to retrieve and collect it.
The Trapper may carry up to 2 Bear Traps at a time.
SPECIAL INTERACTION: SETTING TRAPS![]()
Press and hold the Power button to set and arm a carried Bear Trap:


- Grants a +7.5 % Haste
 Status Effect for 5 seconds.
 - Armed Bear Traps trap and immobilise any Survivor stepping into them.
- This will also injure healthy Survivors.
- Trapped Survivors can try to free themselves from it, which may take several attempts, or wait for another Survivor to rescue them.
- Armed Bear Traps also temporarily trap and immobilise The Trapper stepping into them, until he frees his foot and resets it.
- This will cause any carried Survivor to escape from his shoulder.


SPECIAL INTERACTION: RESETTING TRAPS
Press and hold the Power button while standing above a Disarmed Bear Trap to reset and arm it.
SPECIAL INTERACTION: CATCHING SURVIVORS
Press the Interaction button while standing near a Trapped Survivor to lift them out of the Bear Trap and onto The Trapper's shoulder, immediately allowing him to carry them.
Wailing Bell

Allows the user to enter and walk the Spirit World when rung."
SPECIAL OBJECT: WAILING BELL
The Wraith starts the Trial in the Cloaked State, which has the following effects:
- Grants the Undetectable Status Effect.
- Increases his Movement speed to 6 m/s.
- Fully invisible to Survivors who are farther than 20 metres away from him.
- Partially invisible to Survivors who are within 20 metres of him.
- Fully transparent while stationary for a moment and for as long as he remains unmoving.
- Removes the ability to attack or interact with Survivors.
- The Wraith is still able to interact with Props.


Ringing the Wailing Bell can be heard by Survivors throughout the Trial within the following ranges:
- The bell toll has a range of 24 metres.
- The accompanying *Wooosh* noise during the transition phase has a range of 40 metres.
SPECIAL ABILITY: CLOAK / UNCLOAK![]()
The Wraith must Uncloak in order to attack and interact with Survivors.
Press and hold the Power button at any time to ring the Wailing Bell and Uncloak, exiting the Spirit World:
- Boosts his Movement speed to 150 % for 1 second.
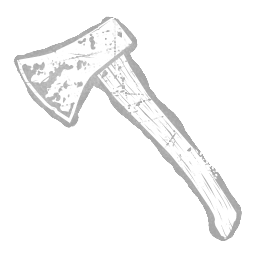
Chainsaw
Grinds through flesh, bone, and soul.
Once revved up, it sends its user into a violent frenzy."
SPECIAL WEAPON: CHAINSAW
Press and hold the Power button to charge the Chainsaw and break into a Chainsaw Sprint:
- Hitting Survivors with the Chainsaw inflicts double damage.
SPECIAL LOCOMOTION: CHAINSAW SPRINT
During a Chainsaw Sprint, The Hillbilly benefits from the following effects:
- Increases his Movement speed to 10.12 m/s.
- Reduces his manoeuvrability.
SPECIAL STATE: OVERDRIVE
Revving the Chainsaw and sprinting with it automatically charges the Overdrive Meter.
It decharges whenever the Chainsaw is not in use for a prolonged time.
Once the meter is full, the Chainsaw is enhanced and benefits from the following effects for 20 seconds:
- Increases the Movement speed of the Chainsaw Sprint to 13 m/s.
- Increases the Charge speed of the Chainsaw by +5 %.
- Reduces the Cool-down time of the Chainsaw by -10 %.
Spencer's Last Breath
Channelling its energy allows The Nurse to pierce and jump through the Spirit World in a blink multiple times in a row.
Doing so leaves her in a state of fatigue."
SPECIAL ABILITY: SPENCER'S LAST BREATH
The Nurse starts the Trial with 2 Tokens.
Press and hold the Power button to charge a Blink.
Release the Power button to initiate a Blink.
Using Spencer's Last Breath consumes -1 Token per Blink / Chain Blink.
SPECIAL LOCOMOTION: BLINK
A Blink allows The Nurse to pierce the Realm of the Entity and teleport through obstacles and walls in a straight line:
- Grants the ability to teleport for up to 20 metres.
- The Nurse can adjust the Teleportation distance by aiming at any point closer to her.
- The Nurse can teleport to other floors by aiming at the ceiling or floor of a room that has another one above or below it.
SPECIAL LOCOMOTION: CHAIN BLINK
After the first Blink, if there is at least 1 Token available, the Chain Blink Window automatically opens for 1.5 seconds, during which The Nurse can initate a Chain Blink:
- Grants the ability to teleport for up to 12 metres.
- The Nurse can adjust the Teleportation distance by aiming at any point closer to her.
- The Nurse can teleport to other floors by aiming at the ceiling or floor of a room that has another one above or below it.
SPECIAL STATE: FATIGUE
After either the Chain Blink Window closes or the final Chain Blink elapses, The Nurse enters a state of Fatigue for 2 to 3 seconds, depending on how many Blinks she chained.
Evil Within


SPECIAL ABILITY: EVIL WITHIN
Evil Within is a tiered Power that requires The Shape to stalk Survivors and drain evil from their shared pool to tier up.
The more he stalks them, the deadlier he becomes.
Evil Within I has the following permanent effects until a tier-up:
- Grants a permanent Undetectable Status Effect.
- Reduces his Movement speed to 4.2 m/s.
- Reduces the Reach of his Lunge Attack by shortening the duration of its open time to 0.2 seconds.
- Allows him to vault Windows in the default time of 1.7 seconds.


Evil Within II has the following permanent effects until a tier-up:
- Reduces his Terror Radius to 16 metres.
- Increases his Movement speed to the default speed of 4.6 m/s.
- Increases the Reach of his Lunge Attack to the default open time of 0.5 seconds.
- Reduces the time to vault Windows to 1.48 seconds.

Evil Within III has the following effects for 60 seconds, after which it automatically regresses back to Evil Within II:
- Causes all Survivors to suffer from the Exposed Status Effect.
- Increases his Terror Radius to the default radius of 32 metres.
- Increases the Reach of his Lunge Attack by extending the duration of its open time to 0.6 seconds.
- Reduces the time to vault Windows further to 1.275 seconds.


SPECIAL ABILITY: STALKING
Press and hold the Power button to stalk all visible Survivors within ~40 metres:
- Stalked Survivors are highlighted to The Shape.
- The colour of their highlight indicates the amount of evil left to drain from them, ranging from white (full) to red (drained).
- Stalking Survivors fills the Power Gauge.
- The closer to a Survivor, the quicker it fills.
- The Shape can only drain evil from one Survivor at a time, prioritising the closest in proximity.
Blackened Catalyst

She bends and shapes mud to her will.
With simple ritualistic drawings, she creates deceitful duplicates of herself, made from mud and decay, which she can use for various effects."
SPECIAL ABILITY: BLACKENED CATALYST
The Hag starts the Trial with 10 Phantasm Traps in her inventory.
Placing additional Phantasm Traps will recycle the oldest one.
SPECIAL TRAP: PHANTASM TRAP
Press the Power button to bend down and draw a muddy sign into the ground, placing and arming a Phantasm Trap.
Survivors entering the Area of Effect, which is only visible to The Hag, will trip the trap, causing a Mud Phantasm to spawn that has the following effects:
- Yanks the camera of the Survivor who tripped the trap towards itself, disorienting them and keeps its sight trained on them.
- Emits a Fake Terror Radius of 8 metres.
Survivors can prevent tripping the trap by doing either of the following:
- Crouch while inside the Area of Effect.
- Interact with Props while inside the Area of Effect.
Survivors can safely remove a trap by wiping it away for 4 seconds when crouching above it.
SPECIAL LOCOMOTION: TELEPORT![]()
Press the Secondary Power button to teleport to any currently tripped Phantasm Trap within 48 metres, taking the place of the Mud Phantasm.
In case of multiple tripped traps, a specific Mud Phantasm can be chosen by aiming at it before teleporting.
Carter's Spark
The Entity has ignited a corrupted and inexhaustible spark in The Doctor's heart which allows him to generate electroconvulsive power at will.
His insidious treatment corrupts the minds of those it touches.
Victims shocked by the corrupt spark begin to lose their grip on reality and, with repeated exposure, inevitably succumb to madness."
SPECIAL ABILITY: CARTER'S SPARK
Striking Survivors with his electro-convulsive abilities, The Doctor increasingly causes them to suffer from the tiered Madness


SPECIAL AFFLICTION: MADNESS
Madness causes increasingly potent afflictions in the affected Survivors, depending on its current tier.
Once Madness is obtained, Survivors are unable to lose it and may only regress it by performing the Snap Out of It interaction.
Madness I has the following permanent effects until a tier-up:
- Causes Survivors to scream once during the tier-up, revealing their location to The Doctor.
- Skill Checks have a chance of 33 % to be Madness Skill Checks.


Madness II has the following permanent effects until a tier-up:
- Causes Survivors to scream once during the tier-up, revealing their location to The Doctor.
- Skill Checks have a chance of 66 % to be Madness Skill Checks.
- Causes Survivors to experience occasional Hallucinations in the form of Illusionary Doctors.
Madness III has the following permanent effects until Survivors Snap Out of It:
- Causes Survivors to scream during the tier-up and then intermittently every few seconds, revealing their location to The Doctor.
- Skill Checks are 100 % Madness Skill Checks.
- Causes Survivors to experience occasional Hallucinations in the form of Illusionary Doctors.
- The Auras of Illusionary Doctors are revealed to The Doctor.
- The Auras
- Suppresses the ability of Survivors to use their Items.
- Suppresses the ability of Survivors to interact both with other Survivors and certain environmental objects.


SPECIAL INTERACTION: SNAP OUT OF IT
Survivors having reached Madness III can perform the Snap Out of It interaction for 12 seconds:
- Succeeding the interaction regresses them back to Madness I.
- Failing the interaction causes them to scream and reveal their location to The Doctor.
SPECIAL ABILITY: SHOCK THERAPY
Press and hold the Power button to perform a Shock Therapy Attack, unleashing a cone-shaped ranged shock attack on the ground in front of The Doctor:
- Shock Therapy has a range of 12 metres and detonates with a delay of 0.8 seconds.
- Increases their Madness by +0.5 Tiers, causing them to scream and reveal their location, if it coincides with a tier-up.
- Interrupts any on-going interaction at the moment of impact.
- Suppresses their ability to perform any interactions, including with Pallets and Windows.


SPECIAL ABILITY: STATIC BLAST
Press and hold the Secondary Power button, once the Power Gauge is full, to perform a Static Blast Attack, unleashing a ranged shock attack that propagates through the air from The Doctor, covering his entire Terror Radius
Survivors struck with a Static Blast Attack suffer from the following effects:
- Increases their Madness by +1 Tier, causing them to scream and reveal their location, if it coincides with a tier-up.
- Interrupts any on-going interaction at the moment of impact.


Survivors suffering from the Oblivious![]() Status Effect when struck by Static Blast have it removed immediately.
Status Effect when struck by Static Blast have it removed immediately.
Static Blast has a Cool-down of 60 seconds.
Hunting Hatchets
The Huntress can throw hatchets with deadly precision."
SPECIAL WEAPON: HUNTING HATCHETS
The Huntress stars the Trial with 7 Hunting Hatchets equipped.
Press and hold the Power button to wind up and charge a Hunting Hatchet.
Release the Power button to throw the Hunting Hatchet or press the Attack button to cancel the throw:
- Releasing at minimum charge throws them at 25 m/s.
- Releasing at maximum charge throws them at 40 m/s.
The Auras
Bubba's Chainsaw
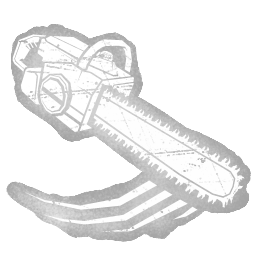
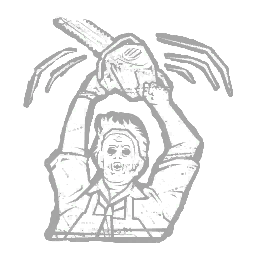
A suitable birthday gift for The Cannibal."
SPECIAL WEAPON: BUBBA'S CHAINSAW
The Cannibal starts the Trial with 3 Tokens.
Tokens automatically recharge at a rate of 0.25 c/s while the Chainsaw is not in use.
SPECIAL ABILITY: CHAINSAW SWEEP
Press and hold the Power button to charge the Chainsaw and break into a Chainsaw Sweep for 2 seconds:
- Hitting Survivors with the Chainsaw inflicts double damage.
- The Chainsaw can hit multiple targets in one sweep.
Using Bubba's Chainsaw consumes 1 Token.
SPECIAL ABILITY: CHAINSAW DASH
Press the Power button again during an on-going Chainsaw Sweep to chain a Chainsaw Dash:
- Resets the Power Gauge timer, extending the Chainsaw Sweep.
- Increases the Cool-down time of the Chainsaw by +1 second per consumed Token.
SPECIAL STATE: TANTRUM
Revving the Chainsaw fills the Tantrum Meter by +20 % per second, with it discharging at the same rate when stopping to rev.
Once the meter is full, or after hitting an obstacle during a Chainsaw Sweep, The Cannibal unleashes a Tantrum for a minimum of 5 seconds, wildly slashing out and damaging any Survivors in close proximity, dealing double damage:
- Increases the Tantrum duration by 1 second per consumed Token.
- Removes any remaining Tokens.
- Reduces his Movement speed by -90 %.
Dream Demon
SPECIAL ABILITY: DREAM DEMON
The Nightmare is cloaked from awake Survivors.
While they can hear his Terror Radius
- The Nightmare is invisible to Survivors farther than 32 metres away.
- The Nightmare is intermittently visible to Survivors from 16 to 32 metres away.
- The Nightmare is fully visible to Survivors closer than 16 metres.
SPECIAL STATE: MICROSLEEP
The mere presence of The Nightmare induces Microsleep in awake Survivors, causing them to passively fall asleep over 60 seconds.
Survivors who woke up with an Alarm Clock are protected from Microsleep for 30 seconds.
SPECIAL STATE: ASLEEP
Survivors who fall asleep automatically enter the Dream World and suffer from the following effects while inside it:
- Causes them to be susceptible to Dream Traps.
- Causes them to suffer from the Oblivious Status Effect.
- Causes them to hear a non-directional Lullaby instead.
Hitting Survivors with a Basic Attack immediately pulls them into the Dream World, unless they are still protected from Microsleep.
SPECIAL INTERACTION: WAKING UP
Survivors have several ways to leave the Dream World and wake up:
- Fail a Skill Check.
- Awake Survivors perform the Wake Up interaction on an asleep Survivor for 3 seconds.
- From the second time onwards, this interaction time is doubled to 6 seconds.
- Interact with their personal Alarm Clock for 3 seconds.
SPECIAL TRAP: DREAM SNARES![]()
Press and hold the Power button to see the outline of a Dream Snare in front of The Nightmare.
Release the Power button to place the trap:
- Causes Survivors who enter its Area of Effect to suffer from a -15 % Hindered Status Effect for as long as they remain inside it.
- This effect lingers for 3 seconds.
- Notifies The Nightmare when tripped.


SPECIAL TRAP: DREAM PALLETS![]()
This trap is only available when using one of 3 specific Add-ons![]() .
.


Press the Power button when near a valid Spawn point for Pallets![]() to place a Dream Pallet there:
to place a Dream Pallet there:
- Dream Pallets are unable to stun The Nightmare and break immediately when dropped.
- Notify The Nightmare when dropped.
SPECIAL LOCOMOTION: DREAM PROJECTION
Press and hold the Secondary Power button, once the Power Gauge is full, to perform a Dream Projection.
Release the Secondary Power button prematurely to cancel the interaction:
- Grants the ability to teleport to any incomplete Generator.
- Causes blood to spew from the selected Generator during the interaction.
- Reduces the Cool-down duration of Dream Projection by a stack-able -15 % for each asleep Survivor, up to a maximum of -60 %.


"You have nothing to worry about. This won't hurt one... little... bit." — Freddy Krueger
Jigsaw's Baptism

The Pig can move stealthily, dash in Ambush attacks and put deadly Reverse Bear Traps on Survivors' heads."
SPECIAL ABILITY: JIGSAW'S BAPTISM
The Pig starts the Trial with 4 Reverse Bear Traps equipped, which cannot be replenished once used.
Additionally, 5 Jigsaw Boxes spawn in random locations in the environment.
SPECIAL LOCOMOTION: CROUCHING
Press the Secondary Power button to transition into the Crouched State:
- Grants the Undetectable Status Effect.
- Reduces her Movement speed to 3.8 m/s.
Press the Secondary Power button again to transition out of the Crouched State.
SPECIAL ABILITY: AMBUSH DASH
Press and hold the Attack button while in the Crouched State to charge and perform an Ambush Dash Attack.:
- Increases her Movement speed to 6.9 m/s for 2.3 seconds while attacking.
- Causes The Pig to automatically exit the Crouched State.
SPECIAL TRAP: REVERSE BEAR TRAPS![]()
Press the Power button while standing above a downed Survivor to attach an unarmed Inactive Reverse Bear Trap to their head.
Whenever a Generator![]() is completed, all currently Inactive Reverse Bear Traps are activated.
is completed, all currently Inactive Reverse Bear Traps are activated.
Active Reverse Bear Traps are armed and on a Death Timer of 150 seconds, which is displayed on the Survivor's Status icon.
Once the Death Timer elapses, the trap snaps open and kills the Trapped Survivor.
The Death Timer is paused whenever that Survivor is downed, hooked, or actively being chased by The Pig.
Trapped Survivors may only leave the Trial normally if their trap is inactive.
Attempting to leave through the Exit Gates![]() with an active trap will trigger the kill mechanism and execute the Survivor halfway into the exit area.
with an active trap will trigger the kill mechanism and execute the Survivor halfway into the exit area.
They may still leave through the Hatch![]() .
.
SPECIAL INTERACTION: JIGSAW BOXES![]()
Survivors can remove a Reverse Bear Trap by interacting with a Jigsaw Box and finding a key.
The Auras![]() of all unsearched Jigsaw Boxes are revealed permanently to Trapped Survivors.
of all unsearched Jigsaw Boxes are revealed permanently to Trapped Survivors.


Trapped Survivors must randomly search between 1 to 4 Jigsaw Boxes:
- Succeeding the search will remove and discard the Reverse Bear Trap.
- Failing the search will cause the Jigsaw Puppet Billy to cackle at the unfortunate Survivor and hide the Aura of the Jigsaw Box.
"You will give everything to me, every cell in your body.
The marks on your arms, they're from another life.
We'll leave that life behind.
When you walk down that corridor there is no turning back.
Do you understand that?" — Jigsaw's Baptism
The Afterpiece Tonic
His favourite, The Afterpiece Tonic, he has used to great effect, intoxicating and capturing many unwilling victims.
The associated Afterpiece Antidote also has useful effects."
SPECIAL ABILITY: THE AFTERPIECE TONIC AND ANTIDOTE
The Clown starts the Trial with a shared stock of 6 Bottles.
Press the Secondary Power button to switch between the Tonic and the Antidote.
Press the Power button to throw a Bottle.
Hold the Power button until a shimmer travels across the Bottle to throw it with maximum strength.
Press and hold the Secondary Power button to replenish the Bottles at any time.
SPECIAL AFFLICTION: TONIC
Upon impact, the Tonic Bottle breaks, releasing a purple Gas Cloud that intoxicates Survivors upon contact and while inside it.
The Clown is immune to its effects.
Intoxicated Survivors suffer from the following effects while inside the Gas Cloud:
- Causes impaired vision.
- Causes involuntary coughing.
- Suppresses the ability to perform Fast Vaults.
- Reduces all Movement speeds through a -15 % Hindered Status Effect.
SPECIAL BENEFIT: ANTIDOTE
Upon impact, the Antidote Bottle breaks, releasing an inactive white Gas Cloud.
The Gas Cloud will turn yellow after 2 seconds and invigorate all Players upon contact.
Invigorated Players benefit from the following effect:
- Increases all Movement speeds through a +10 % Haste Status Effect for 6 seconds.
SPECIAL INTERACTION: NEUTRALISATION
The two types of Gas Clouds instantly neutralise each other upon contact.
Walking from one type into the other one will also neutralise any lingering effects from the former and instead apply the effect(s) of the latter.
Yamaoka's Haunting
The Spirit draws her power from their wrath, haunting the living as retribution for her suffering.
The Spirit can use Yamaoka's Haunting to enter the Ethereal Plane and re-appear at a new location."
SPECIAL ABILITY: YAMAOKA'S HAUNTING
Press and hold the Power button to charge Yamaoka's Haunting and initiate a Phase-Walk for up to 5 seconds:
- Causes The Spirit to depart her physical body and enter the Ethereal Plane, leaving behind a stationary Husk.
Yamaoka's Haunting has a Cool-down of 15 seconds.
SPECIAL LOCOMOTION: PHASE-WALK
During a Phase-Walk, The Spirit experiences the following effects:
- Increases her Movement speed to 7.04 m/s.
- Survivors are invisible to her.
- She can still see and track Scratch Marks.
- She can still see and track Scratch Marks
- The Spirit emits a directional sound cue audible to all Survivors within 24 metres.
- The Husk emits a Terror Radius of 24 metres.


SPECIAL ABILITY: PASSIVE-PHASING
The Spirit is constantly phasing in and out of view for Survivors whenever she is not currently in a Phase-Walk.
Feral Frenzy
Now they draw power from the thrilling freedom of not abiding to any rule but their own."
SPECIAL ABILITY: FERAL FRENZY
Press the Power button to trigger Feral Frenzy:
- Increases their Movement speed to 5.2 m/s.
- Unlocks their ability to perform Feral Vaults and Feral Slashes.
SPECIAL ABILITY: FERAL VAULT
Press the Interaction button during Feral Frenzy while next to a dropped Pallet![]() or a Window
or a Window![]() to perform a Feral Vault:
to perform a Feral Vault:
- Grants the ability to swiftly vault over them in 0.9 seconds.
SPECIAL ABILTIY: FERAL SLASH
Press the Attack button during Feral Frenzy to initiate a Feral Slash Attack
Hitting a Survivor with it applies the following effects:
- Injures Survivors and causes them to suffer from the Deep Wound Status Effect.
- Instantly refills the Power Gauge.
- Triggers Killer Instinct on all Survivors inside the Terror Radius who are not currently suffering from Deep Wound.
- Increases the Movement speed of The Legion by an additional +0.2 m/s per hit Survivor, up to a maximum of +0.8 m/s after four successful Feral Slashes.
- Causes the fifth Feral Slash to be lethal and apply double damage.
- This also affects Survivors already suffering from Deep Wound.


SPECIAL STATE: FATIGUE
After Feral Frenzy either elapses or The Legion cancel it prematurely, they enter a state of Fatigue for 3 seconds.
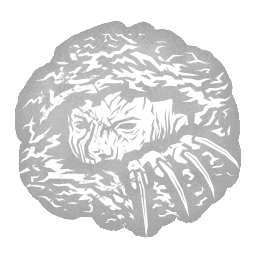
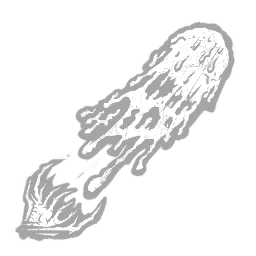
Vile Purge

Her toes blackened, her neck mushroomed into cysts, and her throat gagged with bloody vomit."
SPECIAL ABILITY: VILE PURGE
Press and hold the Power button to charge Vile Purge.
Release the Power button to unleash a stream of infectious bile or press the Attack button to swallow it back down:
- Hitting Survivors with a Vomit Projectile inflicts them with Sickness.
- Successive hits slowly fill the Sickness Meter.
- Hitting environmental objects causes them to become infectious to Survivors for 40 seconds.
SPECIAL STATE: SICKNESS
Sickness is indicated on the Status HUD icon of affected Survivors, which also doubles as a Sickness Meter:
- Infected Survivors with a partially filled Sickness Meter vomit at random intervals, infecting both nearby environmental objects and other Survivors.
- Infected Survivors with a full Sickness Meter are put into the Injured State and suffer permanently from the Broken Status Effect.


SPECIAL OBJECT: POOLS OF DEVOTION
Pools of Devotion![]() spawn randomly throughout the environment:
spawn randomly throughout the environment:


- 5 Pools of Devotion spawn in the Uncorrupted State.
- 1 Pool of Devotion spawns in the Corrupted State.
SPECIAL INTERACTION: CLEANSING INFECTION
Survivors can approach an Uncorrupted Pool of Devotion and interact with it to cleanse themselves.
Cleansing removes all Sickness and automatically heals them back to full health, but corrupts the Pool of Devotion.
SPECIAL INTERACTION: INGESTING CORRUPTION
The Plague can approach a Corrupted Pool of Devotion and press and hold the Interaction button to ingest its corruption and empower her purge:
- Replaces Vile Purge with Corrupt Purge for 60 seconds.
- Resets the Pool of Devotion.
The Plague automatically receives Corrupt Purge when Survivors corrupt all available Pools of Devotion, resetting them all.
SPECIAL ATTACK: CORRUPT PURGE
Press and hold the Power button to charge Corrupt Purge
Release the Power button to unleash a stream of lethal bile or press the Attack button to swallow it back down:
- Hitting Survivors with a Vomit Projectile inflicts them with damage, causing them to lose a Health State.


Night Shroud


When the urge to kill swelled, he'd know exactly how and where to strike."
SPECIAL ABILITY: NIGHT SHROUD
Press the Power button to enter Stealth Mode:
- Grants a permanent Undetectable Status Effect.
- Unlocks the ability to Stalk Survivors.
Performing a Basic Attack automatically ends Stealth Mode and depletes the Power Gauge.
Night Shroud has a Cool-down of 24 seconds.
SPECIAL LOCOMOTION: CROUCHING
Press the Secondary Power button to Crouch:
- Reduces his Movement speed to 3.8 m/s.
- Causes him to be harder to be spotted and revealed by Survivors.
SPECIAL ABILITY: STALKING
Press the Power button when in Stealth Mode to stalk Survivors within 40 metres, filling their Stalk Meter at +20 pts/s.
SPECIAL ABILITY: LEANING AND STALKING
Stalking Survivors while leaning doubles the rate to +40 pts/s.
SPECIAL STATE: MARKED

- Exposed Status Effect.
- Suppresses their ability to reveal The Ghost Face.
SPECIAL INTERACTION: REVEALING
Survivors can attempt to reveal The Ghost Face when he is in Stealth Mode, forcing him out of it and disabling his ability to continue stalking them.
Survivors must see at least 30 % of his model in the central part of their screen while he is within 32 metres in order to start revealing him over the course of 1.5 seconds:
- Triggers markers on the HUD of The Ghost Face, betraying the direction from which he is being revealed from.
- Triggers Killer Instinct for 2 seconds after a successful reveal.
"Don't mind me. That's it, keep going. Perfect. That's the image I'll keep of you." — The Ghost Face
Of the Abyss
Suddenly the ground ripped open, swallowing The Demogorgon whole."
SPECIAL ABILITY: OF THE ABYSS
Press and hold the Power button to channel Of the Abyss:
- Triggers Killer Instinct on Survivors inside the Area of Effect of Active Portals.
- Unlocks the ability to perform a Shred Attack.
SPECIAL ATTACK: SHRED![]()
Press the Attack button after charging Of the Abyss to at least 65 % to dash forwards and unleash a vicious slash:
- Causes The Demogorgon to lunge forwards at 18.4 m/s.
- Grants the ability to destroy Breakable Walls and dropped Pallets.


SPECIAL OBJECTS: PORTALS
The Demogorgon starts the Trial with 6 Portals.
Press and hold the Secondary Power button to bend down and create an Inactive Portal in the ground:
- Inactive Portals are invisible to Survivors and cannot be sealed.
- Inactive Portals do not have an Area of Effect and thus do not trigger Killer Instinct.
- Active Portals are visible to Survivors and can be sealed.
- Active Portals have an Area of Effect of 4 metres around them.
- Survivors inside the Area of Effect suffer permanently from the Oblivious Status Effect and are revealed by Killer Instinct while The Demogorgon is channelling Of the Abyss.
- Survivors inside the Area of Effect suffer permanently from the Oblivious
SPECIAL INTERACTION: SEALING PORTALS
Survivors can interact with Active Portals to seal them, either alone or together with other Survivors, though at increasingly reduced efficiency:
- 1 Survivor seals a Portal in 12 seconds.
- 2 Survivors seal a Portal in ~9 seconds.
- 3 Survivors seal a Portal in 8 seconds.
- 4 Survivors seal a Portal in 6 seconds.
SPECIAL LOCOMOTION: TRAVERSING THE UPSIDE DOWN
Press and hold the Secondary Power button while standing atop any Portal and aiming at any Highlighted Portal to enter the first Portal and traverse the Upside Down, appearing at the second Portal:
- Transforms Inactive Portals into Active Portals.
- Grants the Undetectable Status Effect for 5 seconds.
Yamaoka's Wrath
SPECIAL ABILITY: YAMAOKA'S WRATH
Yamaoka's Wrath passively fills the Power Gauge by +0.2 c/s, up to a maximum of 98 Charges.
Successful Basic Attacks on healthy Survivors fill the Power Gauge by +40 Charges.
SPECIAL STATE: ABSORPTION MODE![]()
Press and hold the Power button to absorb nearby Blood Orbs left in the environment by injured Survivors, further filling the Power Gauge:
- Fills the Power Gauge by +2.5 Charges per Orb.
- The Auras of Blood Orbs are revealed to The Oni within 8 metres.
- Reduces his Movement speed to 3.45 m/s.
SPECIAL STATE: BLOOD FURY
Once the Power Gauge is full at 100 Charges, press the Secondary Power button to transition into Blood Fury:
- Grants the ability to perform Demon Dash and Demon Strike.
SPECIAL LOCOMOTION: DEMON DASH
Press and hold the Power button during Blood Fury to perform a Demon Dash:
- Increases his Movement speed to 7.82 m/s.
- Reduces his manoeuvrability.
SPECIAL ATTACK: DEMON STRIKE
Press and hold the Attack button during Blood Fury to perform a Demon Strike with extended reach:
- Striking Survivors with the Kanabo inflicts double damage.
- The Oni will strike his Kanabo a total of 3 times.
- The Oni can hit and damage multiple Survivors with his Kanabo.
The Redeemer
SPECIAL ABILITY: THE REDEEMER
Press and hold the Power button to Aim Down Sights.
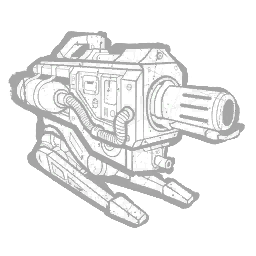
SPECIAL WEAPON: SPEARGUN
Press the Attack button during ADS to shoot The Redeemer, launching a high-speed chained projectile that can spear Survivors within 18 metres, allowing The Deathslinger to reel them in.
SPECIAL INTERACTION: REELING IN
Press and hold the Power button while a Survivor is speared by The Redeemer to reel them in towards you:
- Walking backwards increases the Reeling speed.
- Speared Survivors struggling against the pull of the chain slows the Reeling speed.
Once a Survivor is close enough to you, press the Attack button to break the chain and strike the Survivor with a Basic Attack:
- Causes the Survivor to suffer from the Deep Wound Status Effect.
The Deathslinger can break the chain manually by attacking at any point during the Reeling-in process.
SPECIAL INTERACTION: BREAKING THE CHAIN
Whenever the chain of The Redeemer experiences tension or collides with the environment, it experiences stress that will eventually cause it to break.
The more stress, the faster it will break:
- Causes The Deathslinger to be stunned for 3 seconds.
- Causes the Speared Survivor to break free, but suffer from the Injured State and Deep Wound.
SPECIAL INTERACTION: RELOADING
Press and hold the Secondary Power button to reload The Redeemer after every shot.
Rites of Judgement

SPECIAL ABILITY: RITES OF JUDGEMENT
Press and hold the Power button while moving to carve a Torment Trail into the ground for up to 5 seconds:
- The Power Gauge pauses when standing still while carving.
SPECIAL AFFLICTION: TORMENT
Survivor walking or running over the Torment Trail suffer from the following effects:
- Triggers Killer Instinct for 3 seconds.
- Inflicts Torment.
Survivors can avoid these afflictions by crouching over the Torment Trail and completely remove Torment by being rescued or rescuing another Survivor from a Cage of Atonement![]() .
.


The Executioner can choose to send downed Tormented Survivors to a Cage of Atonement, instead of hooking them.
SPECIAL OBJECT: CAGE OF ATONEMENT![]()
Press the Secondary Power button while standing over a downed Tormented Survivor to send them to a Cage of Atonement.
SPECIAL ATTACK: PUNISHMENT OF THE DAMNED![]()
Press the Attack button during Rites of Judgement to unleash a wave of force in the form of an Attack Trail, damaging any Survivors in its path.
SPECIAL INTERACTION: FINAL JUDGEMENT![]()
Press the Secondary Power button while standing over a downed Tormented Survivor that has reached the second Hook Stage to execute them on the spot, performing a Mini-Mori.
Blighted Corruption

SPECIAL ABILITY: BLIGHTED CORRUPTION
The Blight starts the Trial with 5 Tokens.
Using Blighted Corruption consumes -1 Token per Rush / Lethal Rush.
SPECIAL LOCOMOTION: RUSH
Press the Power button to initiate a Rush that lasts for up to 3 seconds:
- Increases his Movement speed to 9.2 m/s.
- Reduces his manoeuvrability.
- Suppresses his ability to perform an attack.
SPECIAL INTERACTION: SLAM
Running into obstacles or walls during a Rush causes The Blight to perform a Slam and opens the Chain Rush Window.
SPECIAL LOCOMOTION: LETHAL RUSH
Press the Power button during the Chain Rush Window to chain a Lethal Rush that lasts for up to 3 seconds:
- Increases his Movement speed to 9.2 m/s.
- Reduces his manoeuvrability.
- Grants the ability to perform an attack by pressing the Attack button.
- Attacking Breakable Walls or dropped Pallets breaks them.
- Attacking Breakable Walls
SPECIAL STATE: FATIGUE
After either the Chain Rush Window closes, the final Lethal Rush elapses, or The Blight fails to perform a Slam, he enters a state of Fatigue for 2.5 seconds.
Blood Bond


Together they hunt as brother and sister, doubling the threat to Survivors."
SPECIAL ABILITY: BLOOD BOND
Their shared bond allows The Twins to take control individually.
The Twins see the other sibling's Aura![]() at all times.
at all times.
SPECIAL INTERACTION: UNBIND VICTOR![]()
Press the Power button while controlling Charlotte to unbind Victor from her chest, granting him control while she enters a Dormant State.
SPECIAL STATE: DORMANT
While in the Dormant State, Charlotte experiences the following effects:
- Suppresses her Terror Radius and the Red Stain.
- Allows her to temporarily retain her collision with Survivors for 30 seconds.
SPECIAL INTERACTION: SWITCH SIBLING
Press the Secondary Power button to switch control between Charlotte
SPECIAL ABILITY: VICTOR
Victor experiences the following effects while controlling him:
- Hides the Status HUD and disables all active effects from Charlotte's Perks and Add-ons.
- Suppresses the ability to see Scratch Marks.
- Increases his Movement speed to 6.0 m/s.
- Pools of Blood appear to him in bright red.
- Grants the ability to search Lockers for Survivors.
- If he finds one, control will automatically revert to Charlotte while Victor keeps the hiding Survivor trapped inside for 10 seconds.


- Survivors walking or running inside Victor's Shriek range trigger Killer Instinct.
- This effect lingers for 1.5 seconds after leaving the Shriek range.
- Crouching avoids triggering the effect altogether.
SPECIAL ABILITY: POUNCE
Press and hold the Power button while controlling Victor to charge a Pounce.
Press the Attack button to unleash it, causing him to leap forwards
Hitting Survivors with a Pounce causes the following effects:
- Victor latches onto healthy Survivors, causing control to automatically revert to Charlotte.
- This puts them into the Injured State.
- This puts them into the Injured State
- Victor downs already injured Survivors, instead of latching on, causing control to remain with him.
- He is vulnerable for 3 seconds after missing a Pounce.
- He is vulnerable for 5 seconds after downing a Survivor with a Pounce.
SPECIAL INTERACTION: LATCHING ON
The Survivor Victor has latched himself onto suffers permanently from the following effects until they either manage to remove him or they are downed by Charlotte:
- Suffers from the Broken, Incapacitated, and Oblivious Status Effects.
- Suppresses their ability to enter Lockers.
- Suppresses their ability to leave through the Exit Gates.
- This effect lingers for 5 seconds after removing Victor.
- Triggers Killer Instinct on other nearby Survivors.


SPECIAL INTERACTION: REMOVING / CRUSHING VICTOR
Survivors can counter Victor in two ways: Crushing or Removing:
- Crushing is available whenever Victor is idling and control is with Charlotte, or for a short duration after a Pounce without him latching on, and takes 0.35 seconds to complete.
- Removing is available whenever Victor is latched onto a Survivor and takes 8 seconds to complete.
SPECIAL INTERACTION: RECALLING VICTOR
Victor will automatically return to Charlotte after idling for 90 seconds.
Charlotte can recall him earlier already after 30 seconds.
Showstopper
SPECIAL ABILITY: SHOWSTOPPER
The Trickster stars the Trial with 44 Blades equipped.
Press and hold the Power button to enter the Throw State and wind up the Blades.
Release the Power button to exit the Throw State.
SPECIAL STATE: THROW STATE
While in the Throw State, with a Blade at the ready, press the Attack button to throw a single one or press and hold it to unleash a flurry of them:
- Blades are launched at a rate of 3⅓ Blades per second.
- Blades are launched at a speed of 55 m/s for up to 128 metres.
- Reduces his Movement speed to 3.86 m/s.
The Auras
SPECIAL AFFLICTION: LACERATION
Survivors hit with Blades accumulate +1 Charge of Laceration, filling their Laceration Meter.
Once the Laceration Meter is full at 8 Charges, the affected Survivor suffers from the following effects:
- Loses 1 Health State.
- This causes them to stop dead in their tracks, when they transition into the Dying State.
- This causes them to stop dead in their tracks, when they transition into the Dying State


SPECIAL ABILITY: MAIN EVENT
In addition to filling the Laceration Meter, each successful hit with Blades simultaneously charges the Main Event Meter at the same rate.
Once the Main Event Meter is full at 8 Charges, press the Secondary Power button to activate Main Event for a minimum of 6 seconds, unless The Trickster cancels it prematurely by pressing the Secondary Power button again:
- Grants the ability to throw an unlimited amount of Blades.
- Increases the Throw rate of Blades by +66 %.
- Increases the duration of Main Event by +0.5 seconds per obtained Combo Rank.
T-Virus
Its effects heighten aggression and strength within The Nemesis."
SPECIAL ABILITY: T-VIRUS
The power of The Nemesis expands as his Mutation Rate grows.
Mutation Rate 1 has no special benefits for The Nemesis:
- A Tentacle Strike is unable to break Breakable Walls and dropped Pallets.
- A Tentacle Strike has a range of 5 metres.
- Reduces his Movement speed wile charging a Tentacle Strike to 3.8 m/s.
Mutation Rate 2 has the following benefits for The Nemesis:
- Grants the ability for a Tentacle Strike to break Breakable Walls and dropped Pallets.
Mutation Rate 3 has the following additional benefits for The Nemesis:
- Increases the range of the Tentacle Strike to 6 metres.
- Increases his Movement speed wile charging a Tentacle Strike to 4.0 m/s.
SPECIAL ATTACK: TENTACLE STRIKE
Press and hold the Power button to charge a Tentacle Strike, then press the Attack button to unleash it.
Survivors hit with a Tentacle Strike grant The Nemesis Contamination Points towards his Mutation Rate and become afflicted by Contamination:
- Grants +3 Points for hitting Survivors not yet afflicted with Contamination.
- Grants +1 Point for hitting Survivors already afflicted with Contamination.
- Causes all hit Survivors to suffer briefly from a -20 % Hindered Status Effect for 0.25 seconds.
SPECIAL AFFLICTION: CONTAMINATION
Survivors suffering from Contamination are susceptible to damage from being either by a Tentacle Strike or by a Zombie.
Contaminated Survivors occasionally cough, potentially betraying their location.
SPECIAL ENEMY: ZOMBIES
During the Trial, 2 Zombies spawn and roam randomly through the environment.
Both of their Auras
Zombies can track nearby Survivors and are attracted to Loud Noise Notifications.
They can attack Survivors coming too close to them and abide by the same rules as a Tentacle Strike doing so.
Destroying Zombies will cause them to respawn after 12 seconds from below a random Hook![]() .
.
Doing so with a Tentacle Strike as The Nemesis will also grant +1 Point towards Mutation Rate.


Survivors have limited means to counter Zombies:
- Using Flashlights, Firecrackers, or Flash Grenades on them blinds and stuns them in place for 15 seconds.
- Stunning them with a Pallet or Head On destroys them and causes them to respawn after 45 seconds.


SPECIAL ITEM: VACCINE
Survivors can cure themselves or other Survivors from Contamination by locating a Supply Case


- A total of 4 Supply Cases spawn in random locations in the environment.
- The Auras of Supply Cases are revealed to Contaminated Survivors at all times.
- Each Supply Case contains 1 single-use Vaccine.
- Using the Vaccine triggers Killer Instinct for 3 seconds.
Summons of Pain
SPECIAL ABILITY: SUMMONS OF PAIN
Press the Power button to conjure a Gateway up to 16 metres away in front of The Cenobite.
Release the Power button to open the Gateway and possess it.
SPECIAL ATTACK: POSSESSED CHAIN
Press the Attack button while possessing the Gateway to summon forth a guided Possessed Control under your control.
Hitting a Survivor with the Possessed Chain causes the following effects:
- Binds the Survivor with 3 Chains.
- Reduces their Movement speed:
- 1.13 m/s with 3 Chains.
- 1.695 m/s with 2 Chains.
- 2.26 m/s with 1 Chain.
- Causes them to suffer from the Incapacitated Status Effect.
- Suppresses their ability to run.
- Blocks the Exit Gates.
- This effect lingers for 5 seconds after all Chains are removed.
SPECIAL INTERACTION: BREAKING CHAINS
Bound Survivors can perform the Break Free interaction to remove one Chain at a time, each taking 1 second.
Chains are broken upon colliding with the environment, which will spawn a replacement Chain that will attempt to bind the Survivor again.
Chains are also broken when colliding with other Players, but this will not spawn a replacement Chain.
SPECIAL ITEM: LAMENT CONFIGURATION![]()
The Lament Configuration![]() spawns in a random location in the environment at the start of the Trial and slowly charges a Chain Hunt
spawns in a random location in the environment at the start of the Trial and slowly charges a Chain Hunt

The Aura![]() of the Lament Configuration is revealed to Survivors in white at all times and changes to yellow during an active Chain Hunt.
of the Lament Configuration is revealed to Survivors in white at all times and changes to yellow during an active Chain Hunt.
Any Survivor can pick up the Lament Configuration to prevent it from continuing charging a Chain Hunt or ending an on-going one, but not without suffering from the following effects:
- Causes the Survivor to suffer from a permanent Oblivious Status Effect.
- Causes all of their ambient sounds to be replaced with a haunting tune.
- Triggers a Chain Hunt targetting only them.
If they are attacked by The Cenobite, it is dropped from their grasp and respawns after 30 seconds.
SPECIAL ABILITY: CHAIN HUNT
When left to its own devices, the Lament Configuration charges a Chain Hunt over the course of 90 seconds.
During a Chain Hunt, Survivors are repeatedly targetted by Chains spawning from nearby Gateways, which attempt to bind them until 3 Chains are attached to them.
This process continues indefinitely until a Survivor picks up the Lament Configuration.
If The Cenobite picks it up from the ground himself, he instantly starts a Chain Hunt in addition to the following effects:
- Causes all Survivors to be bound by 3 Chains.
- Causes all Survivors to scream and reveal their location for 3 seconds.
- Causes the Lament Configuration to respawn after 10 seconds.
SPECIAL INTERACTION: SOLVING
Solving the Lament Configuration takes 6 seconds to complete:
- Triggers Killer Instinct.
- Causes it to disappear and respawn in a random location after 45 seconds upon success.
SPECIAL LOCOMOTION: TELEPORT
While a Survivor is solving the Lament Configuration, The Cenobite is granted the ability to teleport to within 10 to 12 metres of their location.
- Interrupts the Solving process and briefly binds the Survivor in place with Chains shooting from the Lament Configuration.
Birds of Torment
SPECIAL ABILITY: BIRDS OF TORMENT
The Artist starts the Trial with 3 Tokens.
Press the Power button to charge Birds of Torment and visualise a Flight Path in front of her.
Press the Attack button to consume -1 Token to summon a Dire Crow that faces in the direction of the Flight Path.
Press it again to summon another Dire Crow for each remaining Token.
SPECIAL ATTACK: DIRE CROWS
Dire Crows can stay idling for up to 10 seconds, before they dissolve.
The timer is reset each time a new Dire Crow is summoned.
The Auras![]() of all Dire Crows are revealed to The Artist at all times.
of all Dire Crows are revealed to The Artist at all times.
Survivors coming into contact with idling Dire Crows are damaged, but cause them to dissolve instantly.
Press the Secondary Power button to launch all available Dire Crows in the direction of their individual Flight Paths.
While travelling on their Flight Path of 7.5 metres, Dire Crows can damage Survivors coming into contact with them.
Once a Dire Crow flies past its Flight Path or collides with an obstacle in the environment while still on it, it transforms into a Swarm.
SPECIAL INTERACTION: SWARM
Swarms continue travelling across the environment, while passing through any environmental obstacles.
The Auras of travelling Swarms are revealed to all Players at all times.
Swarms trigger Killer Instinct for 3 seconds on all Survivors too close to their path while travelling past them.
When a Swarm collides with a Survivor, it starts swarming them with a Murder of Crows.
The Auras of Murder of Crows are revealed to The Artist at all times, unless the Swarmed Survivors start repelling them, causing it to be hidden after 2.5 seconds.
When a Swarm collides with a Swarmed Survivor, they are damaged.
SPECIAL INTERACTION: REPELLING
Swarmed Survivors can perform the Repel interaction for 8 second to remove the Murder of Crows.
They can also instantly remove it by entering a Locker![]() .
.
If Swarmed Survivors collide with an idling Dire Crow while performing the Repel interaction, the action is reset.
Deluge of Fear


SPECIAL ABILITY: DELUGE OF FEAR
The Onryō starts the Trial in the Demanifested State, which has the following effects:
- Grants the Undetectable Status Effect.
- This effect lingers for 1 second after Manifesting.
- Fully invisible to Survivors who are farther than 24 metres away from her.
- Intermittently invisible to Survivors who are within 24 metres of her.
- This effect lingers for 4 seconds after Manifesting.
- Removes the ability to attack or interact with Survivors.
- The Onryō is still able to interact with Props.
- The Onryō cannot be stunned by Pallets.
SPECIAL ABILITY: MANIFESTATION / DEMANIFESTATION
Press the Power button while Demanifested to Manifest and be able to attack and interact with Survivors.
Press the Power button while Manifested to Demanifest again.
SPECIAL PROP: TV![]()
TVs![]() spawn randomly throughout the environment.
spawn randomly throughout the environment.
They are turned off at the start of the Trial, but turn on automatically after 30 seconds.
They become turned off for 70 seconds after a Survivor inserts a VHS Tape![]() or for 45 seconds after The Onryō projects through it.
or for 45 seconds after The Onryō projects through it.


TVs have an Area of Effect of 16 metres around them within which they apply Condemned and any other applicable effects.
SPECIAL LOCOMOTION: PROJECTION
Press the Secondary Power button while Demanifested to project yourself to any powered TV in the environment.
If the Power Gauge is full when projecting, all Survivors within the Area of Effect of any powered TV receive +1 Stack of Condemned.
After a Projection, her Movement speed is increased to 6.9 m/s for 2 seconds.
SPECIAL AFFLICTION: CONDEMNED
Interacting with the Power of The Onryō causes Survivors to gain Condemned, slowly filling their Condemned Meter.
Hooking a Survivor locks in some of their Condemned mkaing the affected Stacks impossible to remove:
- The first time being hooked locks in all current Condemned up to 3 Stacks, leaving a minimum of 4 Stacks empty.
- The second time being hooked locks in all current Condemned up to 6 Stacks, leaving a minimum of 1 Stack empty.
SPECIAL INTERACTION: INEXORABLE STARE
Upon reaching full Condemned the affected Survivors triggers Killer Instinct for 6 seconds.
Press the Secondary Power button while standing over a downed and fully Condemned Survivor to execute them on the spot, performing a Mini-Mori.
SPECIAL INTERACTIONS: RETRIEVING TAPE / TURNING OFF TV
Survivors can walk up to any powered TV and interacting with it to retrieve its Cursed Tape, which temporarily turns it off and prevents The Onryō from projecting to it.
Inserting the Cursed Tape into a different TV spreads the message of The Onryō and removes -3 Stacks of Condemned.
Reign of Darkness
And when night falls, it is nearly impossible."
SPECIAL ABILITY: DELUGE OF FEAR
The Dredge starts the Trial with 3 Tokens.
Press and hold the Power button to activate The Gloaming while leaving a Remnant behind:
- Reduces its Movement speed to 3.68 m/s.
- Removes the ability to attack or interact with Survivors or interact with Props.
SPECIAL LOCOMOTION: THE GLOAMING
While roaming the environment in this state, the Auras
Press the Secondary Power button to consume -1 Token and teleport into any Locker at a speed of 12 m/s.
Press it again while inside a Locker to teleport into another Locker until all Tokens are consumed.
Press the Attack button to cancel The Gloaming and instantly return to the Remnant, if it is still available.
The Remnant is removed after the first teleport or when a Survivor collides with it.
The Gloaming has a Cool-down of 12 seconds during Daytime and 4 seconds during Nightfall.
SPECIAL INTERACTION: HIDING INSIDE LOCKERS
After teleporting to a Locker The Dredge sits inside it and can observe the environment outside.
While there is no time limit to this, nearby Survivors will hear a warning sound after 8 seconds have elapsed.
Press the Interaction button to exit the Locker.
If The Dredge teleports into a Locker already occupied by a Survivor, it will trap the Survivor and emerge from the Locker carrying them.
This also happens when a Survivor interacts with a Locker in any way that is already occupied by The Dredge.
SPECIAL INTERACTION: LOCKING LOCKERS
All Lockers spawn with an open latch on their door that Survivors can interact with to close it and lock the door.
Locked Lockers cannot be entered by Survivors and take priority when The Dredge teleports to them.
The Dredge takes 3 seconds to open a Locked Locker from the inside, making a lot of noise in the process.
Once The Dredge emerges from a Locked Locker, its lock is broken permanently.
The Dredge can also break the lock from the outside by hitting it with a Basic Attack.
SPECIAL AFFLICTION: NIGHTFALL
The Nightfall Meter fills passively at a rate of +0.25 c/s during Daytime.
The fill rate is accelerated whenever The Dredge uses its Power and when Survivors are injured or hooked:
- Teleporting to the Remnant grants +10 Charges.
- Hooking a Survivor or injuring them with a Basic Attack grants +20 Charges.
- Hiding inside a Locker grants +6 c/s.
- Each injured Survivor grants a stack-able +0.75 c/s, up to a maximum of +3 c/s.
- Grants the Undetectable Status Effect.
- Increases its Teleporation speed to 38 m/s.
- Reduces the Cool-down duration of The Gloaming to 4 seconds.
- Survivors trigger Killer Instinct within 16 metres of Lockers occupied by The Dredge or The Remnant upon returning to it.
Virulent Bound
SPECIAL ABILITY: VIRULENT BOUND
The Mastermind starts the Trial with 2 Tokens.
SPECIAL ATTACK: BOUND ATTACK
Press and hold the Power button to charge Virulent Bound, reducing his Movement speed to 3.68 m/s while he prepares to strike.
Press the Attack button to initiate a Bound Attack, consuming -1 Token, or release the Power button to cancel it.
Press the Attack button again during the Chain Bound Window of 2 seconds to initiate a second, longer Bound Attack, if there is still a Token available:
- Increases his Movement speed to 14 m/s during a Bound Attack.
- The first Bound lasts for 0.5 seconds.
- The second Bound lasts for 1 second.
SPECIAL INTERACTION: COLLISION
Colliding with a Survivor during a Bound Attack causes The Mastermind to grab them and continue travelling for the remaining duration:
- Crashing into an obstacle with a Survivor causes The Mastermind to slam them against, causing damage, after which they are released from his grasp.
- Failure to crash into an obstacle with a Survivor causes The Mastermind to throw them a few metres instead.
- If they crash into an obstacle then, they also receive damage.
- If they still fail to crash into anything, they will be unharmed.
- In any case, the Survivor is infected with Uroboros.
- Increases their Infection Meter by +20 Charges, if they were already infected.
- Blocks the Exit Gates.
- This effect lingers for 5 seconds after the Survivor is released from a Bound.
SPECIAL INTERACTION: VIRULENT VAULT
Colliding with a dropped Pallet![]() or a Window
or a Window![]() during a Bound Attack causes The Mastermind to automatically vault over it.
during a Bound Attack causes The Mastermind to automatically vault over it.
SPECIAL AFFLICTION: UROBOROS INFECTION
Uroboros grows in strength the longer Survivors are infected by it:
- Being infected passively grants +0.8 c/s.
- First becoming infected or colliding with The Mastermind during a Bound Attack while already infected grants +20 Charges.
Once the Infection Meter is full at 100 Charges, the affected Survivor reaches Critical Infection:
- Causes them to suffer from a permanent -8 % Hindered Status Effect.
- Causes them to instantly be carried when colliding with The Mastermind during a Bound Attack, regardless of their Health State.
SPECIAL ITEM: FIRST AID SPRAY![]()
Survivors can cure themselves or other Survivors from Uroboros by locating a Supply Case![]() and searching it for a First Aid Spray
and searching it for a First Aid Spray![]() :
:

- A total of 6 Supply Cases spawn in random locations in the environment.
- The Auras of Supply Cases are revealed to Infected Survivors at all times.
- Each Supply Case contains 1 First Aid Spray with 2 uses.
- Using the First Aid Spray triggers Killer Instinct for 4 seconds.
Guardia Compagnia


Together, the Guardia Compagnia fights for their own freedom, killing anyone who gets in their way."
SPECIAL ABILITY: GUARDIA COMPAGNIA
The Knight can summon his three loyal companions one at a time to patrol nearby areas, hunt Survivors, or perform tasks on his behalf.
SPECIAL ABILITY: GUARD SUMMON
Press and hold the Power button to enter the Guard Summon Mode for a maximum of 10 seconds.
Press it again to exit the mode prematurely.
Exiting the mode will summon one of 3 Guards, in fixed order, who will do his bidding, each with his own special abilities:
- The Carnifex performs a Guard Order more quickly and has a longer Hunt duration.
- The Assassin walks faster during a Hunt and inflicts hit Survivors with Deep Wound Status Effect.
- The Jailer walks faster during a Patrol with a larger Detection range, and has a longer Patrol duration.
SPECIAL ABILITY: GUARD PATROL
While in the Guard Summon Mode, The Knight can move forwards at 13.8 m/s while steering with his camera, represented to Survivors as a Ghostly Orb that quickly fades to become invisible after exceeding 10 metres in length.
Moving in this form leaves a trail up to a maximum of 32 metres in length, known as the Patrol Path.
Once The Knight exits the mode, a Guard is summoned and starts backtracking the Patrol Path.
Once he reaches the origin of the Patrol Path, he continues patrolling along the pathed route until either the Power Gauge is depleted or he detects a Survivor in his Detection range, which will initiate a Hunt.
The Knight can cancel an active Patrol by hitting the Guard with a Basic Attack.
Drawing a Patrol Path that exceeds 10 metres in length grants the following effects to The Knight:
- Grants a +5 % Haste Status Effect for 2 to 10 seconds, depending on the final length of the Patrol Path.
- Reduces the duration of the Hunt Start-up phase by -10 to -25 %, depending on the final length of the Patrol Path.
SPECIAL ABILITY: GUARD ORDER
While in the Guard Summon Mode, The Knight can command his Guard to perform the Break or Damage Action on Breakable Walls
Damaging a Generator regresses it by -5 %.
SPECIAL ATTACK: GUARD HUNT
If a Survivor is inside the Detection range of a Guard and either in his line-of-sight or triggers a Loud Noise Notification, the Guard will detect their presence and phase through the environment, including through floors and across elevation, to reach their exact detected location over 2.5 seconds, after which he starts a Hunt , chasing after the Hunted Survivor:
- Places a Standard at the exact detected location of the Survivor, which materialises over several seconds.
- Damages any Survivor coming into its attack range, regardless of whether they are the Hunted Survivor or not.
- Grabbing the materialised Standard by walking into it.
- Unhooking another Survivor.
- Outlasting the duration of the Hunt indicated on their HUD portrait.


If the Guard downs the Hunted Survivor, they trigger Killer Instinct for 3 seconds.
Eyes in the Sky
SPECIAL ABILITY: EYES IN THE SKY
The Skull Merchant starts the Trial with 6 Drones in her inventory.
For each Trackable Survivor, The Skull Merchant is granted an increasingly stronger Haste![]() Status Effect:
Status Effect:
- 1 Trackable Survivor grants her +3 %.
- 2 Trackable Survivors grant her +5 %.
- 3 Trackable Survivors grant her +6 %.
- 4 Trackable Survivors grant her +7 %.
SPECIAL INTERACTION: INSPECTING RADAR
Press the Secondary Power button to bring up her Radar.
The Radar displays the location of all Trackable Survivors:
- The Survivor was detected by a Drone in the last 12 seconds.
- The Survivor is wearing a Claw Trap.
- ■ = same elevation
- ▲ = above her
- ▼ = below her
SPECIAL INTERACTION: RECALLING DRONES
While inspecting the Radar and aiming at a specific Drone, press the Power button to recall it into your inventory.
SPECIAL INTERACTION: CHANGING ROTATIONAL DIRECTION
While inspecting the Radar and aiming at a specific Drone, press the Attack button to change the Rotational direction of its Scan Lines.
SPECIAL ABILITY: DEPLOYING DRONES
Press the Power button to deploy a Drone in Stealth Mode
- Conducts an invisible sweeping scan inside its Area of Effect at a Rotational speed of 60 °/s.
- Grants the Undetectable Status Effect for 8 seconds.
- Its Aura is revealed to The Skull Merchant in white at all times.
- Conducts a visible sweeping scan inside its Area of Effect at a Rotational speed of 85 °/s.
- Fills the Lock On Meter by +1 Stack.
- This effects repeats each time a Survivor is detected, unless the detection occurs within 3 seconds of the previous one.
- Its Aura is revealed to The Skull Merchant in yellow at all times.
Survivors who are crouching or standing still inside the Area of Effect cannot be detected by the Scan Lines.
Drones are temporarily deactivated if The Skull Merchant is detected inside their Area of Effect.
SPECIAL AFFLICTION: LOCK ON
Once the Lock-On Meter is full at 3 Stacks, the Survivor becomes Locked On and suffers from the following effects:
- Healthy Survivors receive damage and become injured.
- Injured Survivors suffer from the Deep Wound Status Effect.
- Suffer from the Broken Status Effect regardless of their Health State.
- Receive a Claw Trap.
SPECIAL INTERACTION: HACKING DRONES
Survivors can approach a Stealth Mode Drone and hack it through a unique mini-game:
- Succeeding disables the Drone for 45 seconds, before it returns into the inventory of The Skull Merchant.
- Failing activates the Drone and fills the Lock On Meter by +1 Stack.
SPECIAL AFFLICTION: CLAW TRAP
The Claw Trap attached to a Survivor's arm has a Battery life of 45 seconds and continuously broadcasts their location to the Radar of The Skull Merchant until it runs out, automatically destroying it.
Claw-Trapped Survivors who are scanned by a Drone suffer from the following effects:
- Applies a -10 % Hindered Status Effect for 6 seconds.
- Triggers Killer Instinct for 3 seconds.
Quantum Instantiation
He built a new body, and with it, a terrifying way to bend the rules of physics to his benefit."
SPECIAL ABILITY: QUANTUM INSTANTIATION
The Singularity starts the Trial with 8 Biopods in his inventory.
Placing additional Biodpods will recycle the oldest one.
SPECIAL ABILITY: SHOOTING BIOPODS
Press the Power button to bring up his gun, indicating available target locations on the HUD.
Press the Attack button to shoot a Biopod:
- Shoot it at an available target location within 22 metres to place it.
- Shoot it at an already placed Biopod to remove it.
- Shoot it at a Slipstreamed Survivor to teleport to them.
The Auras![]() of Biopods are revealed to The Singularity at all times.
of Biopods are revealed to The Singularity at all times.
SPECIAL INTERACTION: CONTROLLING BIODPODS
Press the Secondary Power button to control a Biodpod, taking on its POV and allowing The Singularity to observe the environment and Survivors through it.:
- Press the Secondary Power button again while aiming at another Biodpod to control it instead.
- Press the Power button to return to the previously controlled Biopod, which is highlighted in yellow for 5 seconds after leaving it.
- Press the Interaction button to exit the currently controlled Biodpod and return to The Singularity.
If a Survivor is within Line of Sight of a controlled Biopod, as well as within a distance of 20 metres, their outline is highlighted in white and aiming the reticule at them will begin to tag them with Temporal Slipstream, unless they hide or move out of range.
SPECIAL AFFLICTION: TEMPORAL SLIPSTREAM
Successfully tagging a Survivor with Temporal Slipstream makes them vulnerable to the Teleportation Power of The Singularity
Temporal Slipstream spreads to other Survivors within 6 metres over the duration of 2 seconds.
SPECIAL ABILITY: SLIPSTREAM TELEPORTATION
The Singularity can perform a Slipstream Teleport to any Slipstreamed Survivor by either aiming the reticule of a controlled Biopod at them or shooting them directly with a Biopod.
Teleporting through the path of a dropped Pallet instantly breaks it and momentarily slows The Singularity.
Performing a Slipstream Teleport automatically puts The Singularity into Overclock Mode.
SPECIAL STATE: OVERCLOCK MODE
Overclock Mode lasts for 4.7 seconds and is extended by +1 second for each Slipstreamed Survivor, up to a maximum of 8.7 seconds.
The Singularity benefits from the following effects during it:
- The Singularity cannot be stunned with a Pallet.
- Attempting to do so will instantly break the Pallet and only momentarily slow The Singularity.
- Any carried Survivors will not be released from his grasp.
- Increases the Action speeds of breaking Breakable Walls and dropped Pallets, and vaulting Windows by +75 %.
SPECIAL ITEM: ELECTROMAGNETIC PULSE DEVICE
Survivors can cure themselves or other Survivors from Temporal Slipstream by locating a Supply Case


- A total of 4 Supply Cases spawn in random locations in the environment.
- The Auras of Supply Cases are revealed to any Survivor within 32 metres who is not already carrying an EMP.
- Each Supply Case contains 1 single-use EMP.
- Each Supply Case acts as a 3D-printer, automatically printing a new EMP over the course of 100 seconds.
- Survivors can accelerate the printing process by a factor of x4 by continuously interacting with the Supply Case.
Hidden Pursuit

What they found there became one of humanity's greatest horrors."
SPECIAL ABILITY: HIDDEN PURSUIT
The Xenomorph has a set of intertwining Tunnels available to it beneath the environment that it can access from any of the 7 Control Stations spawning in the environment.
SPECIAL OBJECT: CONTROL STATIONS
The Auras
SPECIAL INTERACTION: HIGHLIGHTING CONTROL STATIONS
Press the Secondary Power button while aiming at any Control Station to highlight it in yellow:
- This reveals the shortest path to that Control Station when navigating through the Tunnels.
When near an Exit Gate![]() , the nearest Control Station is automatically highlighted.
, the nearest Control Station is automatically highlighted.
SPECIAL LOCOMOTION: TUNNELS
Press the Interaction button at a Control Station to enter the Tunnels:
- Grants the Undetectable Status Effect.
- Increases its Movement speed to 18 m/s.
- Increases the Charge speed of Crawler Mode to +8 c/s.
Press it again while beneath the same or another Control Station to exit the Tunnels, which triggers the following effects within 12 metres of the Control Station:
- Triggers Killer Instinct for 3 seconds.
- Deactivates any deployed Turrets for 2.5 seconds.
SPECIAL ABILITY: TRACKING FOOTSTEPS
While inside the Tunnels, The Xenomorph can detect the movement of Survivors walking or running above it within 16 metres of its location, indicated by reddish footsteps spawning on the ceiling.
Survivors can avoid being detected by crouching or standing still.
SPECIAL STATE: CRAWLER MODE
The Xenomorph passively charges Crawler Mode at a rate of +1 c/s when outside of the Tunnels.
Once the Power Gauge is full at 35 Charges, it automatically enters it:
- Causes The Xenomorph to walk on all fours.
- Reduces its Terror Radius to 24 metres.
- Grants the ability to perform a Tail Strike Attack.
There are only two ways for The Xenomorph to exit this mode:
- It picks up and carries a downed Survivor.
- It takes too much fire damage from Turrets.
SPECIAL ATTACK: TAIL STRIKE
While in Crawler Mode, press the Power button to perform a Tail Strike Attack, which has an increased reach of 4.8 metres.
SPECIAL ITEM: REMOTE FLAME TURRET![]()
Survivors can interact with a Control Station to retrieve up to 4 Remote Flame Turrets![]() in total and deploy them in the environment to counteract The Xenomorph
in total and deploy them in the environment to counteract The Xenomorph
Turrets can also be undeployed, carried to a new location, and be redeployed.

While carrying a Turret, Survivors experience the following effects:
- Causes them to suffer from a -35 % Hindered Status Effect and the Exhausted and Incapacitated Status Effects.
- Grants immunity from being detected by The Xenomorph when it is inside the Tunnels.
- Reveals their Aura and that of the Turret to other Survivors.


A prolonged attack can stun The Xenomorph and force it out of Crawler Mode, causing the Turret to overheat and break, requiring repairs.
Turrets also overheat when firing continuously for 4 seconds.
The Xenomorph can destroy deployed Turrets by attacking them, causing them to return to Control Stations after 60 seconds.
Control Stations have a Cool-down of 30 seconds, before another Turret can be retrieved from the same one.
"Its structural perfection is matched only by its hostility." — Ash, Science Officer
Playtime's Over

SPECIAL ABILITY: HIDEY-HO MODE
Press the Secondary Power button to enter Hidey-Ho Mode for 14 seconds:
- Grants the Undetectable Status Effect.
- Creates Illusionary Footfalls.
Press it again to exit the mode prematurely.
Hidey-Ho Mode has a Cool-down of 18 seconds.
SPECIAL ABILITY: ILLUSIONARY FOOTFALLS
Illusionary Footfalls generate within 16 metres of any Survivor and aim to disorient them with sounds and footsteps coming from different directions, hiding the true whereabouts of The Good Guy
SPECIAL LOCOMOTION: SLICE & DICE
While in Hidey-Ho Mode, press the Power button to launch a Slice & Dice Attack:
- Increases his Movement speed by +50 % for 1.2 seconds.
- Increases his Lunge duration to 0.6 seconds.
SPECIAL INTERACTION: SCAMPER
While in Hidey-Ho Mode, press the Interaction button while next to a dropped Pallet
A Scamper is performed automatically when colliding with the aforementioned objects during a Slice & Dice Attack.
"I'm one of the most notorious slashers in history. And I don't want to give that up. I am Chucky, the killer doll! And I dig it!" — Chucky
UVX
The codename: Unknown Venom X."
SPECIAL ABILITY: UVX PROJECTILE
Press and hold the Power button to charge UVX
Once it is fully charged, press the Attack button to launch a bouncing projectile, which creates a Blast Area of 2.25 metres upon impact:
- Survivors touching an airborne projectile suffer from a -6 % Hindered Status Effect for 3 seconds.
- Survivors touching the Blast Area suffer from the Weakened State.
UVX has a Cool-down of 7 seconds.
SPECIAL AFFLICTION: WEAKENED
Weakened Survivors receive damage when touching a Blast Area and have up to 6 seconds added back to their Weakened Meter indicated on the HUD..
SPECIAL INTERACTION: STARING DOWN THE UNKNOWN
Survivors can remove their Weakened State by looking directly at The Unknown within a distance of 25 metres for a cumulative total of 10 seconds.
Doing so will highlight their outline in pink to The Unknown.
SPECIAL ABILITY: HALLUCINATIONS
The Unknown intermittently leaves behind a Hallucination, which charges over the course of 45 seconds.
Up to 4 Hallucinations can exist simultaneously in the environment, with the oldest one being recycled when creating another one.
New Hallucinations cannot be created when too close to other existings ones or several props.
The Auras![]() are revealed to The Unknown at all times and to Survivors when within 8 metres.
are revealed to The Unknown at all times and to Survivors when within 8 metres.
Survivors becoming Weakened or touching a Blast Area reduces the Charge time of the next Hallucination by -10 seconds.
SPECIAL INTERACTION: DISPELLING HALLUCINATIONS
Survivors can remove Hallucinations by approaching them and performing the Dispel interaction for 4 seconds:
- Reduces the Dispelling speed of Weakened Survivors by -25 %.
- Succeeding removes the Hallucination from the environment.
- Failing to complete the interaction causes the Survivor to become Weakened and triggers Killer Instinct for 5 seconds.
- This also applies when The Unknown teleports into a Hallucination mid-dispelling.
SPECIAL LOCOMOTION: TELEPORT
Press the Secondary Power button to teleport to any available Hallucination that is at least 3 metres away from your location, leaving behind a temporary Decoy for 5 seconds.
Teleportation has a Cool-down of 25 seconds.
"... Request for analysis [REDACTED] incident [REDACTED] awaiting approval." — Excerpt from leaked OSS report