DocOctober (talk | contribs) mNo edit summary |
DocOctober (talk | contribs) mNo edit summary |
||
| (42 intermediate revisions by 16 users not shown) | |||
| Line 1: | Line 1: | ||
[[File:IconHelp auras.png|right|frameless]] |
[[File:IconHelp auras.png|right|frameless]] |
||
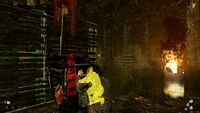
[[File:killerAuraReading.png|right|thumb|A Killer's default Aura-reading]] |
[[File:killerAuraReading.png|right|thumb|A Killer's default Aura-reading]] |
||
| − | [[File:survivorAuraReading.jpg|right|thumb|A Survivor's Aura-reading |
+ | [[File:survivorAuraReading.jpg|right|thumb|A Survivor's Aura-reading]] |
'''{{PAGENAME}}''' are an integral Game Mechanic in ''{{IconLink|Dead by Daylight}}''. |
'''{{PAGENAME}}''' are an integral Game Mechanic in ''{{IconLink|Dead by Daylight}}''. |
||
| Line 12: | Line 12: | ||
'''{{PAGENAME}}''' can be seen through any obstacles and usually across large distances. Aura-reading abilities are great for locating Allies, Enemies or Objectives. |
'''{{PAGENAME}}''' can be seen through any obstacles and usually across large distances. Aura-reading abilities are great for locating Allies, Enemies or Objectives. |
||
| + | |||
| + | === Aura-reveal vs. Aura-Flare-ups === |
||
| + | The are two main types of '''{{PAGENAME}}''' in ''Dead by Daylight'': '''Aura-reveals''' and '''Aura-Flare-ups''': |
||
| + | |||
| + | Whereas '''Aura-reveals or just Auras''' are continuous and reveal not only a Survivor's location, but also their every action for their duration, '''Aura-Flare-ups''' are a mere snapshot of a Survivor's location at the time of it being triggered.<br>Unlike '''Aura-reveals''', they do not relay the Survivor's actions and are always of the same red colour. |
||
| Line 18: | Line 23: | ||
{| class="wikitable" |
{| class="wikitable" |
||
|- |
|- |
||
| + | ! {{clr|16|White Auras}} !! {{clr|8|Red Auras}} !! {{clr|2|Yellow Auras}} !! Various Colours !! {{clr|15|Fuchsia}} |
||
| − | ! Aura Colour !! General Usage !! Usage in Killers !! Usage in Survivors |
||
|- |
|- |
||
| − | ! {{clr|8|Red}} |
||
| − | | Default Aura-reading abilities |
||
| |
| |
||
| + | * Marks Killer Objects: |
||
| ⚫ | |||
| − | * {{IconLink| |
+ | ** {{IconLink|Basement}} |
| ⚫ | |||
| − | * Survivor Auras revealed by Unlockables |
||
| ⚫ | |||
| ⚫ | |||
| ⚫ | |||
| ⚫ | |||
| + | *** '''''Dream Traps''''' |
||
| + | ** {{IconLink|Jigsaw's Baptism}} |
||
| + | *** {{IconLink|Jigsaw Boxes}} |
||
| ⚫ | |||
| + | *** {{IconLink|Cages of Atonement}} |
||
| ⚫ | |||
| ⚫ | |||
| ⚫ | |||
| ⚫ | |||
| + | * Marks Survivor Objects: |
||
| ⚫ | |||
| + | * Marks other Killers: |
||
| + | ** '''Victor''' to '''Charlotte''' and vice versa |
||
| |
| |
||
| ⚫ | |||
| ⚫ | |||
| − | * |
+ | ** {{IconLink|Generators}} |
| − | * |
+ | ** {{IconLink|Hatch}} |
| ⚫ | |||
| ⚫ | |||
| + | ** {{IconLink|Hex Totems}} (Killer only) |
||
| − | ! {{clr|5|Pink}} |
||
| + | * Marks Survivors to the Killer |
||
| − | | Enemy Auras |
||
| + | * Marks dying or hooked Survivors to other Survivors |
||
| ⚫ | |||
| |
| |
||
| + | * Marks healthy or injured Survivors to other Survivors |
||
| − | * Killer Aura revealed by Unlockables |
||
| + | * Marks interacted-with Objectives: |
||
| ⚫ | |||
| − | + | ** {{IconLink|Generators}} |
|
| ⚫ | |||
| ⚫ | |||
| + | * Marks Breakables and Vault Locations: |
||
| ⚫ | |||
| − | * {{IconLink| |
+ | ** {{IconLink|Breakable Walls}} |
| + | ** {{IconLink|Pallets}} |
||
| ⚫ | |||
| + | ** {{IconLink|Windows}} and other Vaults |
||
| ⚫ | |||
| − | * |
+ | * Marks {{IconLink|Hunting Hatchets}} in nearby {{IconLink|Lockers}} |
| − | * {{IconLink|Chests}} revealed by a {{IconLink|Map}} or {{IconLink|Plunderer's Instinct}} |
||
| ⚫ | |||
| − | ! {{clr|2|Yellow}} |
||
| − | | Allied Auras |
||
| ⚫ | |||
| − | * {{IconLink|Generators}} revealed by {{IconLink|Discordance}} |
||
| − | * Regressing {{IconLink|Generators}} interrupted by Survivors. |
||
| − | * {{IconLink|Hooks}} with a hooked Survivor |
||
| ⚫ | |||
| − | ** '''''Illusionary Doctors''''' (currently) |
||
| ⚫ | |||
| ⚫ | |||
| − | * Survivor Auras revealed by Unlockables |
||
| − | * Auras of {{IconLink|Windows}} and {{IconLink|Pallets}} revealed by {{IconLink|Windows Of Opportunity}} |
||
| − | * Auras of Visceral Cankers revealed by a {{IconLink|Map}} |
||
| ⚫ | |||
| − | ! {{clr|10|Blue}} |
||
| ⚫ | |||
| ⚫ | |||
| ⚫ | |||
| ⚫ | |||
| ⚫ | |||
| ⚫ | |||
| − | * Frozen Cocktail Machines |
||
| ⚫ | |||
| − | ! {{clr|6|Orange}} |
||
| ⚫ | |||
| ⚫ | |||
| ⚫ | |||
| ⚫ | |||
| ⚫ | |||
| − | ! White |
||
| ⚫ | |||
| |
| |
||
| + | * '''{{clr|5|Pink}}:''' marks the Killer to Survivors |
||
| ⚫ | |||
| − | * |
+ | * '''{{clr|9|Beige}}:''' marks the {{IconLink|Exit Gate}} Switches |
| + | * '''{{clr|25|Brass}}:''' marks Killer Traps: |
||
| ⚫ | |||
| + | ** {{IconLink|Bear Traps}} |
||
| + | ** {{IconLink|Phantasm Traps}} |
||
| + | * '''{{clr|10|Blue}}:''' marked special Event Objectives (unused): |
||
| + | ** Lunar Hooks & Generators ([[Lunar New Year]]) |
||
| + | ** Grill Hooks & Frozen Cocktail Machines ([[Scorching Summer BBQ]]) |
||
| + | * '''{{clr|6|Orange}}:''' marks special Event Objectives: |
||
| + | ** Blighted/Cankerous Hooks & Blighted Generators ([[Blights]]) |
||
| |
| |
||
| + | * Marks secondary Objectives: |
||
| ⚫ | |||
| − | * {{IconLink| |
+ | ** {{IconLink|Chests}} |
| ⚫ | |||
|} |
|} |
||
| + | === Additional Uses === |
||
| + | * In cases of '''Auras''' being used to showcase a progression of an action, the object's Aura will slowly transition from '''{{clr|16|white}}''' when the action begins to '''{{clr|8|red}}''' when the action has reached completion. |
||
| + | |||
| − | == |
+ | == Unlockables == |
=== Add-ons (Killer) === |
=== Add-ons (Killer) === |
||
{| class="wikitable" |
{| class="wikitable" |
||
| Line 94: | Line 92: | ||
|- |
|- |
||
{{Add-on Table|Willow Wreath|3}} |
{{Add-on Table|Willow Wreath|3}} |
||
| ⚫ | |||
| + | ! colspan="4" | [[File:Nothing.png]] |
||
|- |
|- |
||
{{Add-on Table|"Restraint" - Class II|2}} |
{{Add-on Table|"Restraint" - Class II|2}} |
||
| Line 102: | Line 102: | ||
{{Add-on Table|"Restraint" - Carter's Notes|4}} |
{{Add-on Table|"Restraint" - Carter's Notes|4}} |
||
|- |
|- |
||
| + | ! colspan="4" | [[File:Nothing.png]] |
||
| ⚫ | |||
| ⚫ | |||
|- |
|- |
||
{{Add-on Table|Reflective Fragment|2}} |
{{Add-on Table|Reflective Fragment|2}} |
||
| Line 115: | Line 114: | ||
|- |
|- |
||
{{Add-on Table|Scratched Mirror|4}} |
{{Add-on Table|Scratched Mirror|4}} |
||
| ⚫ | |||
| + | ! colspan="4" | [[File:Nothing.png]] |
||
|- |
|- |
||
{{Add-on Table|Fuming Mix Tape|5}} |
{{Add-on Table|Fuming Mix Tape|5}} |
||
! {{IconLink|Feral Frenzy}} |
! {{IconLink|Feral Frenzy}} |
||
| ⚫ | |||
| + | ! colspan="4" | [[File:Nothing.png]] |
||
|- |
|- |
||
{{Add-on Table|Pungent Phial|3}} |
{{Add-on Table|Pungent Phial|3}} |
||
| Line 123: | Line 126: | ||
|- |
|- |
||
{{Add-on Table|Glowing Concoction|4}} |
{{Add-on Table|Glowing Concoction|4}} |
||
| ⚫ | |||
| + | ! colspan="4" | [[File:Nothing.png]] |
||
|- |
|- |
||
{{Add-on Table|Amanda's Secret|4}} |
{{Add-on Table|Amanda's Secret|4}} |
||
| Line 128: | Line 133: | ||
|- |
|- |
||
{{Add-on Table|Amanda's Letter|5}} |
{{Add-on Table|Amanda's Letter|5}} |
||
| ⚫ | |||
| + | ! colspan="4" | [[File:Nothing.png]] |
||
| ⚫ | |||
| ⚫ | |||
| + | ! {{IconLink|Of the Abyss}} |
||
| ⚫ | |||
| + | ! colspan="4" | [[File:Nothing.png]] |
||
| ⚫ | |||
| + | {{Add-on Table|Diamond Cufflinks|4}} |
||
| + | ! {{IconLink|Showstopper}} |
||
| ⚫ | |||
| + | ! colspan="4" | [[File:Nothing.png]] |
||
|- |
|- |
||
{{Add-on Table|Tattoo's Middle Finger|5}} |
{{Add-on Table|Tattoo's Middle Finger|5}} |
||
! {{IconLink|The Afterpiece Tonic}} |
! {{IconLink|The Afterpiece Tonic}} |
||
| ⚫ | |||
| + | ! colspan="4" | [[File:Nothing.png]] |
||
| ⚫ | |||
| ⚫ | |||
| + | ! {{IconLink|The Redeemer}} |
||
| ⚫ | |||
| + | ! colspan="4" | [[File:Nothing.png]] |
||
|- |
|- |
||
{{Add-on Table|"All Seeing" - Mud|2}} |
{{Add-on Table|"All Seeing" - Mud|2}} |
||
| Line 140: | Line 164: | ||
|- |
|- |
||
{{Add-on Table|"All Seeing" - Spirit|5}} |
{{Add-on Table|"All Seeing" - Spirit|5}} |
||
| ⚫ | |||
| + | ! colspan="4" | [[File:Nothing.png]] |
||
| ⚫ | |||
| + | {{Add-on Table|Renjiro's Bloody Glove|5}} |
||
| + | ! {{IconLink|Yamaoka's Wrath}} |
||
|} |
|} |
||
| Line 145: | Line 174: | ||
{| class="wikitable" |
{| class="wikitable" |
||
{{Add-on Items Table|Eroded Token|2}} |
{{Add-on Items Table|Eroded Token|2}} |
||
| − | ! rowspan=" |
+ | ! rowspan="5" | {{IconLink|Key}} |
|- |
|- |
||
{{Add-on Items Table|Scratched Pearl|2}} |
{{Add-on Items Table|Scratched Pearl|2}} |
||
| Line 152: | Line 181: | ||
|- |
|- |
||
{{Add-on Items Table|Blood Amber|4}} |
{{Add-on Items Table|Blood Amber|4}} |
||
| ⚫ | |||
| + | {{Add-on Items Table|Unique Wedding Ring|4}} |
||
| ⚫ | |||
| + | ! colspan="4" | [[File:Nothing.png]] |
||
|- |
|- |
||
{{Add-on Items Table|Red Twine|2}} |
{{Add-on Items Table|Red Twine|2}} |
||
| Line 172: | Line 205: | ||
|- |
|- |
||
{{Item Table|Rainbow Map|5}} |
{{Item Table|Rainbow Map|5}} |
||
| ⚫ | |||
| + | |||
| + | === Offerings === |
||
| ⚫ | |||
|- |
|- |
||
| − | {{ |
+ | {{Offering Table|Bloodied Blueprint}} |
|- |
|- |
||
| − | {{ |
+ | {{Offering Table|Torn Blueprint}} |
| ⚫ | |||
| ⚫ | |||
|} |
|} |
||
=== Perks (Killer) === |
=== Perks (Killer) === |
||
{| class="wikitable" |
{| class="wikitable" |
||
| ⚫ | |||
{{Perk Table|A Nurse's Calling}} |
{{Perk Table|A Nurse's Calling}} |
||
|- |
|- |
||
| Line 189: | Line 225: | ||
|- |
|- |
||
{{Perk Table|Blood Warden}} |
{{Perk Table|Blood Warden}} |
||
| ⚫ | |||
| ⚫ | |||
| ⚫ | |||
| ⚫ | |||
| + | |- |
||
| + | {{Perk Table|Dead Man's Switch}} |
||
|- |
|- |
||
{{Perk Table|Deerstalker}} |
{{Perk Table|Deerstalker}} |
||
|- |
|- |
||
{{Perk Table|Discordance}} |
{{Perk Table|Discordance}} |
||
| + | |- |
||
| + | {{Perk Table|Gearhead}} |
||
| + | |- |
||
| + | {{Perk Table|Hangman's Trick}} |
||
| + | |- |
||
| + | {{Perk Table|Hex: Retribution}} |
||
| + | |- |
||
| + | {{Perk Table|Hex: The Third Seal}} |
||
| + | |- |
||
| + | {{Perk Table|Hex: Undying}} |
||
| + | |- |
||
| + | {{Perk Table|I'm All Ears}} |
||
| + | |- |
||
| + | {{Perk Table|Knock Out}} |
||
| + | |- |
||
| + | {{Perk Table|Lightborn}} |
||
| + | |- |
||
| + | {{Perk Table|Surveillance}} |
||
|- |
|- |
||
{{Perk Table|Territorial Imperative}} |
{{Perk Table|Territorial Imperative}} |
||
| + | |- |
||
| + | {{Perk Table|Thrilling Tremors}} |
||
| + | |- |
||
| + | {{Perk Table|Trail of Torment}} |
||
| + | |- |
||
| + | {{Perk Table|Zanshin Tactics}} |
||
|} |
|} |
||
=== Perks (Survivor) === |
=== Perks (Survivor) === |
||
{| class="wikitable" |
{| class="wikitable" |
||
| + | |- |
||
{{Perk Table|Aftercare}} |
{{Perk Table|Aftercare}} |
||
|- |
|- |
||
{{Perk Table|Alert}} |
{{Perk Table|Alert}} |
||
| + | |- |
||
| + | {{Perk Table|Babysitter}} |
||
| + | |- |
||
| + | {{Perk Table|Better Together}} |
||
| + | |- |
||
| + | {{Perk Table|Blood Pact}} |
||
| + | |- |
||
| + | {{Perk Table|Boil Over}} |
||
|- |
|- |
||
{{Perk Table|Bond}} |
{{Perk Table|Bond}} |
||
| Line 212: | Line 287: | ||
|- |
|- |
||
{{Perk Table|Detective's Hunch}} |
{{Perk Table|Detective's Hunch}} |
||
| + | |- |
||
| + | {{Perk Table|Distortion}} |
||
|- |
|- |
||
{{Perk Table|Empathy}} |
{{Perk Table|Empathy}} |
||
| Line 217: | Line 294: | ||
{{Perk Table|Kindred}} |
{{Perk Table|Kindred}} |
||
|- |
|- |
||
| − | {{Perk Table|Object |
+ | {{Perk Table|Object of Obsession}} |
| + | |- |
||
| + | {{Perk Table|Off the Record}} |
||
| + | |- |
||
| + | {{Perk Table|Open-Handed}} |
||
|- |
|- |
||
{{Perk Table|Plunderer's Instinct}} |
{{Perk Table|Plunderer's Instinct}} |
||
|- |
|- |
||
| − | {{Perk Table| |
+ | {{Perk Table|Red Herring}} |
|- |
|- |
||
| − | {{Perk Table| |
+ | {{Perk Table|Repressed Alliance}} |
| ⚫ | |||
| − | |||
| − | |||
| − | == Aura-affecting Unlockables== |
||
| − | === Perks (Killer) === |
||
| ⚫ | |||
| ⚫ | |||
|- |
|- |
||
| − | {{Perk Table| |
+ | {{Perk Table|Saboteur}} |
|- |
|- |
||
| − | {{Perk Table| |
+ | {{Perk Table|Sole Survivor}} |
| ⚫ | |||
| − | |||
| − | === Perks (Survivor) === |
||
| − | {| class="wikitable" |
||
| ⚫ | |||
|- |
|- |
||
| − | {{Perk Table| |
+ | {{Perk Table|Visionary}} |
|- |
|- |
||
| − | {{Perk Table| |
+ | {{Perk Table|Wake Up!}} |
|- |
|- |
||
| − | {{Perk Table| |
+ | {{Perk Table|Windows of Opportunity}} |
|} |
|} |
||
| + | |||
| + | |||
| ⚫ | |||
| ⚫ | |||
| ⚫ | ** However, Aura flare-ups caused by {{IconLink|Rancor}}, {{IconLink|Infectious Fright}} or {{IconLink|Madness}} Tier-ups do not strictly count as Aura-reading abilities, those remain unaffected by hiding inside a Locker or when using Perks such as {{IconLink|Distortion}} or {{IconLink|Sole Survivor}}. |
||
| Line 256: | Line 330: | ||
File:20180529235917_1.jpg|Yellow Auras of Windows and Pallets |
File:20180529235917_1.jpg|Yellow Auras of Windows and Pallets |
||
</gallery> |
</gallery> |
||
| − | |||
| − | |||
| ⚫ | |||
| ⚫ | |||
| ⚫ | ** However, Aura flare-ups caused by {{IconLink|Rancor}}, {{IconLink|Infectious Fright}} or {{IconLink|Madness}} Tier-ups do not strictly count as Aura-reading abilities, those remain unaffected by hiding inside a Locker or when using Perks such as {{IconLink|Distortion}} or {{IconLink|Sole Survivor}}. |
||
| Line 267: | Line 336: | ||
[[de:Auren]] |
[[de:Auren]] |
||
[[es:Auras]] |
[[es:Auras]] |
||
| − | [[pt |
+ | [[pt:Auras]] |
| + | [[zh:气场]] |
||
Revision as of 18:35, 5 March 2021

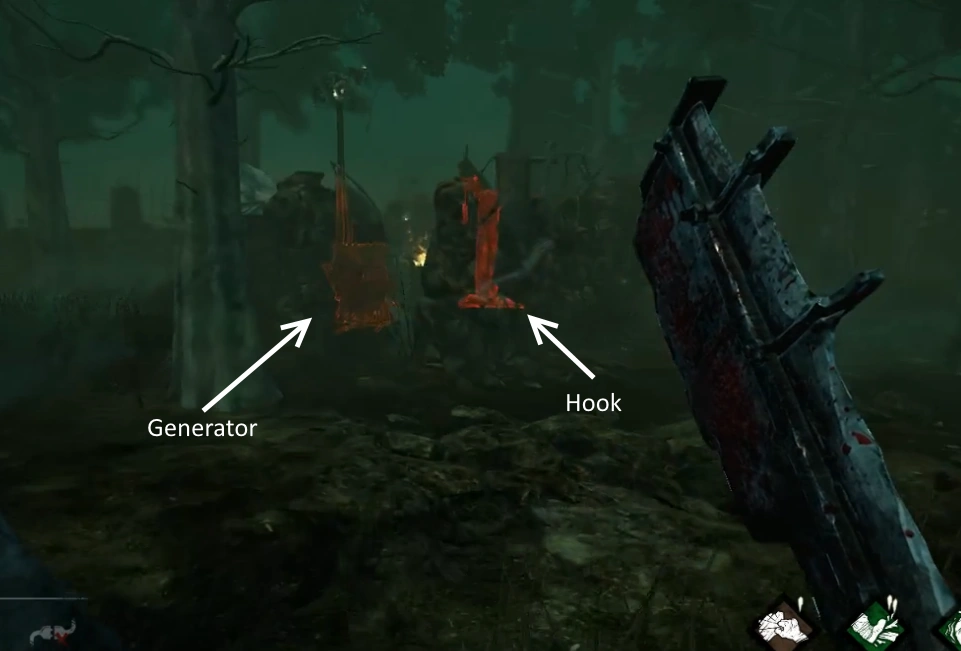
A Killer's default Aura-reading

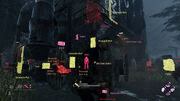
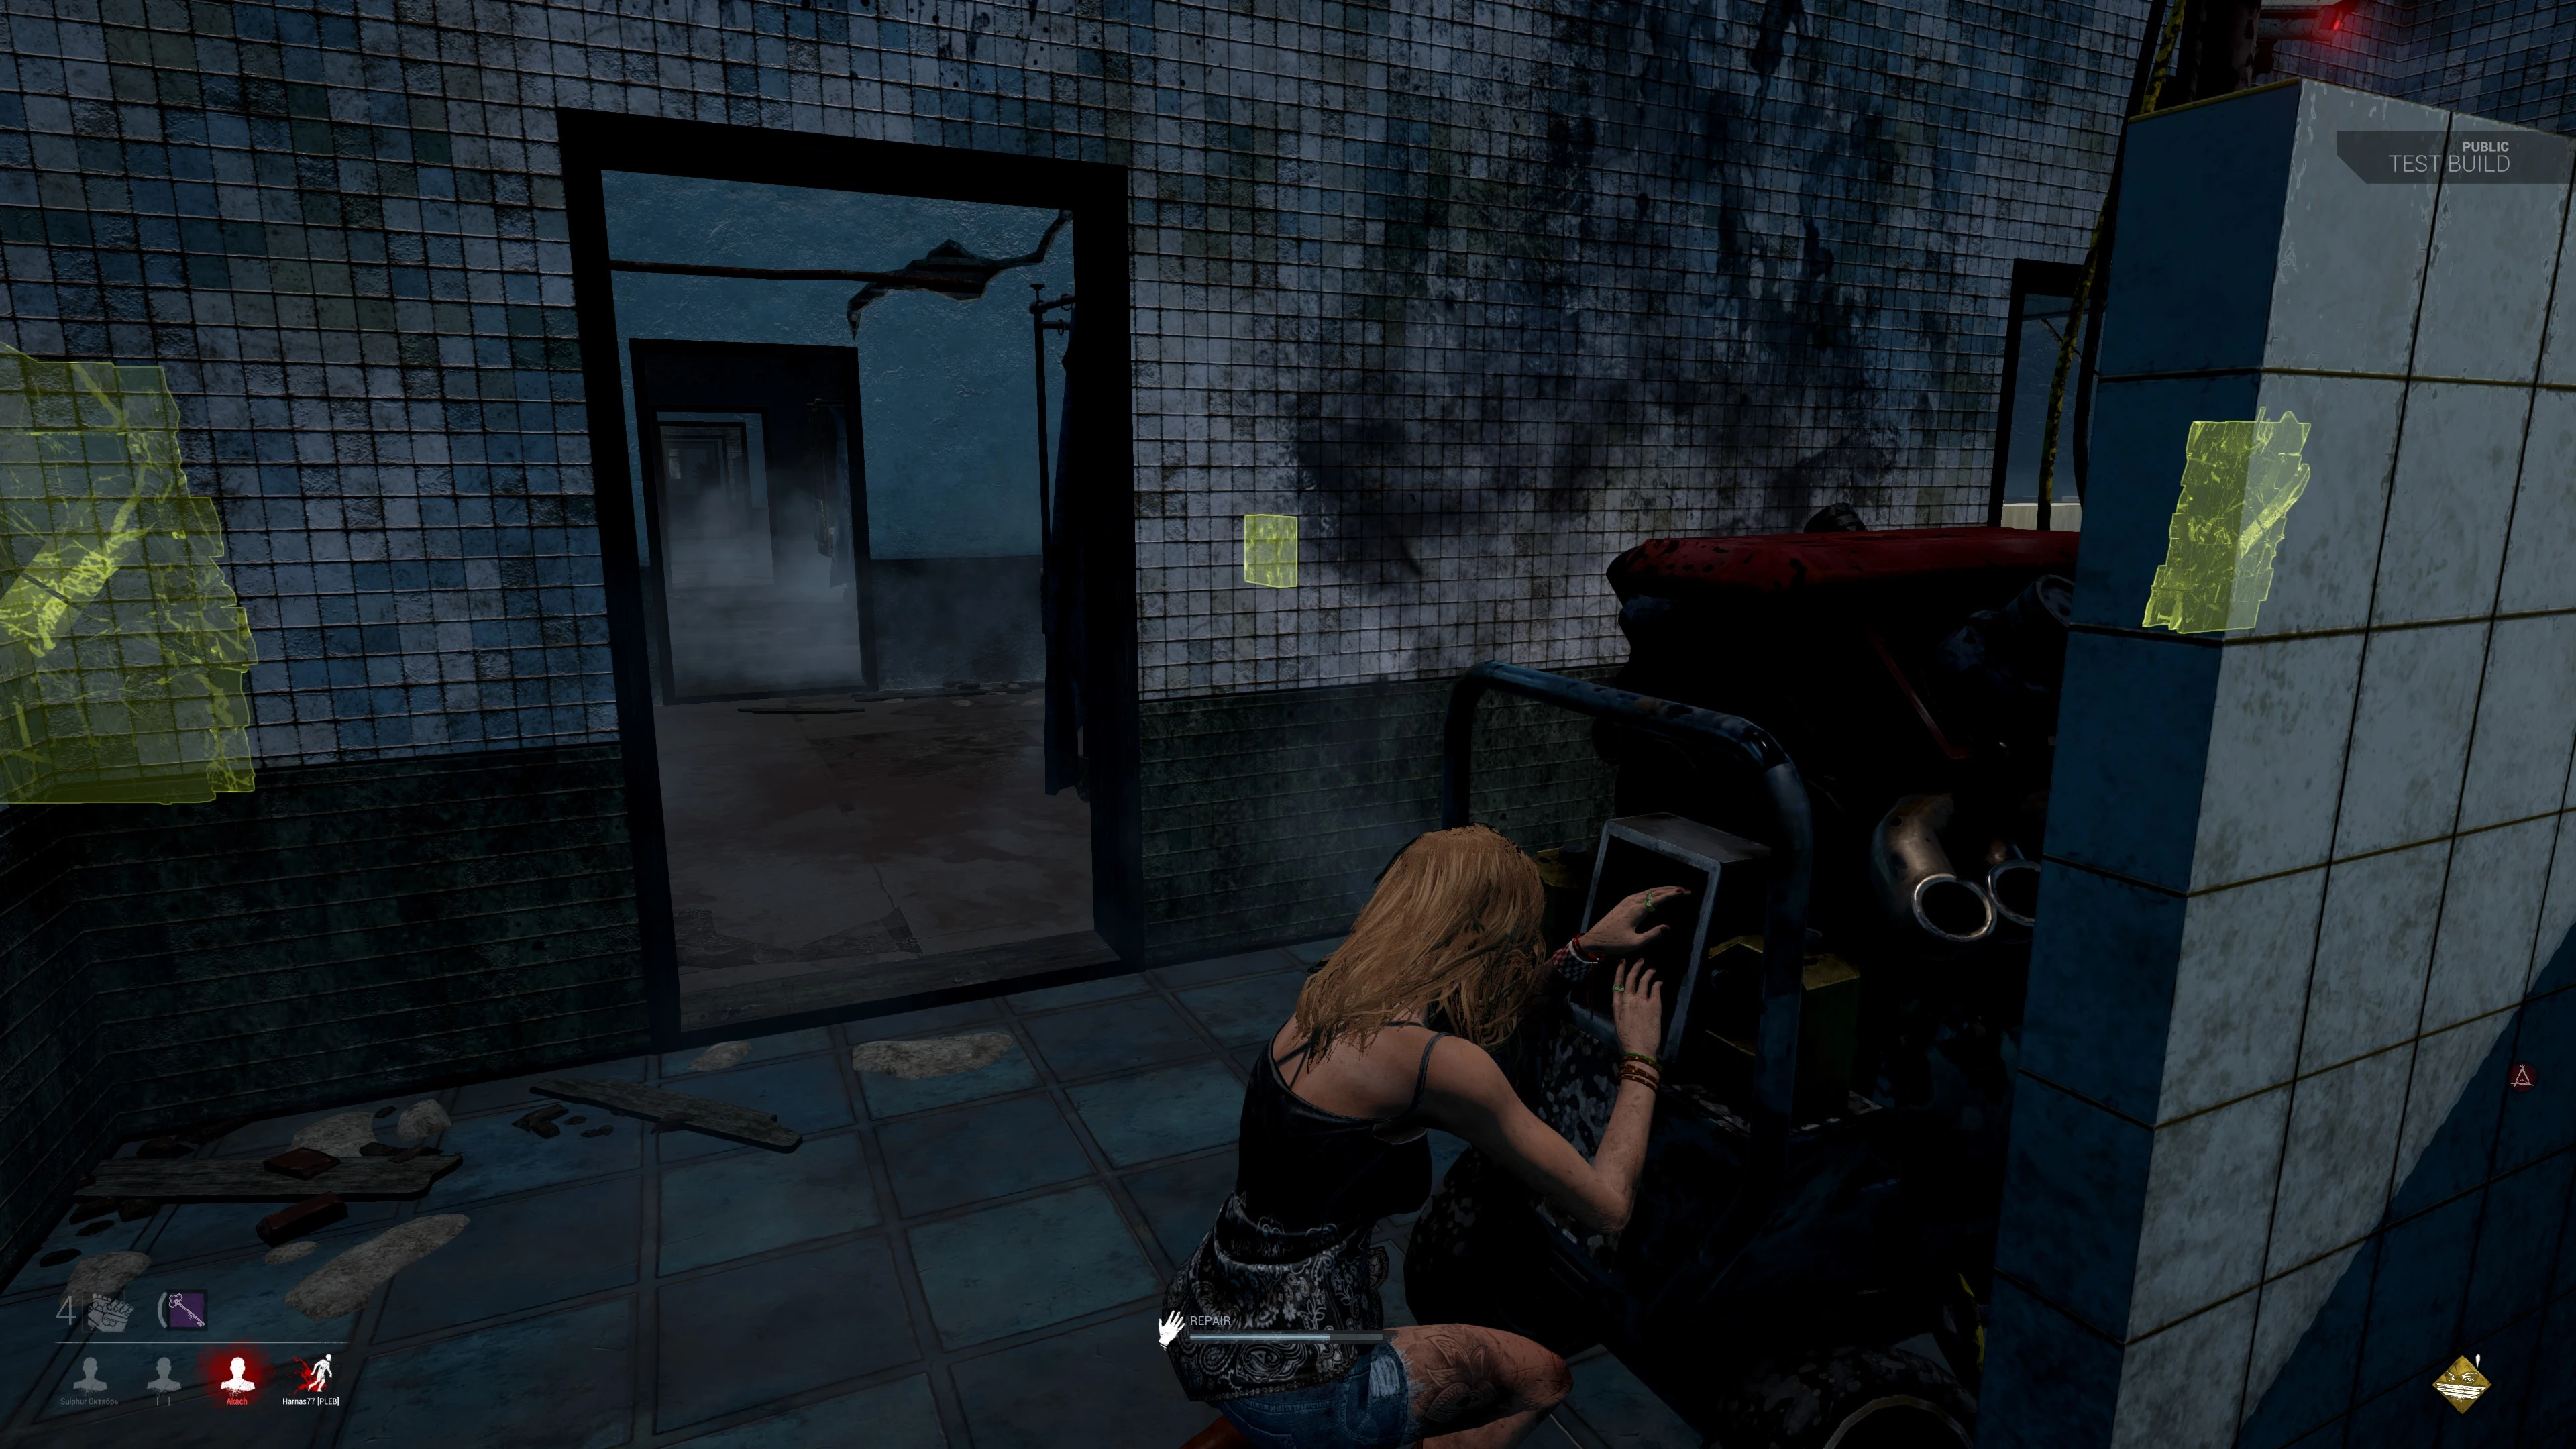
A Survivor's Aura-reading
Auras are an integral Game Mechanic in Template:IconLink.
Overview
- For a guide on some in-game distances to better gauge the working-radius of Aura-reading Perks, please refer to Distances.
Some Unlockables unlock potential in one's Aura-reading abilities.
Auras can be seen through any obstacles and usually across large distances. Aura-reading abilities are great for locating Allies, Enemies or Objectives.
Aura-reveal vs. Aura-Flare-ups
The are two main types of Auras in Dead by Daylight: Aura-reveals and Aura-Flare-ups:
Whereas Aura-reveals or just Auras are continuous and reveal not only a Survivor's location, but also their every action for their duration, Aura-Flare-ups are a mere snapshot of a Survivor's location at the time of it being triggered.
Unlike Aura-reveals, they do not relay the Survivor's actions and are always of the same red colour.
Aura Colours
Auras come in different colours, depending on whether the Aura is from an Objective, an Ally or an Enemy.
| White Auras | Red Auras | Yellow Auras | Various Colours | Fuchsia |
|---|---|---|---|---|
|
|
|
|
|
Additional Uses
- In cases of Auras being used to showcase a progression of an action, the object's Aura will slowly transition from white when the action begins to red when the action has reached completion.
Unlockables
Add-ons (Killer)
Template:Add-on TableTemplate:Add-on TableTemplate:Add-on TableTemplate:Add-on TableTemplate:Add-on TableTemplate:Add-on TableTemplate:Add-on TableTemplate:Add-on TableTemplate:Add-on TableTemplate:Add-on TableTemplate:Add-on TableTemplate:Add-on TableTemplate:Add-on TableTemplate:Add-on TableTemplate:Add-on TableTemplate:Add-on TableTemplate:Add-on TableTemplate:Add-on TableTemplate:Add-on TableTemplate:Add-on TableTemplate:Add-on TableTemplate:Add-on TableTemplate:Add-on TableTemplate:Add-on Table| Template:IconLink | |||
|---|---|---|---|
| Template:IconLink | |||
| Template:IconLink | |||
| Template:IconLink | |||
| Template:IconLink | |||
| Template:IconLink | |||
| Template:IconLink | |||
| Template:IconLink | |||
| Template:IconLink | |||
| Template:IconLink | |||
| Template:IconLink | |||
| Template:IconLink | |||
Add-ons (Survivor)
Template:Add-on Items TableTemplate:Add-on Items TableTemplate:Add-on Items TableTemplate:Add-on Items TableTemplate:Add-on Items TableTemplate:Add-on Items TableTemplate:Add-on Items TableTemplate:Add-on Items TableTemplate:Add-on Items TableTemplate:Add-on Items TableTemplate:Add-on Items Table| Template:IconLink | |||
|---|---|---|---|
| Template:IconLink | |||
Items
Template:Item TableTemplate:Item TableOfferings
Template:Offering TableTemplate:Offering TablePerks (Killer)
Template:Perk TableTemplate:Perk TableTemplate:Perk TableTemplate:Perk TableTemplate:Perk TableTemplate:Perk TableTemplate:Perk TableTemplate:Perk TableTemplate:Perk TableTemplate:Perk TableTemplate:Perk TableTemplate:Perk TableTemplate:Perk TableTemplate:Perk TableTemplate:Perk TableTemplate:Perk TableTemplate:Perk TableTemplate:Perk TableTemplate:Perk TableTemplate:Perk TableTemplate:Perk TableTemplate:Perk TablePerks (Survivor)
Template:Perk TableTemplate:Perk TableTemplate:Perk TableTemplate:Perk TableTemplate:Perk TableTemplate:Perk TableTemplate:Perk TableTemplate:Perk TableTemplate:Perk TableTemplate:Perk TableTemplate:Perk TableTemplate:Perk TableTemplate:Perk TableTemplate:Perk TableTemplate:Perk TableTemplate:Perk TableTemplate:Perk TableTemplate:Perk TableTemplate:Perk TableTemplate:Perk TableTemplate:Perk TableTemplate:Perk TableTemplate:Perk TableTemplate:Perk TableTemplate:Perk Table
Trivia
- As a Survivor, hiding in a Template:IconLink will stop any Aura-reading ability of both the Killer and the other Survivors, but will also apply the Template:IconLink Status Effect.
- However, Aura flare-ups caused by Template:IconLink, Template:IconLink or Template:IconLink Tier-ups do not strictly count as Aura-reading abilities, those remain unaffected by hiding inside a Locker or when using Perks such as Template:IconLink or Template:IconLink.
Gallery

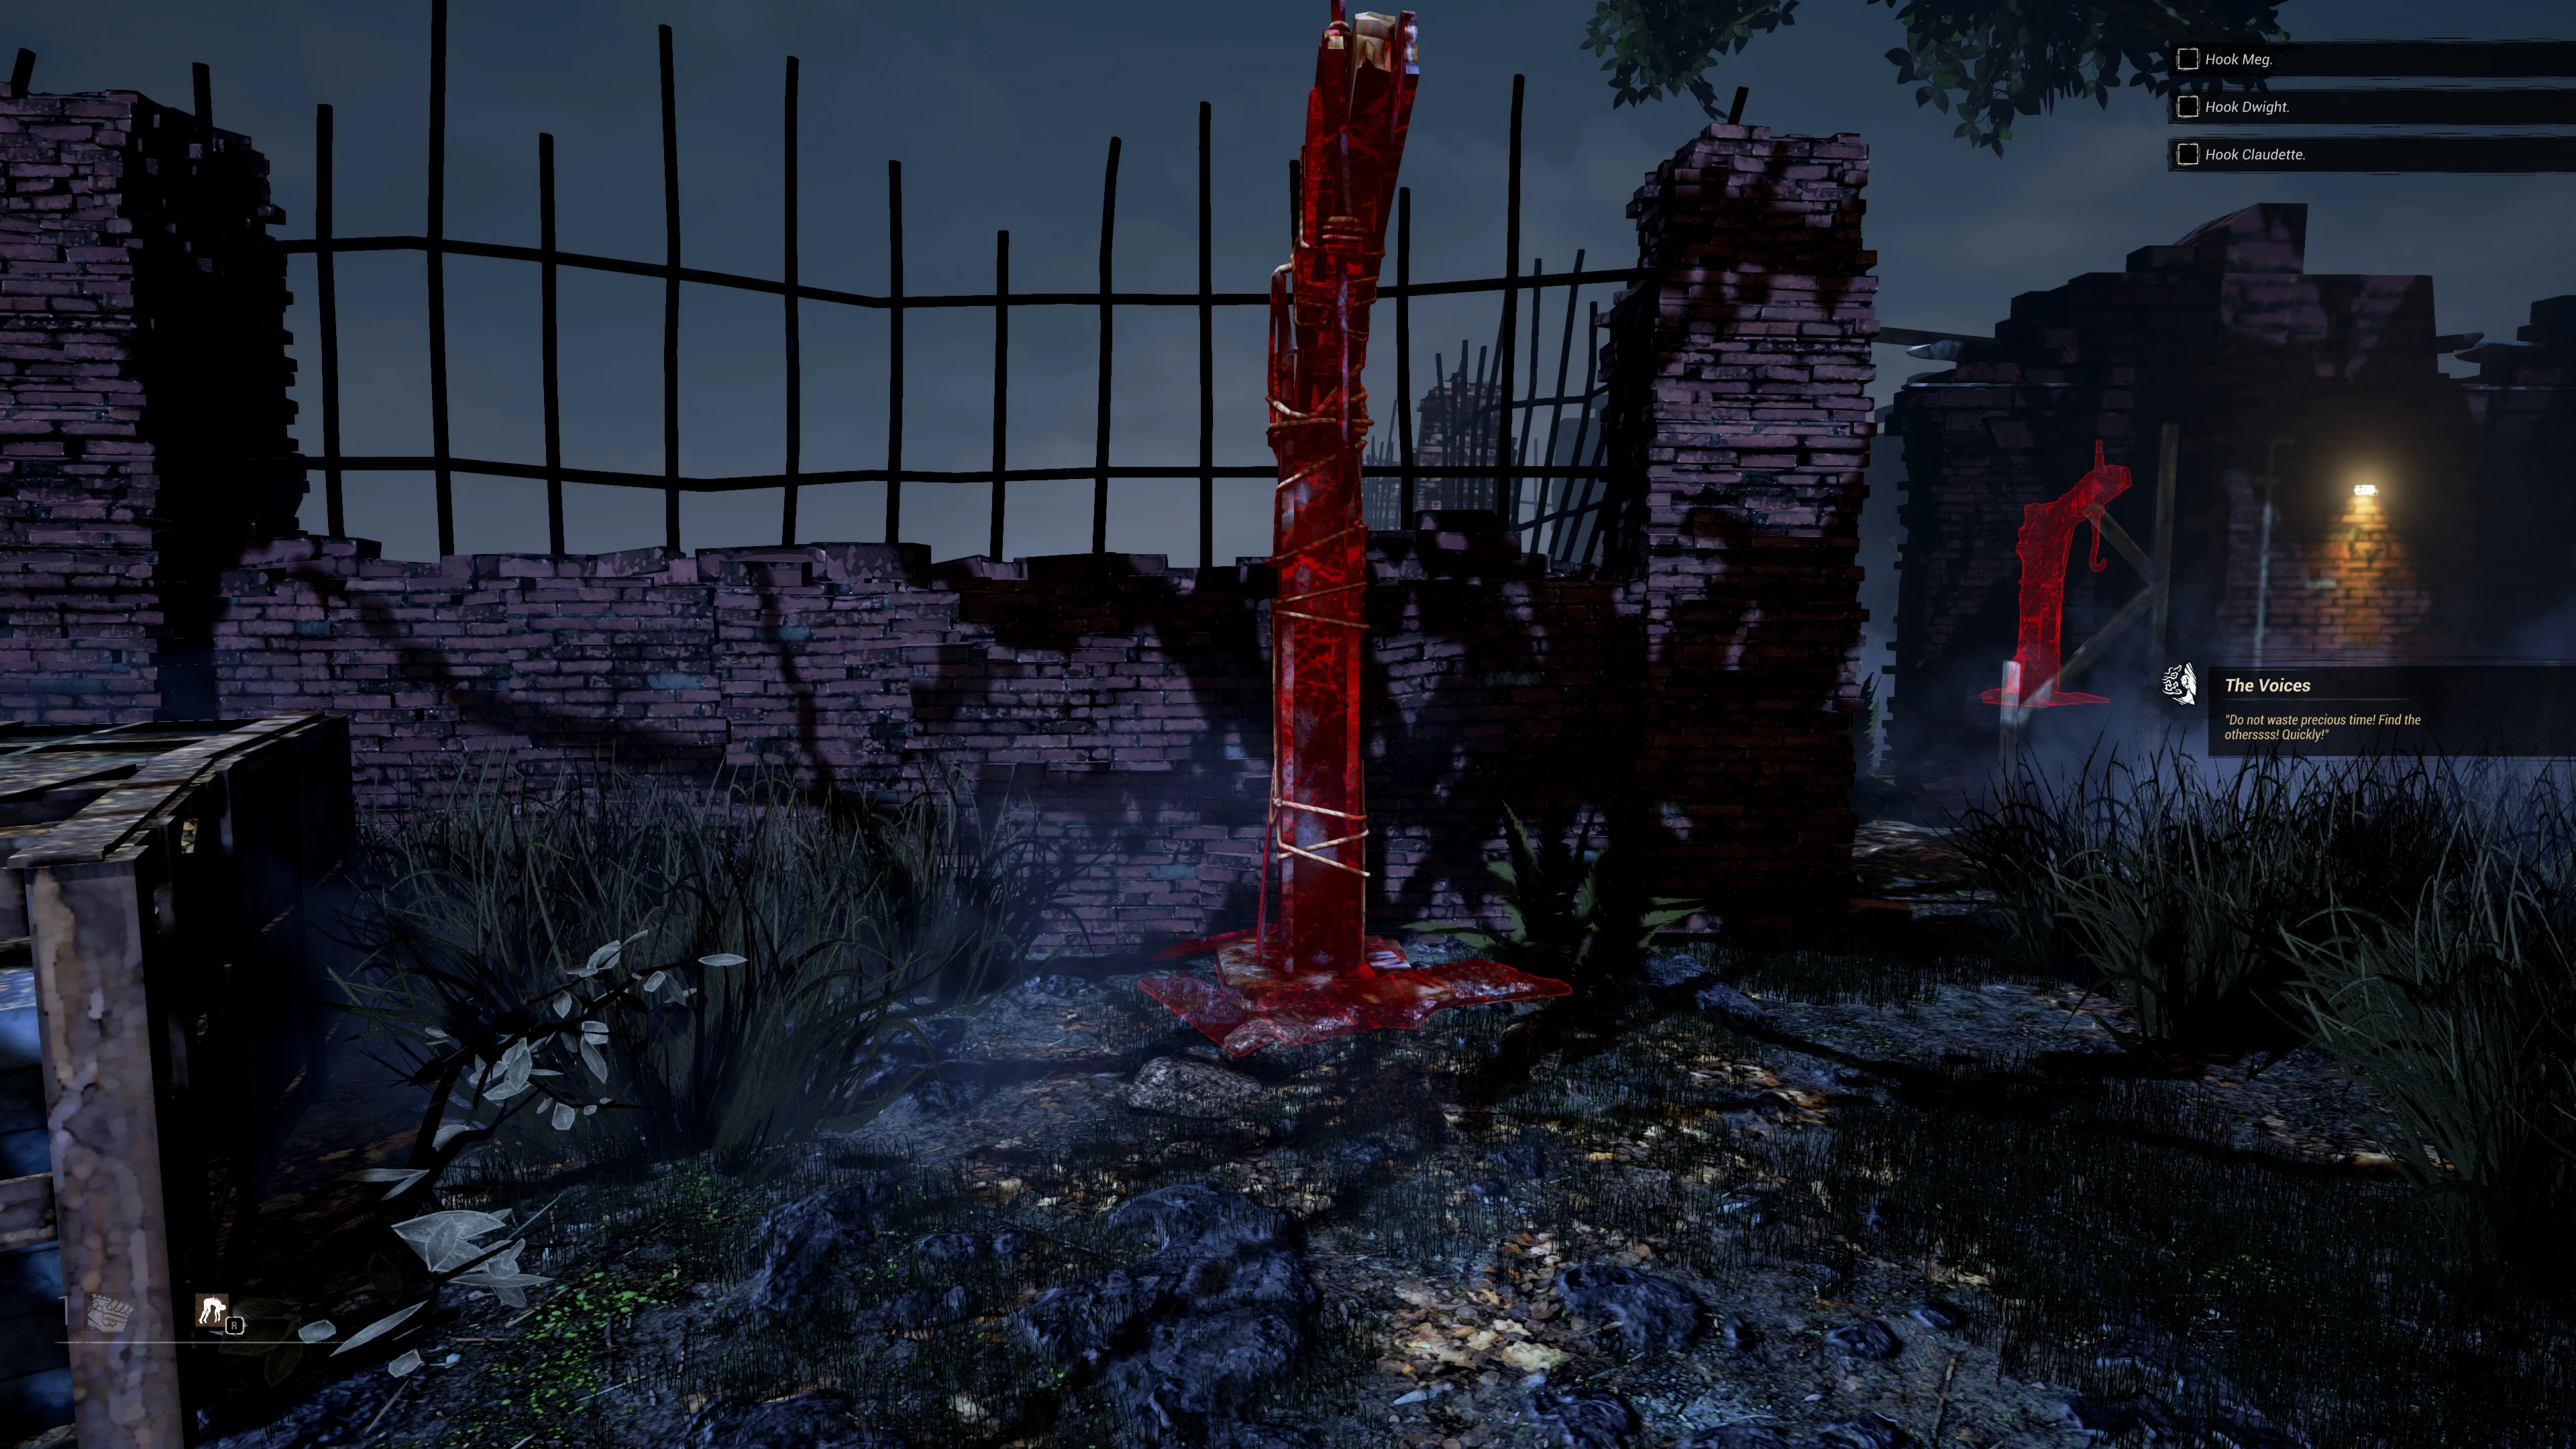
Red Auras of Hooks
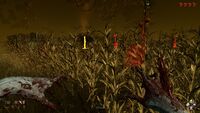
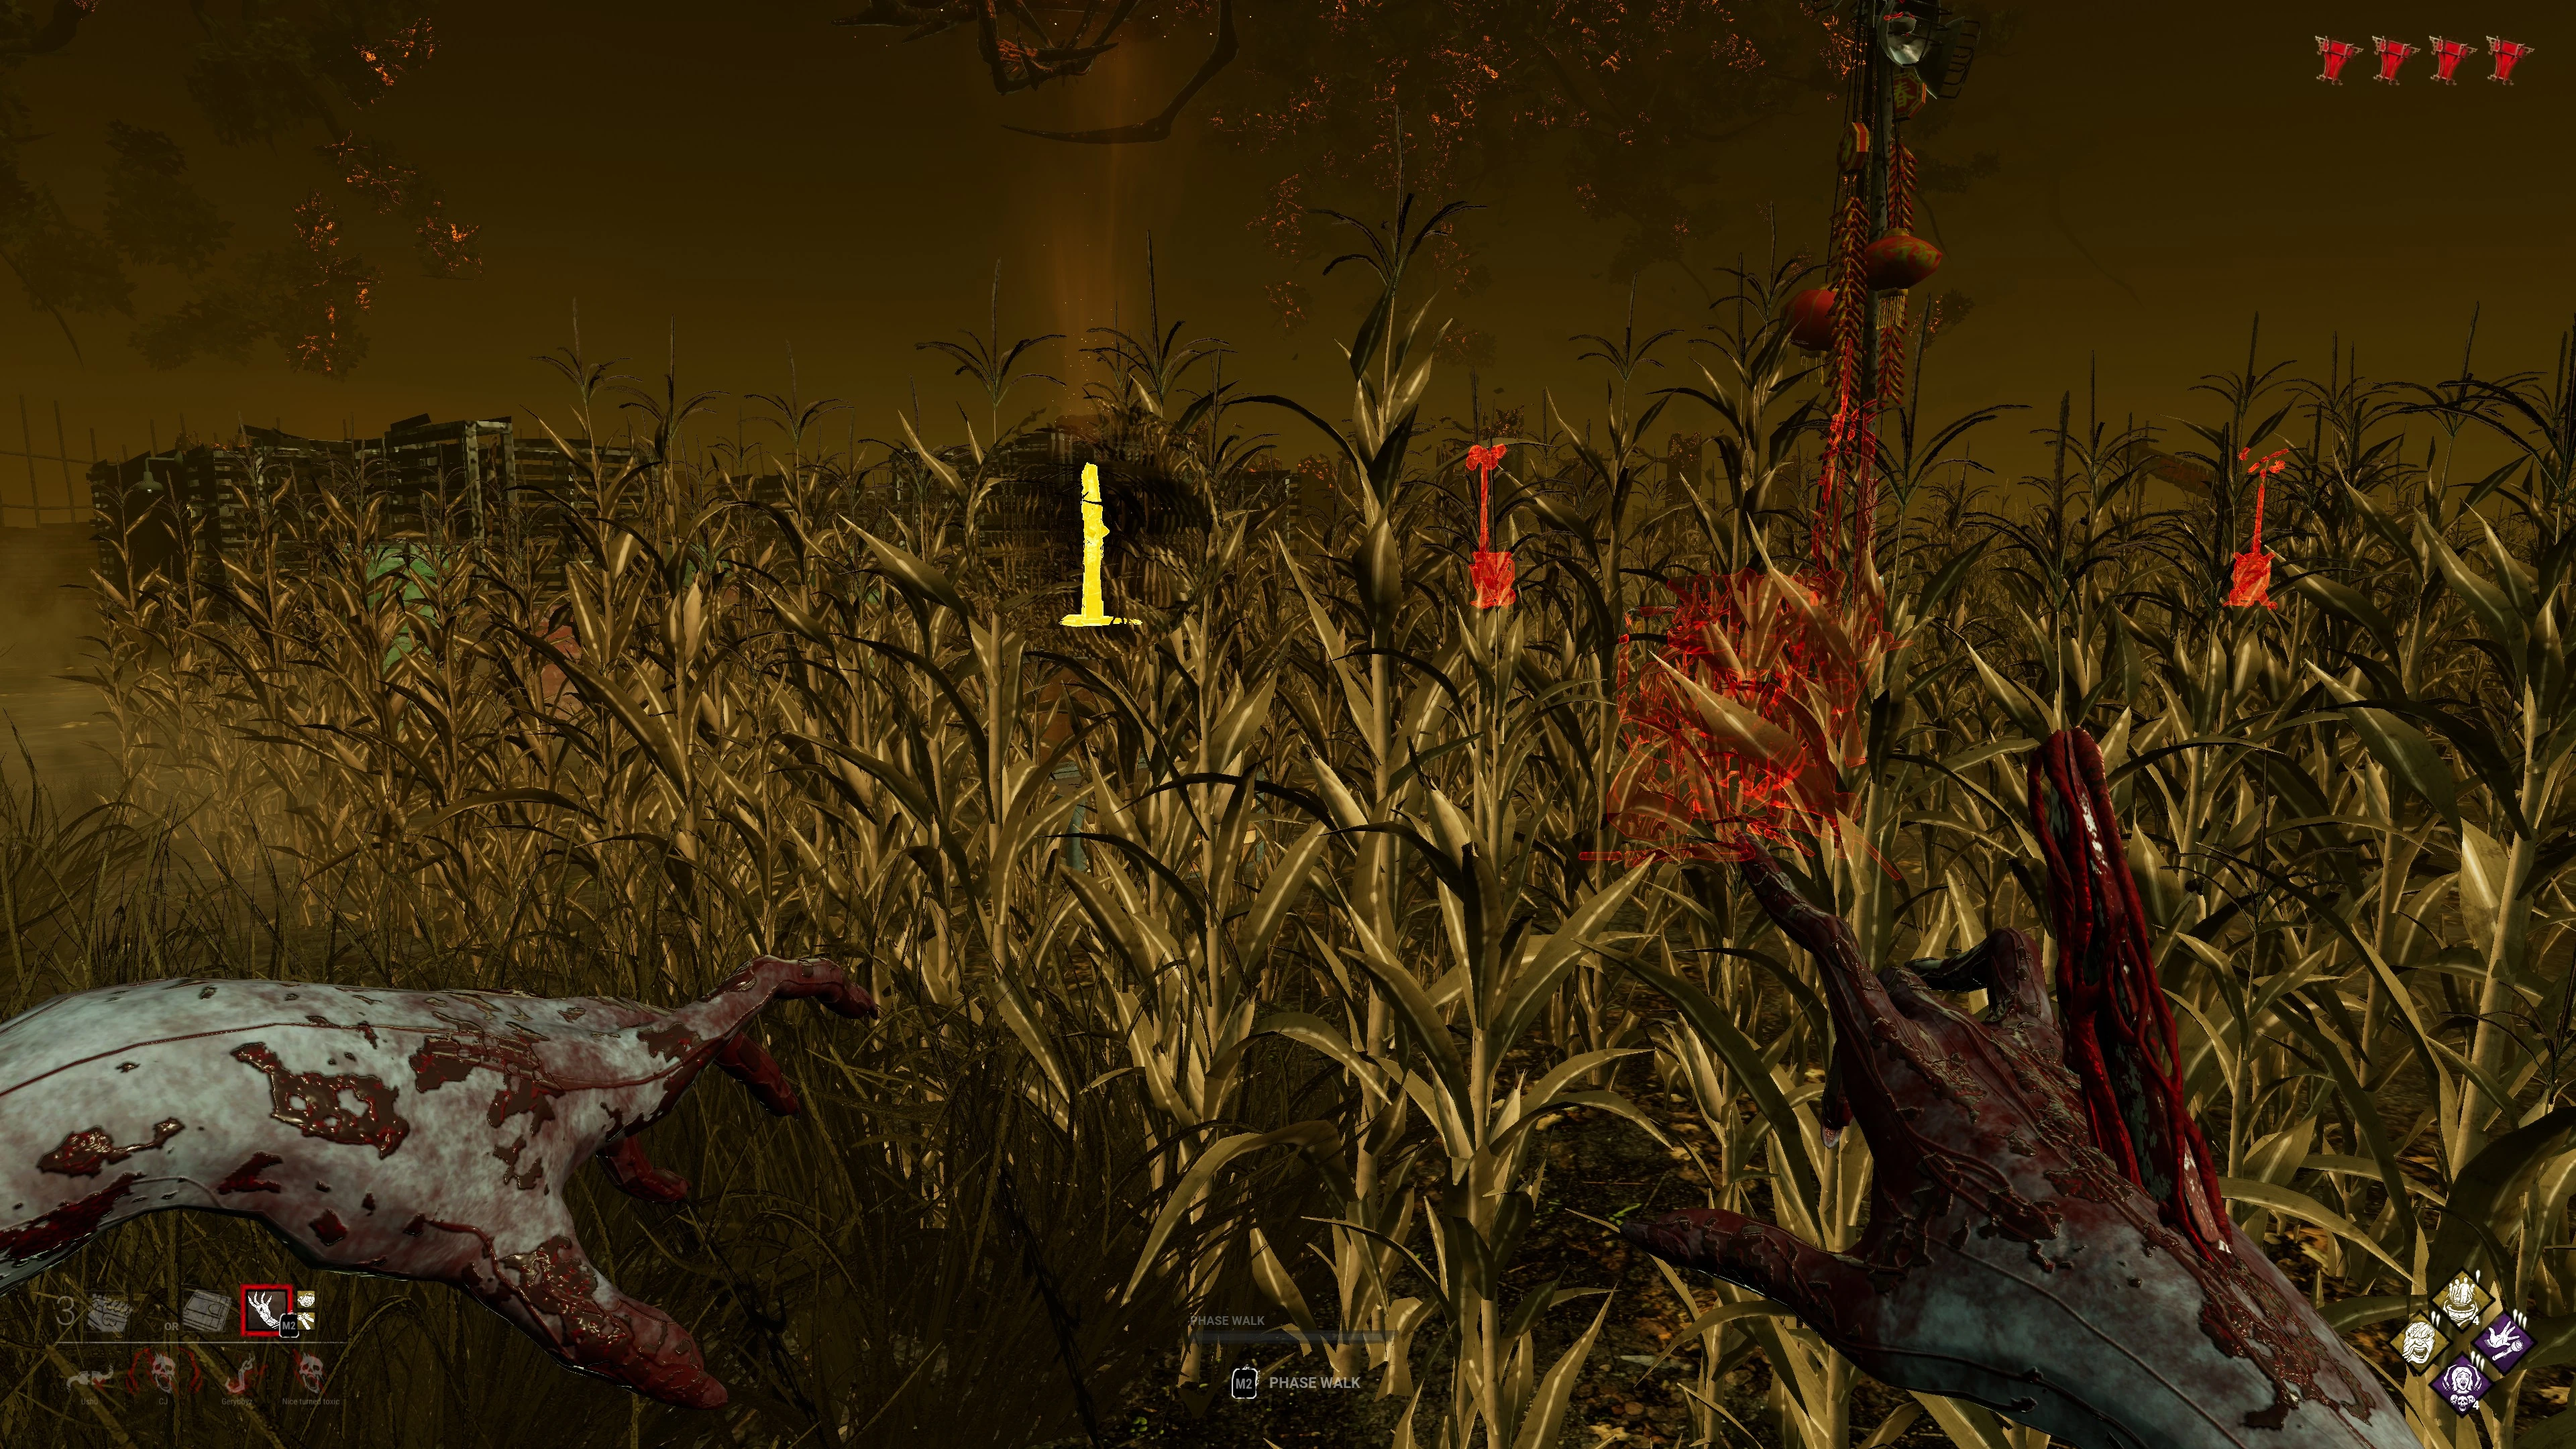
Yellow Aura of Hooked Survivor and Red Auras of Generators
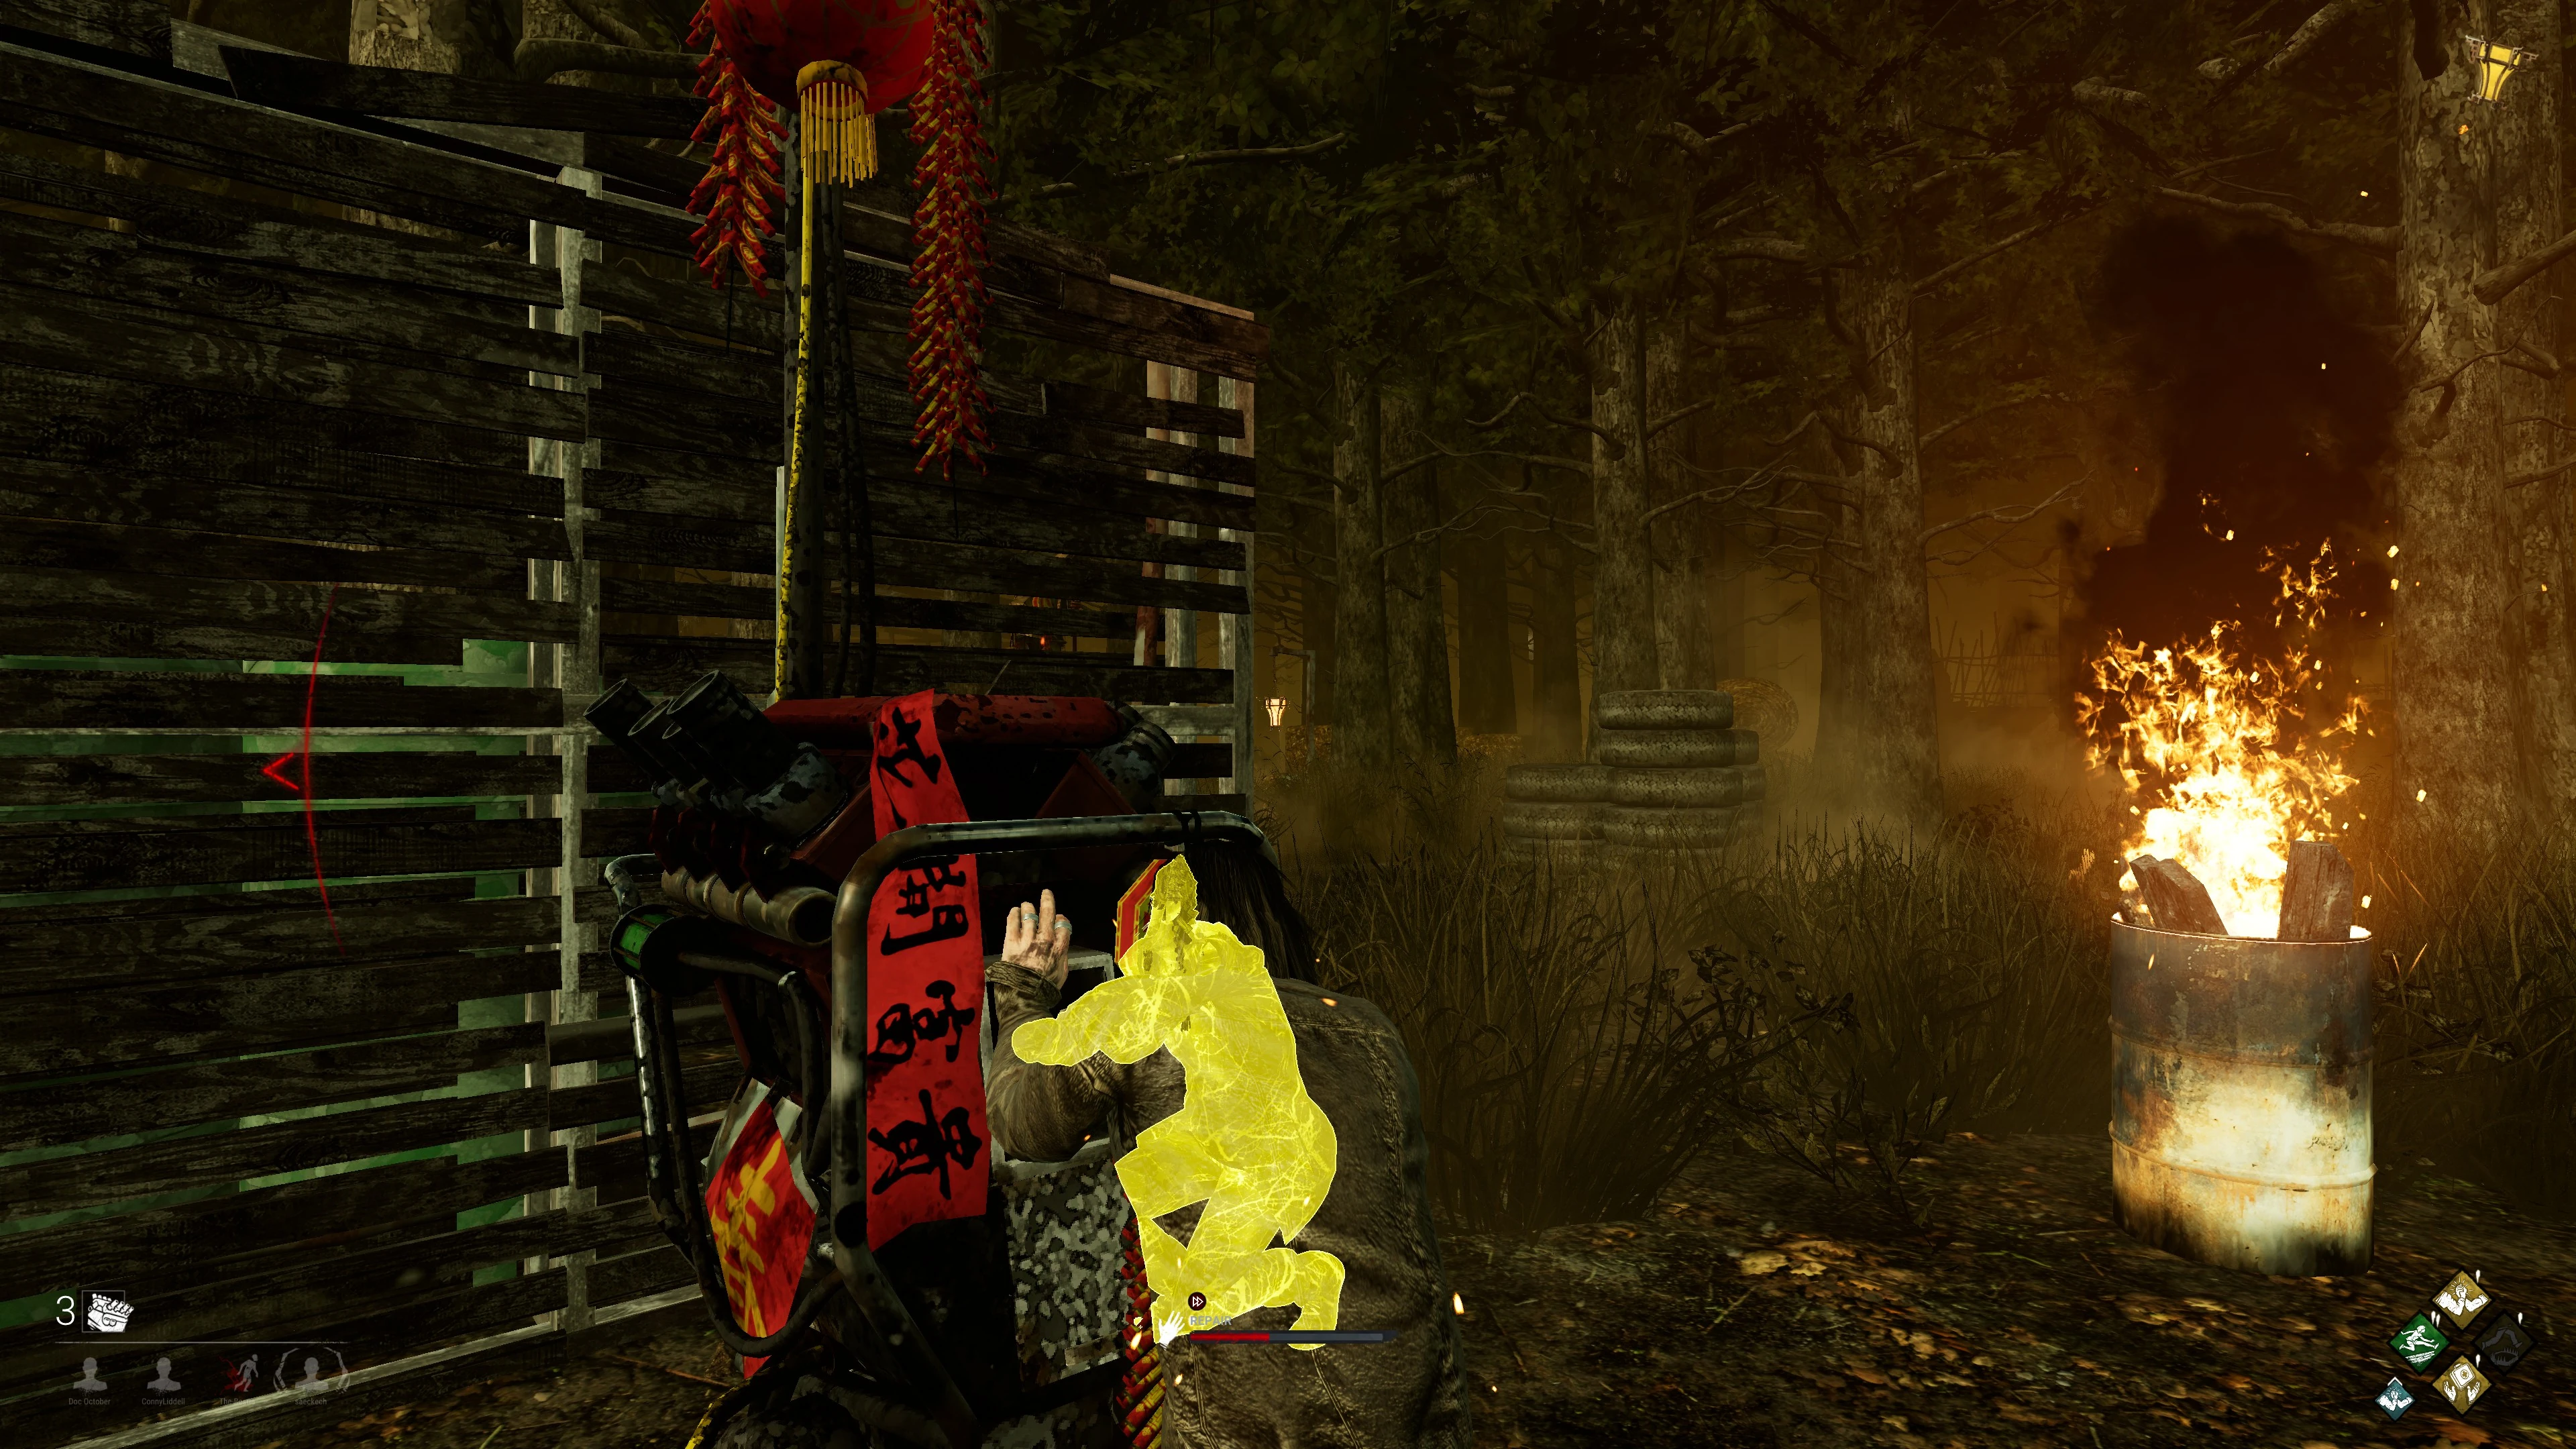
Yellow Aura of an allied Survivor

Yellow Auras of Windows and Pallets