DocOctober (talk | contribs) mNo edit summary |
DocOctober (talk | contribs) mNo edit summary |
||
| Line 24: | Line 24: | ||
=== Numbers === |
=== Numbers === |
||
| − | There are currently a total of '''{{clr|2| |
+ | There are currently a total of '''{{clr|2|416}}''' <!--as of CHAPTER XIV: Cursed Legacy-->'''{{PAGENAME}}''' featured in ''{{IconLink|Dead by Daylight}}'': |
{| class="wikitable" |
{| class="wikitable" |
||
|- |
|- |
||
| Line 51: | Line 51: | ||
The Desktop version of the Wiki supports Mouse-Over functionality for the adjectives found in the Add-on descriptions (i.e. '''slightly increases''', '''moderately decreases''', etc.).<br> |
The Desktop version of the Wiki supports Mouse-Over functionality for the adjectives found in the Add-on descriptions (i.e. '''slightly increases''', '''moderately decreases''', etc.).<br> |
||
Hovering over those will reveal the values behind them (Mac Users might have to highlight the text first). |
Hovering over those will reveal the values behind them (Mac Users might have to highlight the text first). |
||
| − | |||
| − | This feature is currently supported by all Add-ons with exception of the following: |
||
| − | * [[#Bear Trap|Bear Trap]] (Trapper) |
||
| − | * [[#Wailing Bell|Wailing Bell]] (Wraith) |
||
| − | * [[#Flashlight|Flashlight Add-ons]] |
||
| − | * [[#Key|Key Add-ons]] |
||
| − | * [[#Map|Map Add-ons]] |
||
| − | * [[#Med-Kit|Med-Kit Add-ons]] |
||
| − | * [[#Toolbox|Toolbox Add-ons]] |
||
| Line 71: | Line 62: | ||
| + | == [[Power]] Add-ons == |
||
| − | = Add-ons for Killer [[Powers]] = |
||
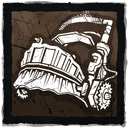
| + | === {{IconLink|Bear Trap}} === |
||
| − | {| class="wikitable" |
||
| + | [[File:TR_charSelect_portrait.png|128px|border|left|link=Trapper]] |
||
| − | |- |
||
| + | [[File:FulliconPowers_trap.png|128px|frameless|right|link=Bear Trap]] |
||
| − | ! colspan="3" style="width:1000px"| |
||
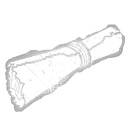
| + | The '''Bear Trap''' is The [[Trapper]]'s main Power and also his secondary weapon: Bear Traps are found lying around the map. They can be picked up and set down mostly anywhere. Traps are not armed until picked up and placed. The Trapper starts the game with a single trap in his hands, and can only carry one at once unless using Add-ons. |
||
| − | == <span style="font-variant:small-caps;"><big>Bear Trap</big></span> == |
||
| − | |- |
||
| − | ! [[File:TR_charSelect_portrait.png|100px|border|center|link=Trapper]] |
||
| − | ! [[File:FulliconPowers_trap.png|100px|frameless|center]] |
||
| − | <center>'''[[Bear Trap]]'''</center> |
||
| − | | <center>The '''Bear Trap''' is The [[Trapper]]'s main Power and also his secondary weapon: Bear Traps are found lying around the map. They can be picked up and set down mostly anywhere. Traps are not armed until picked up and placed. The Trapper starts the game with a single trap in his hands, and can only carry one at once unless using Add-ons.</center><br> |
||
| − | <center>''{{clr|9|"A large foothold trap made of steel."}}''</center> |
||
| − | |- |
||
| − | | colspan="3" | {{Add-ons: Bear Trap (Trapper)}} |
||
| − | |- |
||
| − | ! colspan="3" style="width:1000px"| |
||
| + | ''{{clr|9|"A large foothold trap made of steel."}}'' |
||
| − | == <span style="font-variant:small-caps;"><big>Blackened Catalyst</big></span> == |
||
| − | |- |
||
| − | ! [[File:HA_charSelect_portrait.png|100px|border|center|link=Hag]] |
||
| − | ! [[File:FulliconPowers_blackenedCatalyst.png|100px|frameless|center]] |
||
| − | <center>'''[[Blackened Catalyst]]'''</center> |
||
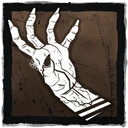
| − | |<center>The '''Blackened Catalyst''' is The [[Hag]]'s main Power: she bends and shapes mud to her will. With simple ritualistic drawings, she creates deceitful duplicates of herself made from mud and decay which she can use for various effects.</center><br> |
||
| − | <center>''{{clr|9|"Source of The Hag's power, a blackened finger used as a catalyst for her terrible power."}}''</center> |
||
| − | |- |
||
| − | | colspan="3" | {{Add-ons: Blackened Catalyst (Hag)}} |
||
| − | |- |
||
| − | ! colspan="3" style="width:1000px"| |
||
| + | {{Add-ons: Bear Trap (Trapper)}} |
||
| − | == <span style="font-variant:small-caps;"><big>Bubba's Chainsaw</big></span> == |
||
| − | |- |
||
| − | ! [[File:CA charSelect portrait.png|100px|border|center|link=Cannibal]] |
||
| − | ! [[File:FulliconPowers_bubbasChainsaw.png|100px|frameless|center]] |
||
| − | <center>'''[[Bubba's Chainsaw]]'''</center> |
||
| − | |<center>'''Bubba's Chainsaw''' is The Cannibal's main Power and also his secondary weapon: it shares a lot of the [[Chainsaw]]'s abilities and Add-ons. The Cannibal can charge it up to break into a crazed sprint, wildly swinging his Chainsaw around, putting any Survivor unlucky enough to come in contact with it into the [[Dying State]]. Can hit multiple targets on a single charge.</center><br> |
||
| − | <center>''{{clr|9|"An incredibly powerful and heavy Chainsaw."}}''</center> |
||
| − | |- |
||
| − | | colspan="3" | {{Add-ons: Bubba's Chainsaw (Cannibal)}} |
||
| − | |- |
||
| − | ! colspan="3" style="width:1000px"| |
||
| + | === {{IconLink|Blackened Catalyst}} === |
||
| − | == <span style="font-variant:small-caps;"><big>Carter's Spark</big></span> == |
||
| + | [[File:HA_charSelect_portrait.png|128px|border|left|link=Hag]] |
||
| − | |- |
||
| − | + | [[File:FulliconPowers_blackenedCatalyst.png|128px|frameless|right|link=Blackened Catalyst]] |
|
| + | The '''Blackened Catalyst''' is The [[Hag]]'s main Power: she bends and shapes mud to her will. With simple ritualistic drawings, she creates deceitful duplicates of herself made from mud and decay which she can use for various effects. |
||
| − | ! [[File:FulliconPowers_cartersSpark.png|100px|frameless|center]] |
||
| − | <center>'''[[Carter's Spark]]'''</center> |
||
| − | |<center>'''Carter's Spark''' is The [[Doctor]]'s main Power: The [[Entity]] has ignited a corrupted and inexhaustible spark in the Doctor's heart which allows him to generate electro-convulsive power at will. |
||
| − | His insidious treatment corrupts the minds of those it touches. Victims shocked by the corrupt spark begin to lose their grip on reality and, with repeated exposure, inevitably succumb to madness.</center><br> |
||
| − | <center>''{{clr|9|"Is it a gift, or a curse?"}}''</center> |
||
| − | |- |
||
| − | | colspan="3" | {{Add-ons: Carter's Spark (Doctor)}} |
||
| − | |- |
||
| − | ! colspan="3" style="width:1000px"| |
||
| + | ''{{clr|9|"Source of The Hag's power, a blackened finger used as a catalyst for her terrible power."}}'' |
||
| − | == <span style="font-variant:small-caps;"><big>Chainsaw</big></span> == |
||
| − | |- |
||
| − | ! [[File:HB_charSelect_portrait.png|100px|border|center|link=Hillbilly]] |
||
| − | ! [[File:FulliconPowers_chainsaw.png|100px|frameless|center]] |
||
| − | <center>'''[[Chainsaw]]'''</center> |
||
| − | |<center>The '''Chainsaw''' is The [[Hillbilly]]'s main Power and also his secondary weapon: Once revved up, sends its user into a violent frenzy, running at high speed across the map. The noise can be heard across the whole map, similar to the Wraith's Wailing Bell. It too can be muffled with Add-ons.</center><br> |
||
| − | <center>''{{clr|9|"A hulking and deadly chainsaw of terrifying strength. Grinds through flesh, bone and soul."}}''</center> |
||
| − | |- |
||
| − | | colspan="3" | {{Add-ons: Chainsaw (Hillbilly)}} |
||
| − | |- |
||
| − | ! colspan="3" style="width:1000px"| |
||
| + | {{Add-ons: Blackened Catalyst (Hag)}} |
||
| − | == <span style="font-variant:small-caps;"><big>Dream Demon</big></span> == |
||
| − | |- |
||
| − | ![[File:EK_charSelect_portrait.png|100px|border|center|link=Nightmare]] |
||
| − | ! [[File:FulliconPowers_dreamDemon.png|100px|frameless|center]] |
||
| − | <center>'''[[Dream Demon]]'''</center> |
||
| − | |<center>'''Dream Demon''' is The [[Nightmare]]'s main Power: The Nightmare pulls his victims passively into the '''[[Dream World]]'''. Once in the Dream World, they can be affected by his ''Dream Snares''. He can also use his '''Dream Projection''' to teleport to a Generator in his view.</center><br> |
||
| − | <center>''{{clr|9|"You have nothing to worry about. This won't hurt one... little... bit." — Freddy Krueger"}}''</center> |
||
| − | |- |
||
| − | | colspan="3" | {{Add-ons: Dream Demon (Nightmare)}} |
||
| − | |- |
||
| − | ! colspan="3" style="width:1000px"| |
||
| + | === {{IconLink|Bubba's Chainsaw}} === |
||
| − | == <span style="font-variant:small-caps;"><big>Evil Within</big></span> == |
||
| + | [[File:CA_charSelect_portrait.png|128px|border|left|link=Cannibal]] |
||
| − | |- |
||
| − | + | [[File:FulliconPowers_bubbasChainsaw.png|128px|frameless|right|link=Bubba's Chainsaw]] |
|
| + | '''Bubba's Chainsaw''' is The Cannibal's main Power and also his secondary weapon: it shares a lot of the [[Chainsaw]]'s abilities and Add-ons. The Cannibal can charge it up to break into a crazed sprint, wildly swinging his Chainsaw around, putting any Survivor unlucky enough to come in contact with it into the {{IconLink|Dying State}}. Can hit multiple targets on a single charge. |
||
| − | ! [[File:FulliconPowers_stalker1.png|100px|frameless|center]] |
||
| − | <center>'''[[Evil Within]]'''</center> |
||
| − | |<center>'''Evil Within''' is The [[Shape]]'s main Power: activating Evil Within allows him to see his prey clearly and build up more evil power by stalking them.</center><br> |
||
| − | <center>''{{clr|9|"The darkness inside feeds his determination to take the life of his prey."}}''</center> |
||
| − | |- |
||
| − | | colspan="3" | {{Add-ons: Evil Within (Shape)}} |
||
| − | |- |
||
| − | ! colspan="3" style="width:1000px"| |
||
| + | ''{{clr|9|"An incredibly powerful and heavy Chainsaw."}}'' |
||
| − | == <span style="font-variant:small-caps;"><big>Feral Frenzy</big></span> == |
||
| − | |- |
||
| − | ! [[File:KK_charSelect_portrait.png|100px|border|center|link=Legion]] |
||
| − | ! [[File:FulliconPowers_feralFrenzy.png|100px|frameless|center]] |
||
| − | <center>'''[[Feral Frenzy]]'''</center> |
||
| − | |<center>'''Feral Frenzy''' is The Legion's main Power: activating it will put The Legion into a frenzy, considerably increasing their movement speed for a limited time. Successful attacks can be chained between Survivors and apply the '''''{{IconLink|Deep Wound}}''''' '''Status Effect''', putting them into a bleed-out timer.</center> |
||
| − | |- |
||
| − | | colspan="3" | {{Add-ons: Feral Frenzy (Legion)}} |
||
| − | |- |
||
| − | ! colspan="3" style="width:1000px"| |
||
| + | {{Add-ons: Bubba's Chainsaw (Cannibal)}} |
||
| − | == <span style="font-variant:small-caps;"><big>Hunting Hatchets</big></span> == |
||
| − | |- |
||
| − | ! [[File:BE_charSelect_portrait.png|100px|border|center|link=Huntress]] |
||
| − | ! [[File:FulliconPowers_huntingHatchets.png|100px|frameless|center]] |
||
| − | <center>'''[[Hunting Hatchets]]'''</center> |
||
| − | |<center>'''Hunting Hatchets''' are The [[Huntress]]' main Power and also her secondary weapons: charging up her Hatchets allows her to throw them at great speed at fleeing Survivors or use it as a ranged weapon to snipe Survivors from afar.</center><br> |
||
| − | <center>''{{clr|9|"A skill taught by her mother and mastered in the wild. The Huntress can throw Hatchets with deadly precision."}}''</center> |
||
| − | |- |
||
| − | | colspan="3" | {{Add-ons: Hunting Hatchets (Huntress)}} |
||
| − | |- |
||
| − | ! colspan="3" style="width:1000px"| |
||
| + | === {{IconLink|Carter's Spark}} === |
||
| − | == <span style="font-variant:small-caps;"><big>Jigsaw's Baptism</big></span> == |
||
| + | [[File:DO_charSelect_portrait.png|128px|border|left|link=Doctor]] |
||
| − | |- |
||
| − | + | [[File:FulliconPowers_cartersSpark.png|128px|frameless|right|link=Carter's Spark]] |
|
| + | '''Carter's Spark''' is The [[Doctor]]'s main Power: The [[Entity]] has ignited a corrupted and inexhaustible spark in the Doctor's heart which allows him to generate electro-convulsive power at will. |
||
| − | ! [[File:FulliconPowers_jigsawsBaptism.png|100px|frameless|center]] |
||
| + | His insidious treatment corrupts the minds of those it touches. Victims shocked by the corrupt spark begin to lose their grip on reality and, with repeated exposure, inevitably succumb to madness. |
||
| − | <center>'''[[Jigsaw's Baptism]]'''</center> |
||
| − | |<center>'''Jigsaw's Baptism''' is The Pig's primary Power: It allows her to put Reverse Bear Traps onto dying Survivors, that will instantly sacrifice them once they trigger. She can ambush Survivors by crouching towards them and then dash forward.</center><br> |
||
| − | <center>''{{clr|9|""You will give everything to me, every cell in your body. The marks on your arms, they're from another life. We'll leave that life behind. When you walk down that corridor there is no turning back. Do you understand that?" — Jigsaw's Baptism}}''</center> |
||
| − | |- |
||
| − | | colspan="3" | {{Add-ons: Jigsaw's Baptism (Pig)}} |
||
| − | |- |
||
| − | ! colspan="3" style="width:1000px"| |
||
| + | ''{{clr|9|"Is it a gift, or a curse?"}}'' |
||
| − | == <span style="font-variant:small-caps;"><big>Night Shroud</big></span> == |
||
| − | |- |
||
| − | ! [[File:OK_charSelect_portrait.png|100px|border|center|link=Pig]] |
||
| − | ! [[File:FulliconPowers nightShroud.png|100px|frameless|center]] |
||
| − | <center>'''[[Night Shroud]]'''</center> |
||
| − | |<center>'''Night Shroud''' is The Ghost Face's primary Power: It allows him to stalk Survivors, standing or crouched, making them {{IconLink|Exposed}} for a limited time. While Night Shroud is active, The Ghost Face has no Terror Radius and Red Stain, as long as he isn't seen by any Survivor. </center><br> |
||
| − | <center>''{{clr|9|"Don't mind me. That's it, keep going. Perfect. That's the image I'll keep of you." — The Ghost Face}}''</center> |
||
| − | |- |
||
| − | | colspan="3" | {{Add-ons: Night Shroud (Ghost Face)}} |
||
| − | |- |
||
| − | ! colspan="3" style="width:1000px"| |
||
| + | {{Add-ons: Carter's Spark (Doctor)}} |
||
| − | == <span style="font-variant:small-caps;"><big>Of the Abyss</big></span> == |
||
| − | |- |
||
| − | ! [[File:QK_charSelect_portrait.png|100px|border|center|link=Demogorgon]] |
||
| − | ! [[File:FulliconPowers_ofTheAbyss.png|100px|frameless|center]] |
||
| − | <center>'''[[Of the Abyss]]'''</center> |
||
| − | |<center>'''Of the Abyss''' is The Demogorgon's main Power: it allows them to set Portals throughout the Trial Grounds and teleport between them. They can also channel their Power to perform an increased Lunge attack called ''Shred''.</center> |
||
| − | |- |
||
| − | | colspan="3" | {{Add-ons: Of the Abyss (Demogorgon)}} |
||
| − | |- |
||
| − | ! colspan="3" style="width:1000px"| |
||
| + | === {{IconLink|Chainsaw}} === |
||
| − | == <span style="font-variant:small-caps;"><big>Spencer's Last Breath</big></span> == |
||
| + | [[File:HB_charSelect_portrait.png|128px|border|left|link=Hillbilly]] |
||
| − | |- |
||
| − | + | [[File:FulliconPowers_chainsaw.png|128px|frameless|right|link=Chainsaw]] |
|
| + | The '''Chainsaw''' is The [[Hillbilly]]'s main Power and also his secondary weapon: Once revved up, sends its user into a violent frenzy, running at high speed across the map. The noise can be heard across the whole map, similar to the Wraith's Wailing Bell. It too can be muffled with Add-ons. |
||
| − | ! [[File:FulliconPowers_breath.png|100px|frameless|center]] |
||
| − | <center>'''[[Spencer's Last Breath]]'''</center> |
||
| − | |<center>'''Spencer's Last Breath''' is The [[Nurse]]'s main Power: channeling its energy allows The Nurse to pierce and jump through the [[Spirit World]] in a Blink multiple times in a row. Doing so leaves her in a state of fatigue.</center><br> |
||
| − | <center>''{{clr|9|"A powerful and violent last breath snatched from Crotus Prenn Asylum warden Patrick Spencer."}}''</center> |
||
| − | |- |
||
| − | | colspan="3" | {{Add-ons: Spencer's Last Breath (Nurse)}} |
||
| − | |- |
||
| − | ! colspan="3" style="width:1000px"| |
||
| + | ''{{clr|9|"A hulking and deadly chainsaw of terrifying strength. Grinds through flesh, bone and soul."}}'' |
||
| − | == <span style="font-variant:small-caps;"><big>The Afterpiece Tonic</big></span> == |
||
| − | |- |
||
| − | ! [[File:GK_charSelect_portrait.png|100px|border|center|link=Clown]] |
||
| − | ! [[File:FulliconPowers_gasBomb.png|100px|frameless|center]] |
||
| − | <center>'''[[The Afterpiece Tonic]]'''</center> |
||
| − | |<center>'''The Afterpiece Tonic''' is The Clown's main Power: throwing a bottle will release a cloud of intoxicating smoke once it breaks. Survivors passing through the cloud will be affected with blurred vision, slower movement speed and coughing fits, amongst various other afflictions based on the chosen Add-ons.</center> |
||
| − | |- |
||
| − | | colspan="3" | {{Add-ons: The Afterpiece Tonic (Clown)}} |
||
| − | |- |
||
| − | ! colspan="3" style="width:1000px"| |
||
| + | {{Add-ons: Chainsaw (Hillbilly)}} |
||
| − | == <span style="font-variant:small-caps;"><big>Vile Purge</big></span> == |
||
| − | |- |
||
| − | ! [[File:MK_charSelect_portrait.png|100px|border|center|link=Plague]] |
||
| − | ! [[File:FulliconPowers_vilePurge.png|100px|frameless|center]] |
||
| − | <center>'''[[Vile Purge]]'''</center> |
||
| − | |<center>'''Vile Purge''' is The Plague's main Power: it allows her to spread her disease and infect Survivors.</center> |
||
| − | |- |
||
| − | | colspan="3" | {{Add-ons: Vile Purge (Plague)}} |
||
| − | |- |
||
| − | ! colspan="3" style="width:1000px"| |
||
| + | === {{IconLink|Dream Demon}} === |
||
| − | == <span style="font-variant:small-caps;"><big>Wailing Bell</big></span> == |
||
| + | [[File:EK_charSelect_portrait.png|128px|border|left|link=Nightmare]] |
||
| − | |- |
||
| − | + | [[File:FulliconPowers_dreamDemon.png|128px|frameless|right|link=Dream Demon]] |
|
| + | '''Dream Demon''' is The [[Nightmare]]'s main Power: The Nightmare pulls his victims passively into the '''[[Dream World]]'''. Once in the Dream World, they can be affected by his ''Dream Snares''. He can also use his '''Dream Projection''' to teleport to a Generator in his view. |
||
| − | ! [[File:FulliconPowers_bell.png|100px|frameless|center]] |
||
| − | <center>'''[[Wailing Bell]]'''</center> |
||
| − | |<center>The '''Wailing Bell''' is The Wraith's main Power: the Wailing Bell holds ancient powers, both with good and bad consequences. It allows its user to enter and walk the [[Spirit World]] when rung. When cloaked, The Wraith has no [[Terror Radius]], meaning that Survivors do not hear a heartbeat, and The Wraith's [[Stain]] is also gone. The Wraith walks moderately faster when cloaked, making up for his inability to interact while in this state. The sound of the Bell is very loud, but can only be heard at a close distance to The Wraith. The accompanying *wooosh* sound, indicating a full uncloak or cloak, is heard by those within 40 metres of range. The volume of the Bell can be reduced with Add-ons.</center><br> |
||
| − | <center>''{{clr|9|"A heavy cast iron bell imbued with ancient powers."}}''</center> |
||
| − | |- |
||
| − | | colspan="3" | {{Add-ons: Wailing Bell (Wraith)}} |
||
| − | |- |
||
| − | ! colspan="3" style="width:1000px"| |
||
| + | ''{{clr|9|"You have nothing to worry about. This won't hurt one... little... bit." — Freddy Krueger"}}'' |
||
| − | == <span style="font-variant:small-caps;"><big>Yamaoka's Haunting</big></span> == |
||
| − | |- |
||
| − | ! [[File:HK_charSelect_portrait.png|100px|border|center|link=Spirit]] |
||
| − | ! [[File:FulliconPowers_yamaokasHaunting.png|100px|frameless|center]] |
||
| − | <center>'''[[Yamaoka's Haunting]]'''</center> |
||
| − | |<center>'''Yamaoka's Haunting''' is The Spirit's main Power: it allows her to teleport by entering an ethereal plane and moving high-speed to a new location.</center> |
||
| − | |- |
||
| − | | colspan="3" | {{Add-ons: Yamaoka's Haunting (Spirit)}} |
||
| − | |- |
||
| − | ! colspan="3" style="width:1000px"| |
||
| + | {{Add-ons: Dream Demon (Nightmare)}} |
||
| − | == <span style="font-variant:small-caps;"><big>Yamaoka's Wrath</big></span> == |
||
| − | |- |
||
| − | ! [[File:SK_charSelect_portrait.png|100px|border|center|link=Oni]] |
||
| − | ! [[File:FulliconPowers_yamaokasWrath.png|100px|frameless|center]] |
||
| − | <center>'''[[Yamaoka's Wrath]]'''</center> |
||
| − | |<center>'''Yamaoka's Wrath''' is The Oni's main Power: it allows him to go into a Blood Fury by absorbing Blood Orbs dropped by injured survivors. When he is in this Blood Fury, he can dash at high speeds and deal a horrible blow to the survivor's with his Kanabō, which downs them in a single hit.</center> |
||
| − | |- |
||
| − | | colspan="3" | {{Add-ons: Yamaoka's Wrath (Oni)}} |
||
| − | |} |
||
| − | = |
+ | === {{IconLink|Evil Within}} === |
| + | [[File:SH_charSelect_portrait.png|128px|border|left|link=Shape]] |
||
| − | {| class="wikitable" |
||
| + | [[File:FulliconPowers_dreamDemon.png|128px|frameless|right|link=Evil Within]] |
||
| − | |- |
||
| + | '''Evil Within''' is The [[Shape]]'s main Power: activating Evil Within allows him to see his prey clearly and build up more evil power by stalking them. |
||
| − | ! colspan="2" style="width:1000px"| |
||
| − | == <span style="font-variant:small-caps;"><big>Flashlight</big></span> == |
||
| − | |- |
||
| − | ! [[File:iconItems flashlight.png|100px|border|center|link=Flashlights]] |
||
| − | <center>'''[[Flashlight]]'''</center> |
||
| − | | <center>The '''Flashlight''' is an Item that is used to blind the Killer. If they are carrying a Survivor on their shoulder, getting blinded will make them drop that Survivor and be stunned for a few seconds.<br> |
||
| − | The Flashlight is also very effective against three Killers, The [[Hag]], The [[Wraith]] and The [[Nurse]].</center><br> |
||
| − | <center>''{{clr|9|"Most of the battery life was wastefully used by the previous owner."}}''</center> |
||
| − | |- |
||
| − | | colspan="2" | {{Add-ons: Flashlight}} |
||
| − | |- |
||
| − | ! colspan="2" style="width:1000px"| |
||
| + | ''{{clr|9|"The darkness inside feeds his determination to take the life of his prey."}}'' |
||
| − | == <span style="font-variant:small-caps;"><big>Key</big></span> == |
||
| − | |- |
||
| − | ! [[File:iconItems key.png|100px|border|center|link=Keys]] |
||
| − | <center>'''[[Key]]'''</center> |
||
| − | | <center>The '''Key''' is an Item that can be used to open the [[Black Lock|Hatch]] when it spawns. It can also be used with [[Add-ons]] to enhance its power and show the user different [[Auras]], such as those of other Survivors in their vicinity or that of the Killer. The Broken Key cannot be used to open the Hatch and is of no use without Add-ons.</center> |
||
| − | |- |
||
| − | | colspan="2" | {{Add-ons: Key}} |
||
| − | |- |
||
| − | ! colspan="2" style="width:1000px"| |
||
| + | {{Add-ons: Evil Within (Shape)}} |
||
| − | == <span style="font-variant:small-caps;"><big>Map</big></span> == |
||
| − | |- |
||
| − | ! [[File:iconItems map.png|100px|border|center|link=Maps]] |
||
| − | <center>'''[[Map]]'''</center> |
||
| − | | <center>The '''Map''' is an Item that is used to track and mark props in the World. The standard map can only track Generators, but can track different props as well with the use of [[Add-ons]] |
||
| − | that enhance its power. You can even make the tracked [[Auras]] visible to other Survivors and create markers that look like a pillar of bright light.</center> |
||
| − | |- |
||
| − | | colspan="2" | {{Add-ons: Map}} |
||
| − | |- |
||
| − | ! colspan="2" style="width:1000px"| |
||
| + | === {{IconLink|Feral Frenzy}} === |
||
| − | == <span style="font-variant:small-caps;"><big>Med-Kit</big></span> == |
||
| + | [[File:KK_charSelect_portrait.png|128px|border|left|link=Legion]] |
||
| − | |- |
||
| − | + | [[File:FulliconPowers_feralFrenzy.png|128px|frameless|right|link=Feral Frenzy]] |
|
| + | '''Feral Frenzy''' is The Legion's main Power: activating it will put The Legion into a frenzy, considerably increasing their movement speed for a limited time. Successful attacks can be chained between Survivors and apply the '''''{{IconLink|Deep Wound}}''''' '''Status Effect''', putting them into a bleed-out timer. |
||
| − | <center>'''[[Med-Kit]]'''</center> |
||
| + | |||
| − | | <center>The '''Med-Kit''' is an Item that is used to heal yourself and other Survivors. Other Survivors can also be healed without the use of a Med-Kit, but it takes considerably longer.<br> |
||
| + | {{Add-ons: Feral Frenzy (Legion)}} |
||
| − | Without the use of [[Self-Care]], a Survivor cannot heal themselves without one. Different [[Add-ons]] can be equipped that enhance its healing speed or durability.</center> |
||
| + | |||
| − | |- |
||
| + | === {{IconLink|Hunting Hatchets}} === |
||
| − | | colspan="2" | {{Add-ons: Med-Kit}} |
||
| + | [[File:BE_charSelect_portrait.png|128px|border|left|link=Huntress]] |
||
| − | |- |
||
| + | [[File:FulliconPowers_huntingHatchets.png|128px|frameless|right|link=Hunting Hatchets]] |
||
| − | ! colspan="2" style="width:1000px"| |
||
| + | '''Hunting Hatchets''' are The [[Huntress]]' main Power and also her secondary weapons: charging up her Hatchets allows her to throw them at great speed at fleeing Survivors or use it as a ranged weapon to snipe Survivors from afar. |
||
| + | |||
| + | '{{clr|9|"A skill taught by her mother and mastered in the wild. The Huntress can throw Hatchets with deadly precision."}}'' |
||
| + | |||
| + | {{Add-ons: Hunting Hatchets (Huntress)}} |
||
| + | |||
| + | === {{IconLink|Jigsaw's Baptism}} === |
||
| + | [[File:FK_charSelect_portrait.png|128px|border|left|link=Pig]] |
||
| + | [[File:FulliconPowers_jigsawsBaptism.png|128px|frameless|right|link=Jigsaw's Baptism]] |
||
| + | '''Jigsaw's Baptism''' is The Pig's primary Power: It allows her to put Reverse Bear Traps onto dying Survivors, that will instantly sacrifice them once they trigger. She can ambush Survivors by crouching towards them and then dash forward. |
||
| + | |||
| + | ''{{clr|9|""You will give everything to me, every cell in your body. The marks on your arms, they're from another life. We'll leave that life behind. When you walk down that corridor there is no turning back. Do you understand that?" — Jigsaw's Baptism}}'' |
||
| + | {{Add-ons: Jigsaw's Baptism (Pig)}} |
||
| − | == <span style="font-variant:small-caps;"><big>Toolbox</big></span> == |
||
| + | |||
| − | |- |
||
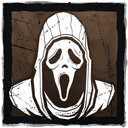
| + | === {{IconLink|Night Shroud}} === |
||
| − | ! [[File:iconItems toolbox.png|100px|border|center|link=Toolboxes]] |
||
| + | [[File:OK_charSelect_portrait.png|128px|border|left|link=Ghost Face]] |
||
| − | <center>'''[[Toolbox]]'''</center> |
||
| + | [[File:FulliconPowers_nightShroud.png|128px|frameless|right|link=Night Shroud]] |
||
| − | | <center>The '''Toolbox''' is an Item that can be used to repair [[Generators]] more quickly or sabotage hooks. Different Toolboxes have different uses and not all of them are good for both uses. [[Add-ons]] can be equipped to enhance their speed and durability.</center><br> |
||
| + | '''Night Shroud''' is The Ghost Face's primary Power: It allows him to stalk Survivors, standing or crouched, making them {{IconLink|Exposed}} for a limited time. While Night Shroud is active, The Ghost Face has no Terror Radius and Red Stain, as long as he isn't seen by any Survivor. |
||
| − | <center>''{{clr|9|"It is unclear as to where these tools come from. Were they brought in by one of us or did they belong to one of the monsters?"}}''</center> |
||
| + | |||
| − | |- |
||
| + | ''{{clr|9|"Don't mind me. That's it, keep going. Perfect. That's the image I'll keep of you." — The Ghost Face}}'' |
||
| − | | colspan="2" | {{Add-ons: Toolbox}} |
||
| + | |||
| − | |} |
||
| + | {{Add-ons: Night Shroud (Ghost Face)}} |
||
| + | |||
| + | === {{IconLink|Of the Abyss}} === |
||
| + | [[File:QK_charSelect_portrait.png|128px|border|left|link=Demogorgon]] |
||
| + | [[File:FulliconPowers_ofTheAbyss.png|128px|frameless|right|link=Of the Abyss]] |
||
| + | '''Of the Abyss''' is The Demogorgon's main Power: it allows them to set Portals throughout the Trial Grounds and teleport between them. They can also channel their Power to perform an increased Lunge attack called ''Shred''. |
||
| + | |||
| + | {{Add-ons: Of the Abyss (Demogorgon)}} |
||
| + | |||
| + | === {{IconLink|Spencer's Last Breath}} === |
||
| + | [[File:NR_charSelect_portrait.png|128px|border|left|link=Nurse]] |
||
| + | [[File:FulliconPowers_breath.png|128px|frameless|right|link=Spencer's Last Breath]] |
||
| + | '''Spencer's Last Breath''' is The [[Nurse]]'s main Power: channelling its energy allows The Nurse to pierce and jump through the [[Spirit World]] in a Blink multiple times in a row. Doing so leaves her in a state of fatigue. |
||
| + | |||
| + | ''{{clr|9|"A powerful and violent last breath snatched from Crotus Prenn Asylum warden Patrick Spencer."}}'' |
||
| + | |||
| + | {{Add-ons: Spencer's Last Breath (Nurse)}} |
||
| + | |||
| + | === {{IconLink|The Afterpiece Tonic}} === |
||
| + | [[File:GK_charSelect_portrait.png|128px|border|left|link=Clown]] |
||
| + | [[File:FulliconPowers_theAfterpieceTonic.png|128px|frameless|right|link=The Afterpiece Tonic]] |
||
| + | '''The Afterpiece Tonic''' is The Clown's main Power: throwing a bottle will release a cloud of intoxicating smoke once it breaks. Survivors passing through the cloud will be affected with blurred vision, slower movement speed and coughing fits, amongst various other afflictions based on the chosen Add-ons. |
||
| + | |||
| + | {{Add-ons: The Afterpiece Tonic (Clown)}} |
||
| + | |||
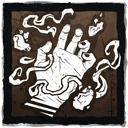
| + | === {{IconLink|Vile Purge}} === |
||
| + | [[File:MK_charSelect_portrait.png|128px|border|left|link=Plague]] |
||
| + | [[File:FulliconPowers_vilePurge.png|128px|frameless|right|link=Vile Purge]] |
||
| + | '''Vile Purge''' is The Plague's main Power: it allows her to spread her disease and infect Survivors. |
||
| + | |||
| + | {{Add-ons: Vile Purge (Plague)}} |
||
| + | |||
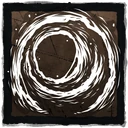
| + | === {{IconLink|Wailing Bell}} === |
||
| + | [[File:WR_charSelect_portrait.png|128px|border|left|link=Wraith]] |
||
| + | [[File:FulliconPowers_bell.png|128px|frameless|right|link=Wailing Bell]] |
||
| + | The '''Wailing Bell''' is The Wraith's main Power: the Wailing Bell holds ancient powers, both with good and bad consequences. It allows its user to enter and walk the [[Spirit World]] when rung. When cloaked, The Wraith has no [[Terror Radius]], meaning that Survivors do not hear a heartbeat, and The Wraith's [[Stain]] is also gone. The Wraith walks moderately faster when cloaked, making up for his inability to interact while in this state. The sound of the Bell is very loud, but can only be heard at a close distance to The Wraith. The accompanying *wooosh* sound, indicating a full uncloak or cloak, is heard by those within 40 metres of range. The volume of the Bell can be reduced with Add-ons. |
||
| + | |||
| + | {{Add-ons: Wailing Bell (Wraith)}} |
||
| + | |||
| + | === {{IconLink|Yamaoka's Haunting}} === |
||
| + | [[File:HK_charSelect_portrait.png|128px|border|left|link=Spirit]] |
||
| + | [[File:FulliconPowers_yamaokasHaunting.png|128px|frameless|right|link=Yamaoka's Haunting]] |
||
| + | '''Yamaoka's Haunting''' is The Spirit's main Power: it allows her to teleport by entering an ethereal plane and moving high-speed to a new location. |
||
| + | |||
| + | {{Add-ons: Yamaoka's Haunting (Spirit)}} |
||
| + | |||
| + | === {{IconLink|Yamaoka's Wrath}} === |
||
| + | [[File:SK_charSelect_portrait.png|128px|border|left|link=Oni]] |
||
| + | [[File:FulliconPowers_yamaokasWrath.png|128px|frameless|right|link=Yamaoka's Wrath]] |
||
| + | '''Yamaoka's Wrath''' is The Oni's main Power: it allows him to go into a Blood Fury by absorbing Blood Orbs dropped by injured survivors. When he is in this Blood Fury, he can dash at high speeds and deal a horrible blow to the survivor's with his Kanabō, which downs them in a single hit. |
||
| + | |||
| + | {{Add-ons: Yamaoka's Wrath (Oni)}} |
||
| + | |||
| + | |||
| + | == {{IconLink|Items}} Add-ons == |
||
| + | === {{IconLink|Firecracker}} === |
||
| + | [[File:IconItems firecracker.png|128px|frameless|left|link=Firecrackers]] |
||
| + | The '''Firecrackers''' is an Item that is used to blind and deafen the Killer, but also affects other Survivors if they happen to be within the Area of Effect. Getting blinded will make a Killer drop a carried Survivor. |
||
| + | |||
| + | {{Add-ons: Firecracker}} |
||
| + | |||
| + | === {{IconLink|Flashlight}} === |
||
| + | [[File:IconItems flashlight.png|128px|frameless|left|link=Flashlights]] |
||
| + | The '''Flashlight''' is an Item that is used to blind the Killer. If they are carrying a Survivor on their shoulder, getting blinded will make them drop that Survivor and be stunned for a few seconds.<br> |
||
| + | The Flashlight is also very effective against three Killers, The [[Hag]], The [[Wraith]] and The [[Nurse]]. |
||
| + | |||
| + | {{Add-ons: Flashlight}} |
||
| + | |||
| + | === {{IconLink|Key}} === |
||
| + | [[File:IconItems key.png|128px|frameless|left|link=Keys]] |
||
| + | The '''Key''' is an Item that can be used to open the [[Black Lock|Hatch]] when it spawns. It can also be used with [[Add-ons]] to enhance its power and show the user different [[Auras]], such as those of other Survivors in their vicinity or that of the Killer. The Broken Key cannot be used to open the Hatch and is of no use without Add-ons. |
||
| + | |||
| + | {{Add-ons: Key}} |
||
| + | |||
| + | === {{IconLink|Map}} === |
||
| + | [[File:IconItems map.png|128px|frameless|left|link=Maps]] |
||
| + | The '''Map''' is an Item that is used to track and mark props in the World. The standard map can only track Generators, but can track different props as well with the use of [[Add-ons]] |
||
| + | that enhance its power. You can even make the tracked [[Auras]] visible to other Survivors and create markers that look like a pillar of bright light. |
||
| + | |||
| + | {{Add-ons: Map}} |
||
| + | |||
| + | === {{IconLink|Med-Kit}} === |
||
| + | [[File:IconItems map.png|128px|frameless|left|link=Med-Kits]] |
||
| + | The '''Med-Kit''' is an Item that is used to heal yourself and other Survivors. Other Survivors can also be healed without the use of a Med-Kit, but it takes considerably longer. |
||
| + | |||
| + | Without the use of {{IconLink|Self-Care}}, a Survivor cannot heal themselves without one. Different [[Add-ons]] can be equipped that enhance its healing speed or durability. |
||
| + | |||
| + | {{Add-ons: Med-Kit}} |
||
| + | |||
| + | === {{IconLink|Toolbox}} === |
||
| + | [[File:IconItems toolbox.png|128px|frameless|left|link=Toolboxes]] |
||
| + | The '''Toolbox''' is an Item that can be used to repair {{IconLink|Generators}} more quickly or sabotage hooks. Different Toolboxes have different uses and not all of them are good for both uses. Add-ons can be equipped to enhance their speed and durability. |
||
| + | |||
| + | ''{{clr|9|"It is unclear as to where these tools come from. Were they brought in by one of us or did they belong to one of the monsters?"}}'' |
||
| + | |||
| + | {{Add-ons: Toolbox}} |
||
| − | = Decommissioned Add-ons = |
+ | == Decommissioned Add-ons == |
| − | These Add-ons have been replaced with new Add-ons during an Add-on Pass and are no longer in use. |
+ | These Add-ons have been replaced with new Add-ons during an ''Add-on Pass'' and are no longer in use. |
{{Add-ons: Decommissioned}} |
{{Add-ons: Decommissioned}} |
||
| − | = Unused Add-ons = |
+ | == Unused Add-ons == |
| − | These Add-ons are found in the |
+ | These Add-ons are found in the Game but not are not used. |
{{Add-ons: Unused}} |
{{Add-ons: Unused}} |
||
Revision as of 13:20, 14 December 2019
Add-ons are an addition to Killer Powers and Survivor Template:IconLink.
Overview
- This Article presents an overview of all Add-ons featured in the Game. For more detailed information, such as the numbers behind the adjectives, please refer to an Add-on's respective Article.
Add-ons boost specific aspect of a Killer's Power and a Survivor's Item when equipped.
Players can equip up to two Add-ons at the same time, however, it is not possible to equip the same Add-on twice.
For Killers, Add-ons are single-use only and lost after a Trial.
- This can only be prevented by burning the Template:IconLink Offering.
For Survivors, whether or not they lose their Add-ons after a Trial depends on the situation.
- Add-ons are lost upon using up all charges of an Item.
- Add-ons are lost upon disconnecting from the Trial.
- Add-ons are lost upon dying in a Trial, unless the Template:IconLink Offering was burnt.
- Add-ons are kept if one escapes with the Item that they are equipped on.
Stacking
Add-ons which affect the same part of a Power will generally stack with one another (both positive and negative effects).
Older Add-ons used to mention if they would stack or not. Newer Add-ons of more recent Killers do not mention this anymore unless they specifically do not stack.
Numbers
There are currently a total of 416 Add-ons featured in Template:IconLink:
| 152 | Common Add-ons |
| 198 | Uncommon Add-ons |
| 183 | Rare Add-ons |
| 148 | Very Rare Add-ons |
| 74 | Ultra Rare Add-ons |
| 28 | Decommissioned Add-ons |
| 14 | Unused Add-ons |
Differences to in-game Descriptions
It is the Wiki's philosophy that information provided to knowledge-seeking Players of Dead by Daylight should be as easily understandable as possible. The Wiki Administrators therefore take the liberty to occasionally rephrase and/or reword an Add-on's description, if the in-game one differs from the actual effect the Add-on has or if the in-game phrasing is sub-optimal due to English being a second language for the majority of the Developer team, sometimes making an Add-on's exact effect difficult to understand without additional explanation.
Additionally, all Add-on descriptions are reformatted to have a consistent layout across all Killers.
Mouse-Over Support
The Desktop version of the Wiki supports Mouse-Over functionality for the adjectives found in the Add-on descriptions (i.e. slightly increases, moderately decreases, etc.).
Hovering over those will reveal the values behind them (Mac Users might have to highlight the text first).
Add-on Series
- Main article: Add-on Series
Killers tend to have Add-on Series, several Add-ons with similar effects, that increase in effectiveness and power the higher their Rarity class is.
Add-ons from Chests
Using the Perk Template:IconLink, a Survivor will find Template:IconLink with Add-ons attached to them.
Power Add-ons
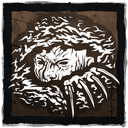
Template:IconLink

The Bear Trap is The Trapper's main Power and also his secondary weapon: Bear Traps are found lying around the map. They can be picked up and set down mostly anywhere. Traps are not armed until picked up and placed. The Trapper starts the game with a single trap in his hands, and can only carry one at once unless using Add-ons.
"A large foothold trap made of steel."
Template:Add-ons: Bear Trap (Trapper)
Template:IconLink
The Blackened Catalyst is The Hag's main Power: she bends and shapes mud to her will. With simple ritualistic drawings, she creates deceitful duplicates of herself made from mud and decay which she can use for various effects.
"Source of The Hag's power, a blackened finger used as a catalyst for her terrible power."
Template:Add-ons: Blackened Catalyst (Hag)
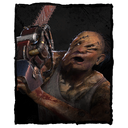
Template:IconLink
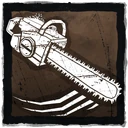
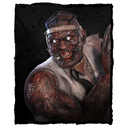
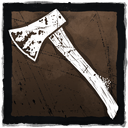
Bubba's Chainsaw is The Cannibal's main Power and also his secondary weapon: it shares a lot of the Chainsaw's abilities and Add-ons. The Cannibal can charge it up to break into a crazed sprint, wildly swinging his Chainsaw around, putting any Survivor unlucky enough to come in contact with it into the Template:IconLink. Can hit multiple targets on a single charge.
"An incredibly powerful and heavy Chainsaw."
Template:Add-ons: Bubba's Chainsaw (Cannibal)
Template:IconLink
Carter's Spark is The Doctor's main Power: The Entity has ignited a corrupted and inexhaustible spark in the Doctor's heart which allows him to generate electro-convulsive power at will. His insidious treatment corrupts the minds of those it touches. Victims shocked by the corrupt spark begin to lose their grip on reality and, with repeated exposure, inevitably succumb to madness.
"Is it a gift, or a curse?"
Template:Add-ons: Carter's Spark (Doctor)
Template:IconLink
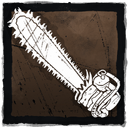
The Chainsaw is The Hillbilly's main Power and also his secondary weapon: Once revved up, sends its user into a violent frenzy, running at high speed across the map. The noise can be heard across the whole map, similar to the Wraith's Wailing Bell. It too can be muffled with Add-ons.
"A hulking and deadly chainsaw of terrifying strength. Grinds through flesh, bone and soul."
Template:Add-ons: Chainsaw (Hillbilly)
Template:IconLink
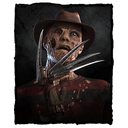
Dream Demon is The Nightmare's main Power: The Nightmare pulls his victims passively into the Dream World. Once in the Dream World, they can be affected by his Dream Snares. He can also use his Dream Projection to teleport to a Generator in his view.
"You have nothing to worry about. This won't hurt one... little... bit." — Freddy Krueger"
Template:Add-ons: Dream Demon (Nightmare)
Template:IconLink

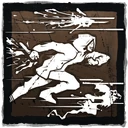
Evil Within is The Shape's main Power: activating Evil Within allows him to see his prey clearly and build up more evil power by stalking them.
"The darkness inside feeds his determination to take the life of his prey."
Template:Add-ons: Evil Within (Shape)
Template:IconLink

Feral Frenzy is The Legion's main Power: activating it will put The Legion into a frenzy, considerably increasing their movement speed for a limited time. Successful attacks can be chained between Survivors and apply the Template:IconLink Status Effect, putting them into a bleed-out timer.
Template:Add-ons: Feral Frenzy (Legion)
Template:IconLink
Hunting Hatchets are The Huntress' main Power and also her secondary weapons: charging up her Hatchets allows her to throw them at great speed at fleeing Survivors or use it as a ranged weapon to snipe Survivors from afar.
'"A skill taught by her mother and mastered in the wild. The Huntress can throw Hatchets with deadly precision."
Template:Add-ons: Hunting Hatchets (Huntress)
Template:IconLink
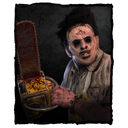
Jigsaw's Baptism is The Pig's primary Power: It allows her to put Reverse Bear Traps onto dying Survivors, that will instantly sacrifice them once they trigger. She can ambush Survivors by crouching towards them and then dash forward.
""You will give everything to me, every cell in your body. The marks on your arms, they're from another life. We'll leave that life behind. When you walk down that corridor there is no turning back. Do you understand that?" — Jigsaw's Baptism
Template:Add-ons: Jigsaw's Baptism (Pig)
Template:IconLink

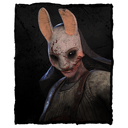
Night Shroud is The Ghost Face's primary Power: It allows him to stalk Survivors, standing or crouched, making them Template:IconLink for a limited time. While Night Shroud is active, The Ghost Face has no Terror Radius and Red Stain, as long as he isn't seen by any Survivor.
"Don't mind me. That's it, keep going. Perfect. That's the image I'll keep of you." — The Ghost Face
Template:Add-ons: Night Shroud (Ghost Face)
Template:IconLink

Of the Abyss is The Demogorgon's main Power: it allows them to set Portals throughout the Trial Grounds and teleport between them. They can also channel their Power to perform an increased Lunge attack called Shred.
Template:Add-ons: Of the Abyss (Demogorgon)
Template:IconLink

Spencer's Last Breath is The Nurse's main Power: channelling its energy allows The Nurse to pierce and jump through the Spirit World in a Blink multiple times in a row. Doing so leaves her in a state of fatigue.
"A powerful and violent last breath snatched from Crotus Prenn Asylum warden Patrick Spencer."
Template:Add-ons: Spencer's Last Breath (Nurse)
Template:IconLink

The Afterpiece Tonic is The Clown's main Power: throwing a bottle will release a cloud of intoxicating smoke once it breaks. Survivors passing through the cloud will be affected with blurred vision, slower movement speed and coughing fits, amongst various other afflictions based on the chosen Add-ons.
Template:Add-ons: The Afterpiece Tonic (Clown)
Template:IconLink

Vile Purge is The Plague's main Power: it allows her to spread her disease and infect Survivors.
Template:Add-ons: Vile Purge (Plague)
Template:IconLink
The Wailing Bell is The Wraith's main Power: the Wailing Bell holds ancient powers, both with good and bad consequences. It allows its user to enter and walk the Spirit World when rung. When cloaked, The Wraith has no Terror Radius, meaning that Survivors do not hear a heartbeat, and The Wraith's Stain is also gone. The Wraith walks moderately faster when cloaked, making up for his inability to interact while in this state. The sound of the Bell is very loud, but can only be heard at a close distance to The Wraith. The accompanying *wooosh* sound, indicating a full uncloak or cloak, is heard by those within 40 metres of range. The volume of the Bell can be reduced with Add-ons.
Template:Add-ons: Wailing Bell (Wraith)
Template:IconLink
Yamaoka's Haunting is The Spirit's main Power: it allows her to teleport by entering an ethereal plane and moving high-speed to a new location.
Template:Add-ons: Yamaoka's Haunting (Spirit)
Template:IconLink

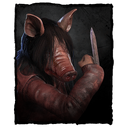
Yamaoka's Wrath is The Oni's main Power: it allows him to go into a Blood Fury by absorbing Blood Orbs dropped by injured survivors. When he is in this Blood Fury, he can dash at high speeds and deal a horrible blow to the survivor's with his Kanabō, which downs them in a single hit.
Template:Add-ons: Yamaoka's Wrath (Oni)
Template:IconLink Add-ons
Template:IconLink
The Firecrackers is an Item that is used to blind and deafen the Killer, but also affects other Survivors if they happen to be within the Area of Effect. Getting blinded will make a Killer drop a carried Survivor.
Template:Add-ons: Firecracker
Template:IconLink

The Flashlight is an Item that is used to blind the Killer. If they are carrying a Survivor on their shoulder, getting blinded will make them drop that Survivor and be stunned for a few seconds.
The Flashlight is also very effective against three Killers, The Hag, The Wraith and The Nurse.
Template:Add-ons: Flashlight
Template:IconLink
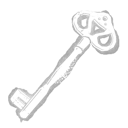
The Key is an Item that can be used to open the Hatch when it spawns. It can also be used with Add-ons to enhance its power and show the user different Auras, such as those of other Survivors in their vicinity or that of the Killer. The Broken Key cannot be used to open the Hatch and is of no use without Add-ons.
Template:Add-ons: Key
Template:IconLink
The Map is an Item that is used to track and mark props in the World. The standard map can only track Generators, but can track different props as well with the use of Add-ons
that enhance its power. You can even make the tracked Auras visible to other Survivors and create markers that look like a pillar of bright light.
Template:Add-ons: Map
Template:IconLink
The Med-Kit is an Item that is used to heal yourself and other Survivors. Other Survivors can also be healed without the use of a Med-Kit, but it takes considerably longer.
Without the use of Template:IconLink, a Survivor cannot heal themselves without one. Different Add-ons can be equipped that enhance its healing speed or durability.
Template:Add-ons: Med-Kit
Template:IconLink
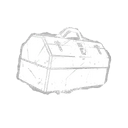
The Toolbox is an Item that can be used to repair Template:IconLink more quickly or sabotage hooks. Different Toolboxes have different uses and not all of them are good for both uses. Add-ons can be equipped to enhance their speed and durability.
"It is unclear as to where these tools come from. Were they brought in by one of us or did they belong to one of the monsters?"
Template:Add-ons: Toolbox
Decommissioned Add-ons
These Add-ons have been replaced with new Add-ons during an Add-on Pass and are no longer in use. Template:Add-ons: Decommissioned
Unused Add-ons
These Add-ons are found in the Game but not are not used. Template:Add-ons: Unused
| UNLOCKABLES | |||
|---|---|---|---|